Invacare Wheelchair Pronto M91 Base User Manual
Page 58
SECTION 9—BATTERIES
Pronto® M91™Base with SureStep®
58
9. If necessary, connect the wiring harness to the two batteries. Refer to Connecting/
Disconnecting the Battery Wiring Harness on page 60.
10. Reconnect RIGHT and LEFT motor leads to allow access to the FRONT of the battery
tray, if disconnected in STEP 5.
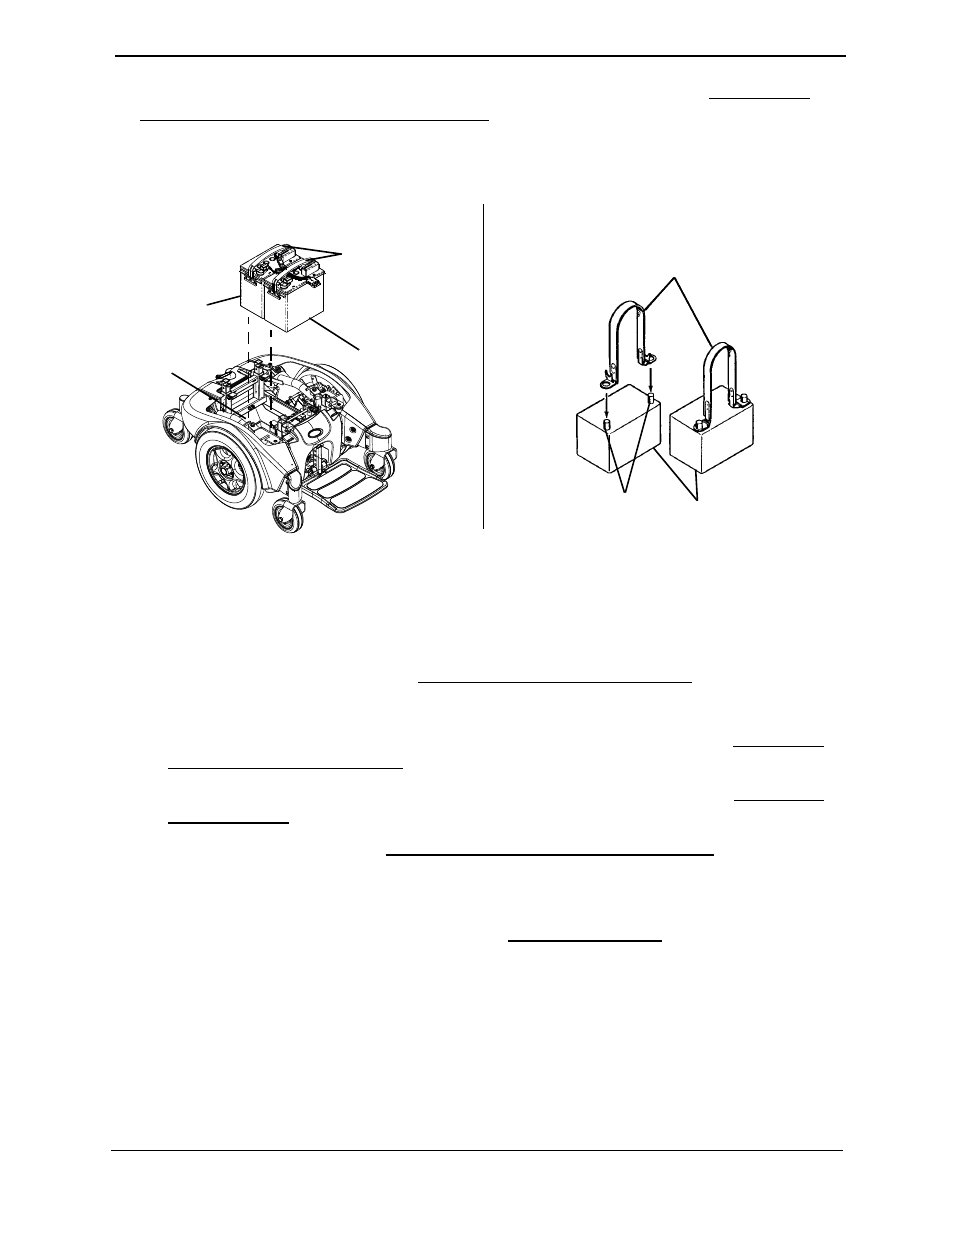
FIGURE 9.1 Batteries with/without Lifting straps
11. Connect the front battery to the controller (RED connector). Refer to FIGURE 9.2.
12. Connect the rear battery to the front battery (RED and BLACK connectors). Refer to
13. Reinstall the top shroud. Refer to Removing/Installing the Shrouds on page 52.
14. Perform one of the following:
• Wheelchairs without Formula PTO Plus ‐ Reinstall the seat. Refer to Removing/
Installing the Seat Assembly on page 46.
• Wheelchairs with Formula PTO Plus ‐ Tilt the seat forward. Refer to Tilting the
15. Connect the joystick. Refer to Disconnecting/Connecting the Joysticks on page 44.
NOTE: New battery(ies) MUST be fully charged before using, otherwise the life of the battery(ies)
will be reduced.
16. If necessary, charge the battery(ies). Refer to Charging Batteries on page 63.
Battery Lifting Straps
Battery
Terminals/Posts
Battery
DETAIL “B” - BATTERIES WITHOUT
BUILT-IN LIFTING STRAPS
DETAIL “A” - BATTERIES WITH
BUILT-IN LIFTING STRAPS
Built-in Lifting
Straps
Front
Battery
Rear
Battery
Battery
Tray