7 heel loop replacement, Remove the lower footrest assembly, Install new heel loop – Invacare 9000 Topaz User Manual
Page 36: Reverse steps 1-4 to reassemble, Locknuts, 5 front riggings
5 FRONT RIGGINGS
Invacare®9000 Topaz™Wheelchair
36
5.7
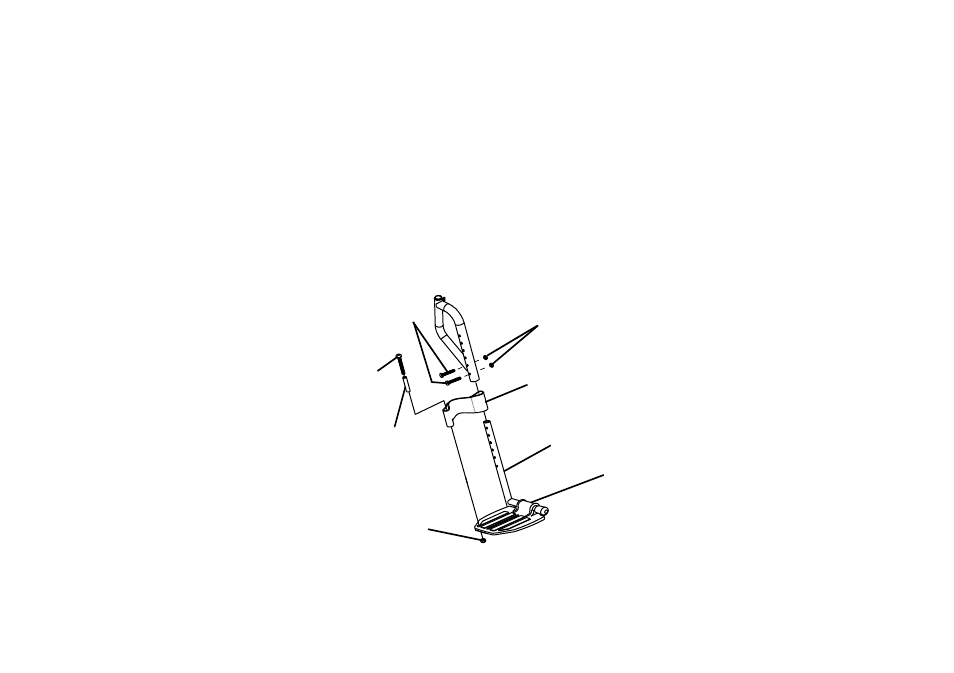
Heel Loop Replacement
1.
Remove the two bolts and locknuts that secure the lower footrest assembly to the upper footrest support.
2.
Remove the lower footrest assembly.
3.
Remove the mounting screw, spacer and locknut that secure the existing heel loop to the footrest.
4.
Slide existing heel loop over the slide tube of the lower footrest assembly.
5.
Install new heel loop.
6.
Reverse STEPS 1-4 to reassemble.
FIGURE 7 Heel Loop Replacement
When securing the heel loop to the footrest assembly, tighten the mounting screw and locknut until the spacer is secure.
Locknuts
Mounting
Screw
Spacer
Lower Footrest
Assembly
Slide Tube
Heel Loop
Bolts
Locknut
See also other documents in the category Invacare Communication:
- LC34 (8 pages)
- 2GT (176 pages)
- 1055947 (2 pages)
- 1145549 (4 pages)
- 6027 (8 pages)
- 01-349 (4 pages)
- Compass XE (12 pages)
- BUZZ HMV (52 pages)
- Excel Power Sling Seat (4 pages)
- Front Anti Tippers 1326 (2 pages)
- Wheelchair 3G Ranger X (6 pages)
- 6291E Adult (16 pages)
- 6845-5 (2 pages)
- XtraTM 1026793 (60 pages)
- Formula TRE (174 pages)
- 6300-5F (36 pages)
- 1048922 (2 pages)
- Wheelchair XP6520 (64 pages)
- 1141466 (8 pages)
- F-6 (52 pages)
- 95-1 (20 pages)
- Auriga10 (63 pages)
- XLT (76 pages)
- 1335 (2 pages)
- 1069956 (2 pages)
- CareGuard (2 pages)
- 1085144 (8 pages)
- 1610 (8 pages)
- Lightweight (64 pages)
- At'm (44 pages)
- 65100R-JR (40 pages)
- Crossfire T6A (6 pages)
- Comfort-Mate Extra / Comfort-Mate Extra Base (4 pages)
- IVC Heavy Duty Shower Chair 9781 (16 pages)
- Lynx L-3X (60 pages)
- GET-U-UP LIFT (28 pages)
- V18PLR (1 page)
- Excel (152 pages)
- 400 (50 pages)
- 9000 (24 pages)
- 4M900 (255 pages)
- A1541 (2 pages)
- ITFG (24 pages)
- 1300 (1 page)