34 icos, Servicing, 47 fan and venturi assembly removal and cleaning – IDEAL INDUSTRIES ICOS HE18 User Manual
Page 34: 48 burner removal and cleaning, 12 4 ser vicing
34
icos -
Installation & Servicing
SERVICING
2
3
1
4
Ecl 6073
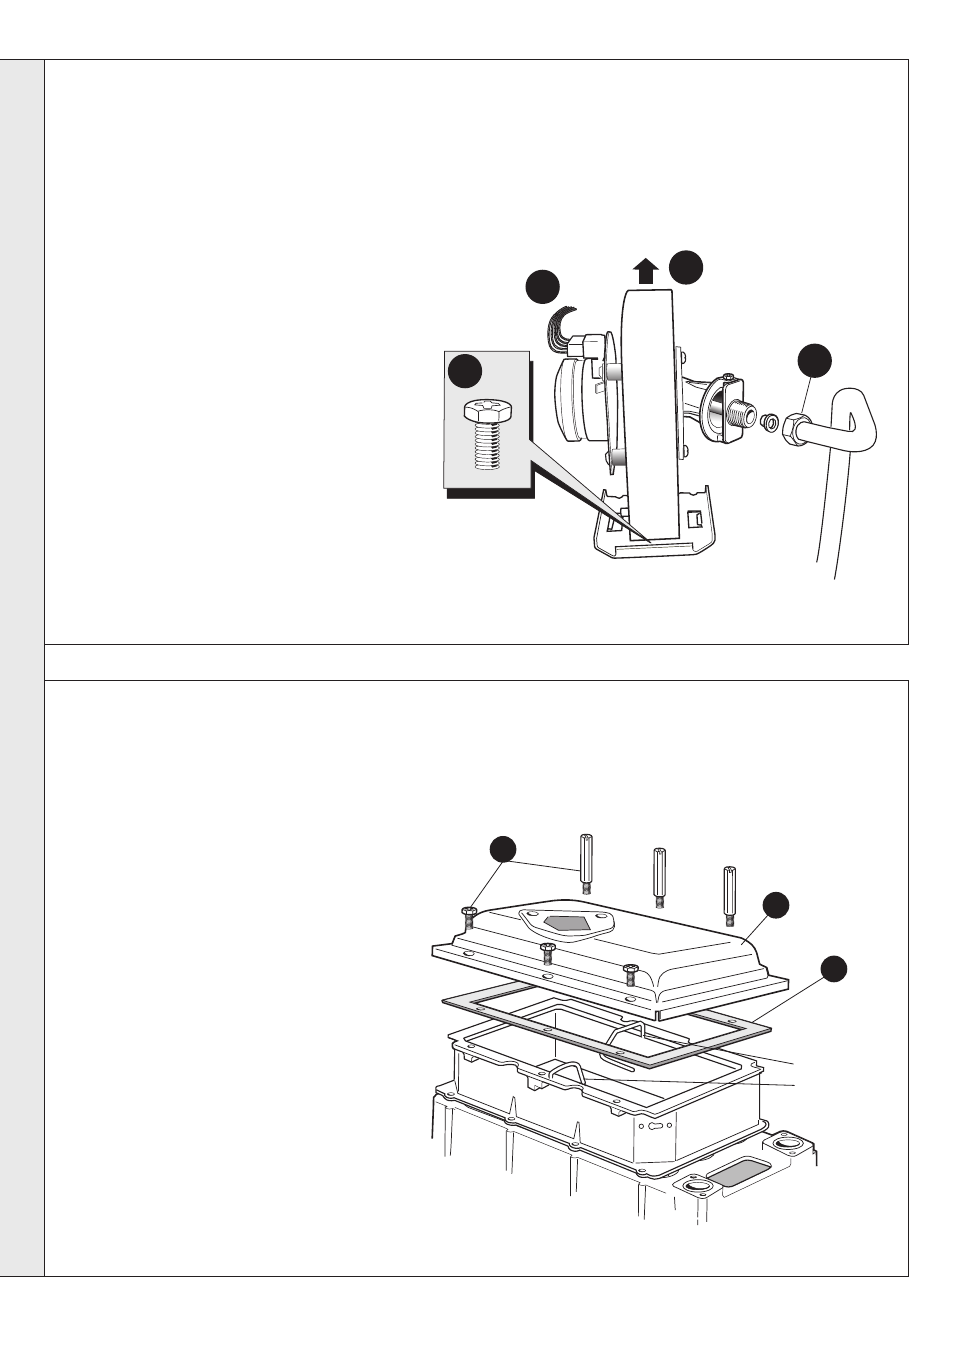
47 FAN AND VENTURI ASSEMBLY REMOVAL AND CLEANING
1. Disconnect the electrical leads from
the fan.
2. Undo the gas pipe union connection to
the injector housing.
3. Undo the screw on the fan mounting
bracket.
4. Lift off the fan and venturi assembly.
5. Inspect the injector for blockage or
damage.
48 BURNER REMOVAL AND CLEANING
1. Remove the 6 screws securing the
burner (the 3 screws at the rear are
extended to ease access).
2. Lift off the burner from the combustion
chamber.
IMPORTANT
The burner head is a ceramic plaque
construction. Care must be taken to
ensure that the burner is not placed
down upon its face as this may cause
damage to the ceramic.
3. Brush off any deposits that may be on
the ceramic with a SOFT brush.
4. Inspect the sealing gasket around the
burner and combustion chamber
insulation for any signs of damage.
Replace as necessary.
Note.
Take care not to disturb the ionisation
probes at the front and rear of the
combustion chamber.
nm7400
Ionisation
Probes
1
2
4
SER
VICING