Zero the controls, Connections, Zero the controls connections – MACKIE PORTABLE RECORDING PREAMP User Manual
Page 10: Onyx s at ellit e
10
ONYX Satellite
ONYX S
at
ellit
e
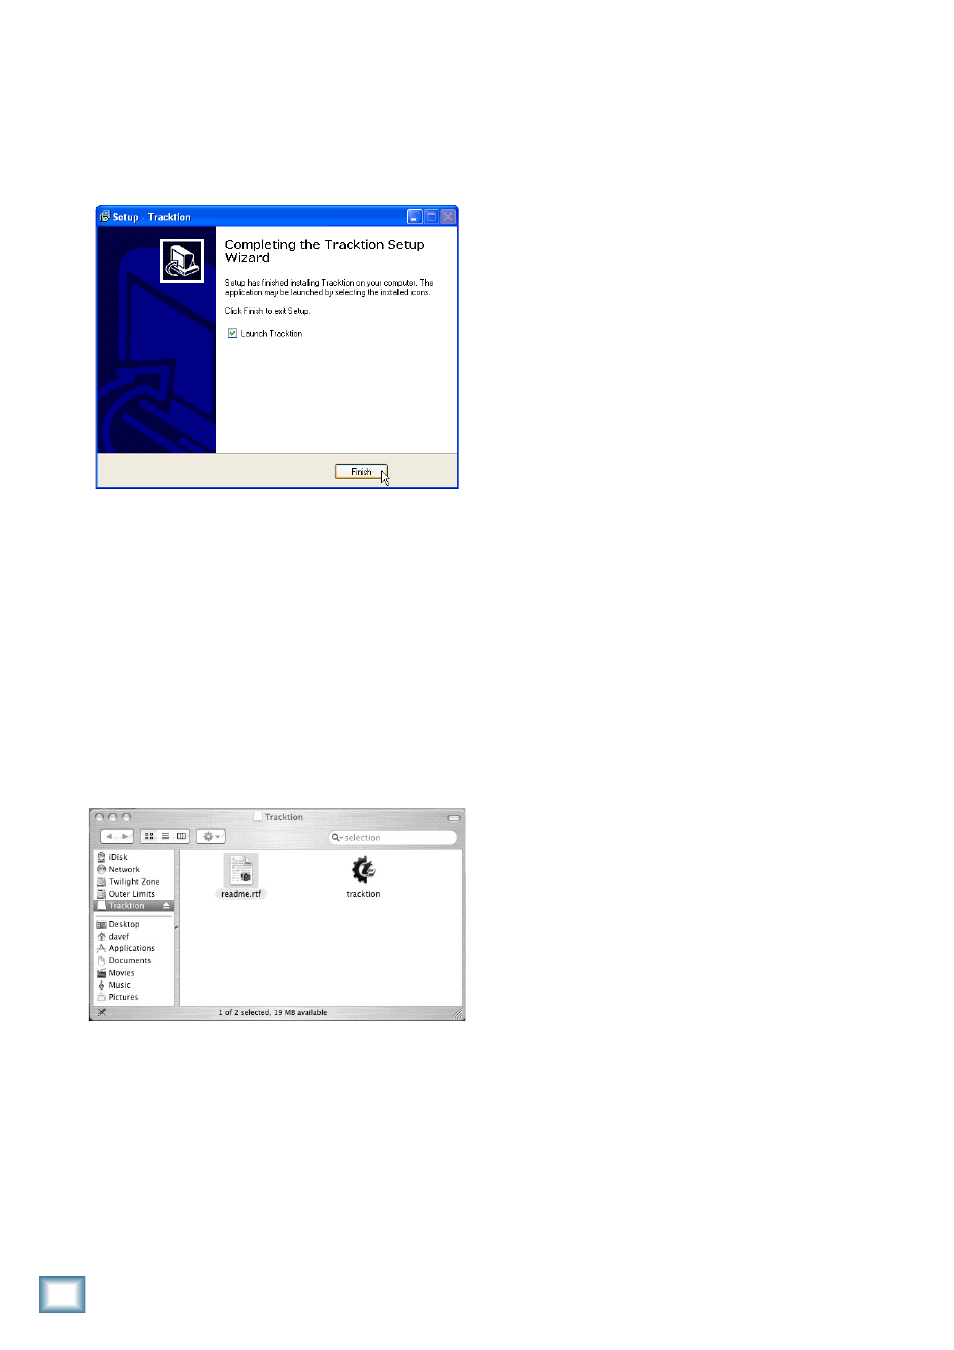
12. When the installer has completed copying the files
into the destination folder, the “Completing the
Tracktion Setup Wizard” window opens. If you want
to launch Tracktion right away, click the “Launch
Tracktion” box. Click “Finish” to complete the
installation.
13. Double-click the Tracktion.exe file in the destina-
tion folder to open Tracktion. (If you selected the
option during the installation, you can double-click
the Tracktion shortcut icon on your desktop.)
To install Tracktion on a Mac running OS X
(version 10..9 or later):
1. Insert the CD-ROM into the CD-ROM drive.
2. Double-click the CD icon on the desktop and
double-click the file named “TracktionSetup.dmg”.
3. A Tracktion window opens. Drag the Tracktion icon
from the Tracktion window into the Applications folder.
4. Double-click the Tracktion file in the Applications
folder to open Tracktion.
Authorizing Tracktion
There is an authorization code on the sleeve of the
CD-ROM that came with your Onyx Satellite. You can
authorize the software from within Tracktion or by going
to http://my.mackie.com.
From Tracktion 2:
1. Open Tracktion 2.
2. Tracktion detects that the software is unregistered
and notifies you that it is running in Demo Mode.
You can choose to continue or click the “Unlock”
button to authorize the software.
3. Follow the instructions for unlocking Tracktion.
From my.mackie.com:
1. Go to http://my.mackie.com
2. If you haven’t done so already, set up an account
by entering your email address and clicking “No, I
want to create an account.” Then click “Continue.”
3. Enter the information to setup your profile. Then
proceed to register Tracktion by clicking “Mackie
Product Registration.”
4. Select “Software” and “Tracktion v2 Music Produc-
tion Software.”
5. Click “Click here to register Tracktion v2 online.”
6. Enter the authorization code from the sleeve on
your CD-ROM in the License Number box. Then
click “Authorize.”
Once you’ve installed and authorized the software,
proceed as follows:
Zero the Controls
1. Turn down the channel GAIN controls, and the
Control Room and Phones level controls.
2. Set all push button switches to their “out” positions.
3. Turn the POWER switch off.
Connections
Note: This tutorial assumes that you are using the Onyx
Satellite with the pod “docked” to the base station.
This demonstrates how to record guitar to your DAW
for tracking, and then record a vocal while monitoring the
guitar track already laid down:
1. Plug a guitar into channel 1 Instrument input and a
microphone into channel 2 MIC input. Push in the
Instrument switch on channel 1.