Getting started – MicroNet Technology Network Device RAIDBank4 User Manual
Page 11
RAIDBank4 Owner’s Manual
11
Connecting the RAIDBank4
Connecting the RAIDBank4 requires an available power socket, and a host with one of the
following interfaces:
• A USB 2.0 port
• An external SATA host bus connector with large LUN and port multiplier support
• The Ethernet remote management requires an available Ethernet jack to a hub or switch on
your network.
1. Plug the AC adapter cord into the power port on the back of the drive. The plug should
not require much effort to insert. If the plug will not go in, do not force it; the plug is
probably upside down. Rotate the plug and try again. Incorrectly inserting the plug
could damage the drive and void the warranty.
2. Plug the power cord into the power socket
3. Connect the appropriate cable to your host. USB and eSATA plugs are shaped so they can
only be properly inserted one way. Be sure to insert the plugs properly
or you may damage the drive and void the warranty.
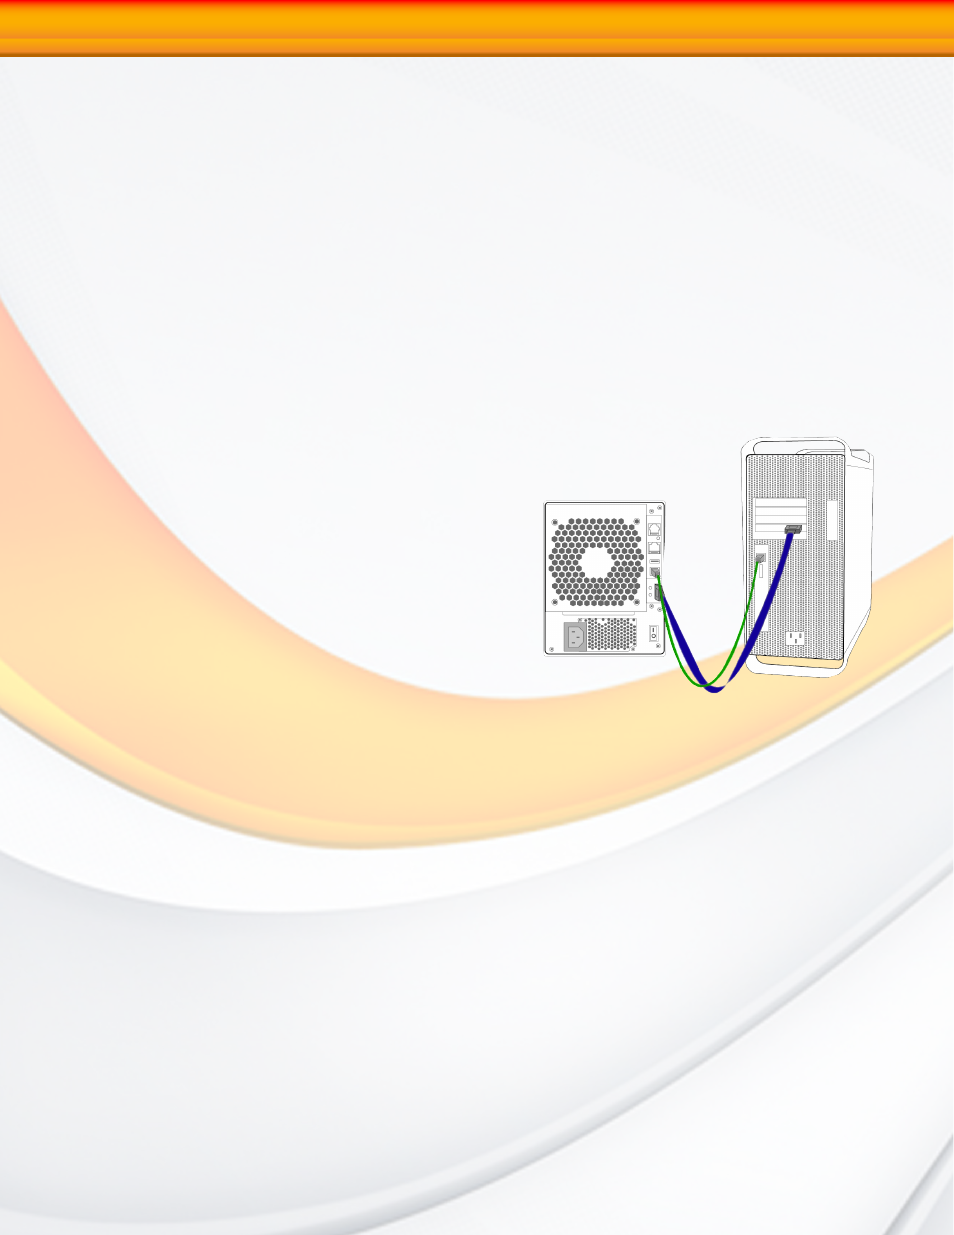
(USB)
Connect the square USB 2.0 connector
(type B) of the included USB cable to a the
square USB plug on the RAIDBank4 (illustrated
right in green), and the rectangular end to a
free USB port on your computer.
(eSATA)
Connect the included eSATA cable to
a free eSATA port on your computer (illustrated
right in blue.) If your computer does not
have eSATA ports, you may purchase an eSATA
expansion card for your computer. Contact your
authorized MicroNet reseller for further details.
4. Flip the power switch located on the back of the RAIDBank4 to the “ON” position
(labelled “-”.)
1-Getting Started