Genicom microLaser 170 User Manual
Page 65
Operation
52
Zebra XiII Printer User’s Guide
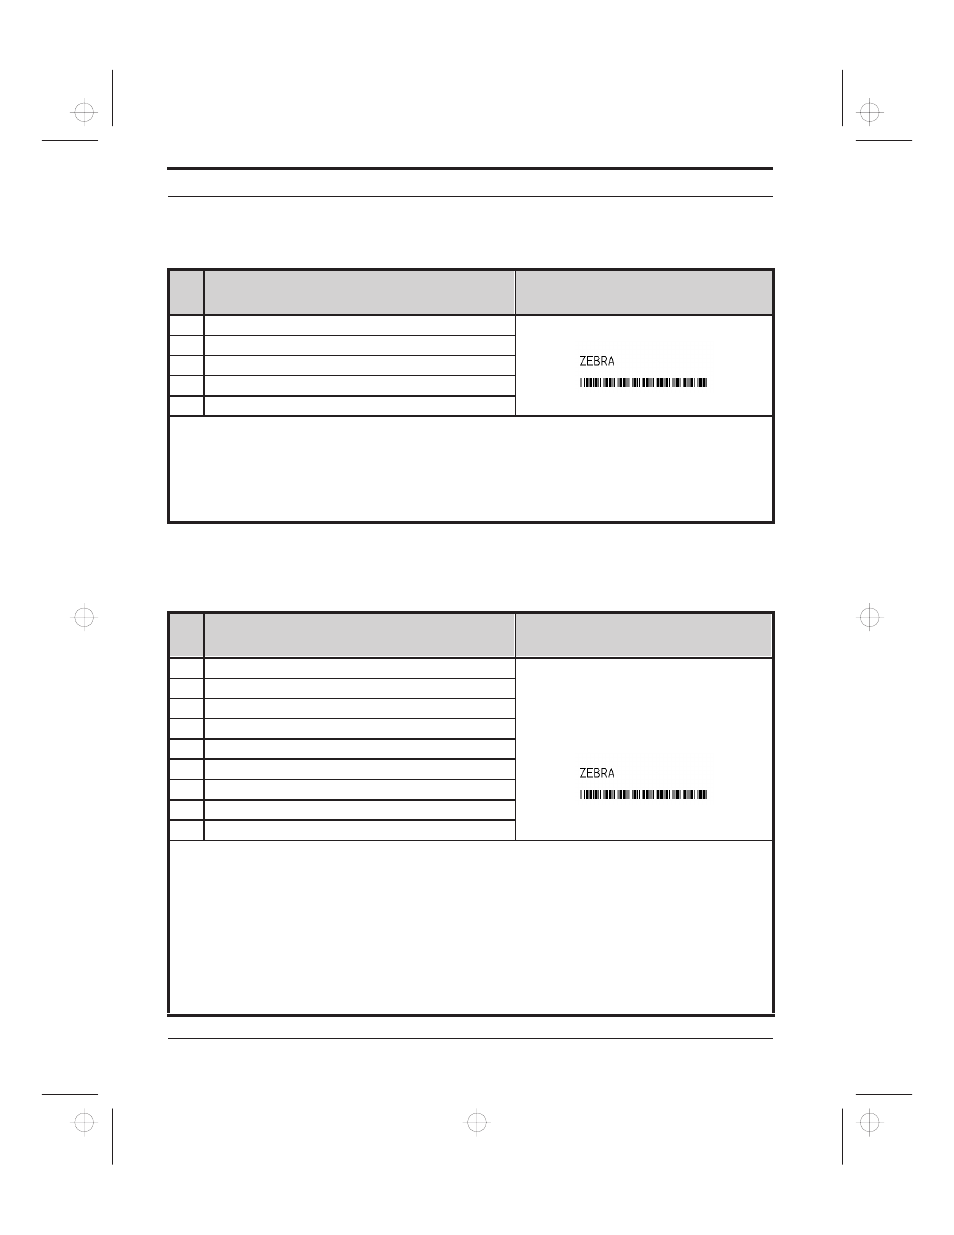
Format 1: Simple Text and a Barcode
Format 2: Saving a Label Format As a Graphic Image
Line
#
Type this label format:
You’ll get this printout:
1.
^XA
2.
^LH30,30
3.
^FO20,10^AD^FDZEBRA^FS
4.
^FO20,60^B3N,Y,20,N^FDAAA001^FS
5.
^XZ
Line #1: Indicates start of label format.
Line #2: Sets label home position (in dots) from the upper left-hand corner of the label.
Line #3: Sets field origin, selects font “D”, defines field data as “ZEBRA”.
Line #4: Sets field origin, selects bar code Code 39, sets barcode height at 20 dot rows, defines field data
for bar code as “AAA001".
Line #5: End of label format
Line
#
Type this label format:
You’ll get this printout:
1.
^XA
Same as Format 1, but this format was also
saved in the printer’s memory as a graphic
image named “FORMAT2”.
2.
^LH30,30
3.
^FO20,10^AD^FDZEBRA^FS
4.
^FO20,60^B3N,Y,20,N^FDAAA001^FS
5.
^ISFORMAT2,N
6.
^XZ
7.
^XA
8.
^ILFORMAT2
9.
^XZ
Line #1: Indicates start of label format.
Line #2: Sets label home position (in dots) from the upper left-hand corner of the label.
Line #3: Sets field origin, selects font “D”, defines field data as “ZEBRA”.
Line #4: Sets field origin, selects bar code Code 39, sets barcode height at 20 dot rows, defines field data
for bar code as “AAA001".
Line #5: Saves the format in the printer’s memory as a graphic image named “FORMAT2:, the “N” indi-
cates “do not print after saving.”
Line #6-7: (See Format 1)
Line #8: Load and print the graphic image saved as “FORMAT2”.
Line #9: (See Format 1)
xi2ch2 Page 52 Tuesday, April 23, 1996 1:45 PM