Recommended adjustments – Grizzly Extreme Series Jointer G9953ZXF User Manual
Page 25
Extreme series Jointer (Mfg. since 9/11)
-23-
4. Verify that the outfeed table height is properly
set (refer to
Setting Outfeed Table height
on
page 19).
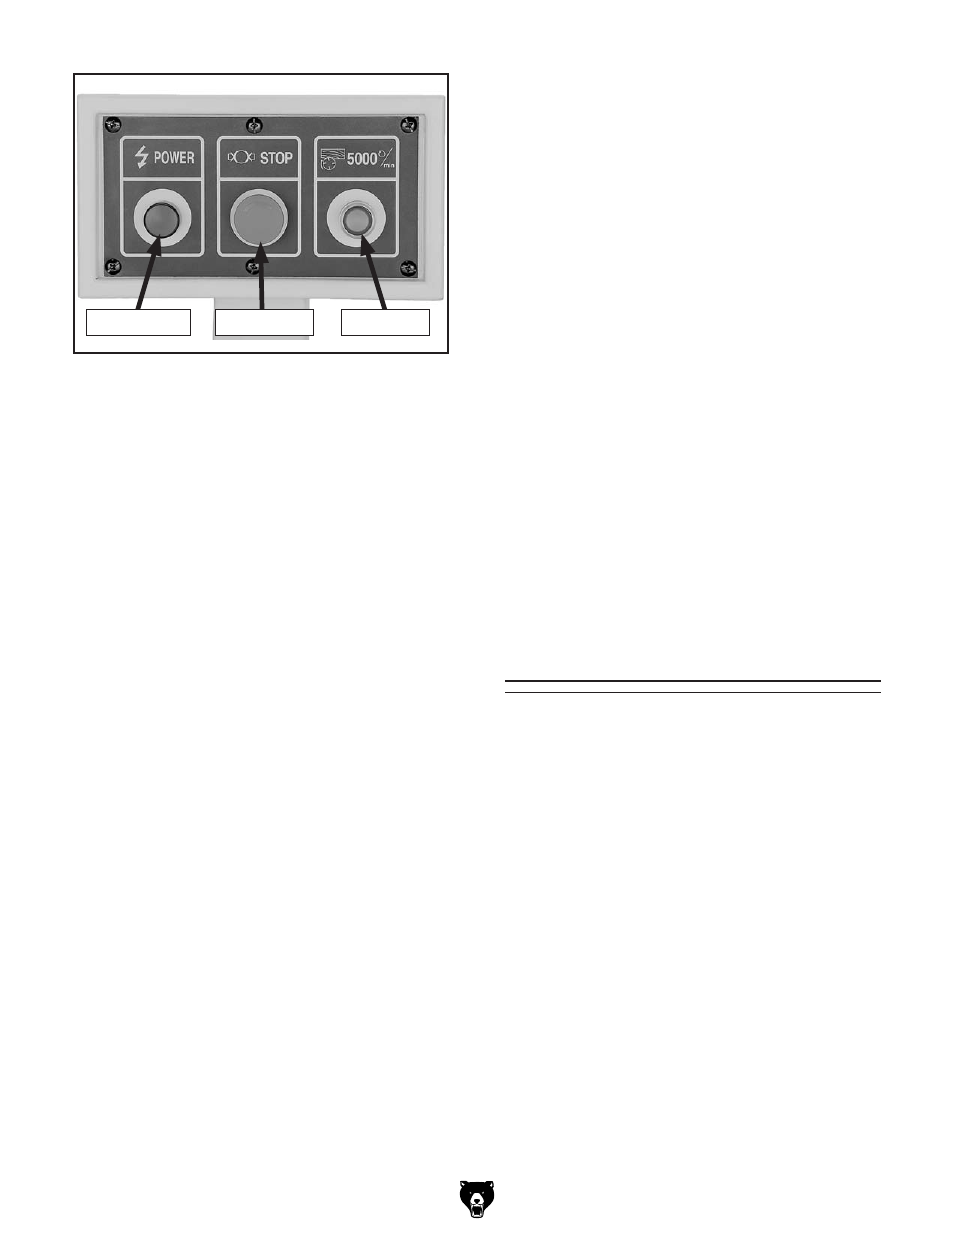
5. Connect the machine to the power source.
6. Verify that the machine is operating correctly
by pushing the oN button.
—When operating correctly, the machine
runs smoothly with little or no vibration or
rubbing noises.
— investigate and correct strange or unusual
noises or vibrations before operating the
machine further. always disconnect the
machine from power when investigating or
correcting potential problems.
7. if equipped on your jointer, rotate the
cutterhead brake handle to stop the machine
and cutterhead.
— if the machine does not turn
OFF, use the
stop button to turn it
OFF and immediately
disconnect power to the machine. the
cutterhead brake feature is not working
correctly. this safety feature must work
properly before proceeding with regular
operations. Call tech support for help.
8. Model G9953ZXF Only: press the stop but-
ton to turn the machine
OFF and observe the
cutterhead rotation.
For your convenience, the adjustments listed
below have been performed at the factory and
no further setup is required to operate your
machine.
however, because of the many variables involved
with shipping, we recommend that you at least
verify the following adjustments to ensure the best
possible results from your new machine.
step-by-step instructions for these adjustments
can be found in the
SERvIcE section, beginning
on
page 36.
Factory adjustments that should be verified:
•
table parallelism (
page 44).
•
Model g9860 & g9953 Knife height (
page
39).
Recommended
adjustments
— if the cutterhead is rotating counterclock-
wise (from right-to-left), the motor is wired
out of phase. disconnect the jointer from
power, then switch any two hot leads com-
ing from the power source.
9. if not already done, use the stop button to
turn the machine
OFF.
10. Without resetting the stop switch, press
the oN button. the machine should not
start.
—if the machine does not start, the stop but-
ton safety feature is working correctly. the
Test Run is complete.
—if the machine does start (with the stop
button pushed in), immediately disconnect
power to the machine. the stop button
safety feature is not working correctly. this
safety feature must work properly before
proceeding with regular operations. Call
tech support at (570) 546-9663 for help.
Figure 28. Control panel.
power lamp
stop Button
oN Button