Installation instructions before you begin, Caution, Water valve assembly installation instructions s – GE IM4A User Manual
Page 36: Tools you will need, Remove the cover, Cut plastic water tubing, Attach the water valve
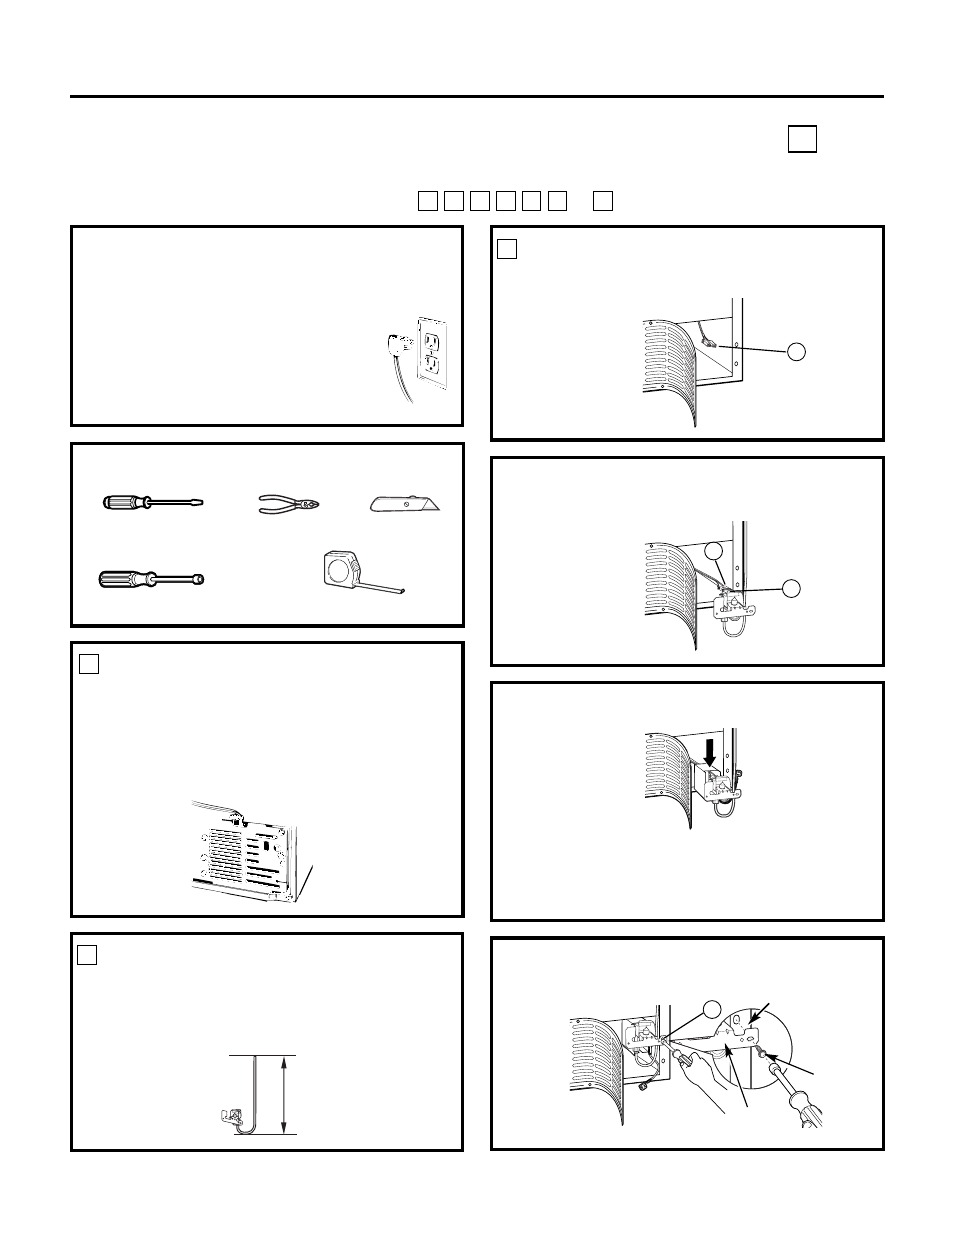
Installation Instructions
BEFORE YOU BEGIN
Read each step thoroughly before proceeding.
•
CAUTION –
Unplug the
Refrigerator. To eliminate the danger
of electric shock during installation, you
must unplug the refrigerator from its
electrical outlet.
Flat blade and Phillips
screwdrivers
Pliers
TOOLS YOU WILL NEED
Sharp knife
1/4
″ and 5/16″ Nutdrivers
REMOVE THE COVER
At the bottom rear of the refrigerator, remove
the screws holding the access cover.
Bend the cover back to access the compartment.
Be sure to save the screws as the access cover must
be reinstalled later to ensure that your refrigerator
will function properly.
1
CUT PLASTIC WATER TUBING
• Measure 25
″ (64 cm) of water tubing starting from
where it is secured to the water valve. Cut off
excess tubing with a sharp knife or single-edge
razor blade.
2
25
″ (64 cm)
Tape measure
• Fasten the water valve to the cabinet by driving
the hex-head screw (10) from the kit into the hole
in the cabinet leg.
ATTACH THE WATER VALVE
• Locate the female connector plug (C).
3
• Plug the female connector (C) onto the male
terminals on the water valve (3). Either wire
can go on either terminal.
C
3
10
C
• Slide the water valve shield with ground wire shipped
with the refrigerator completely onto the water valve.
Cabinet
Water valve
bracket
Hex-head
screw
WATER VALVE ASSEMBLY INSTALLATION INSTRUCTIONS S
Are these the right instructions for your model? Follow the Installation Instructions indicated by
the label on the back of the refrigerator—
or S
R
Q
P
N
M
L
NOTE: If the water valve shield (part WR02X11753)
has been misplaced and/or the ground wire (part
WR23X10347) is missing from the water valve shield,
call 1.800.626.2002 and order the appropriate part(s).
36