GE WBVH6240 User Manual
Page 38
To replace the thermistor:
Push the thermistor into the rubber gasket until
fully seated.
Note: Ensure heater assembly is fully seated in the
tub.
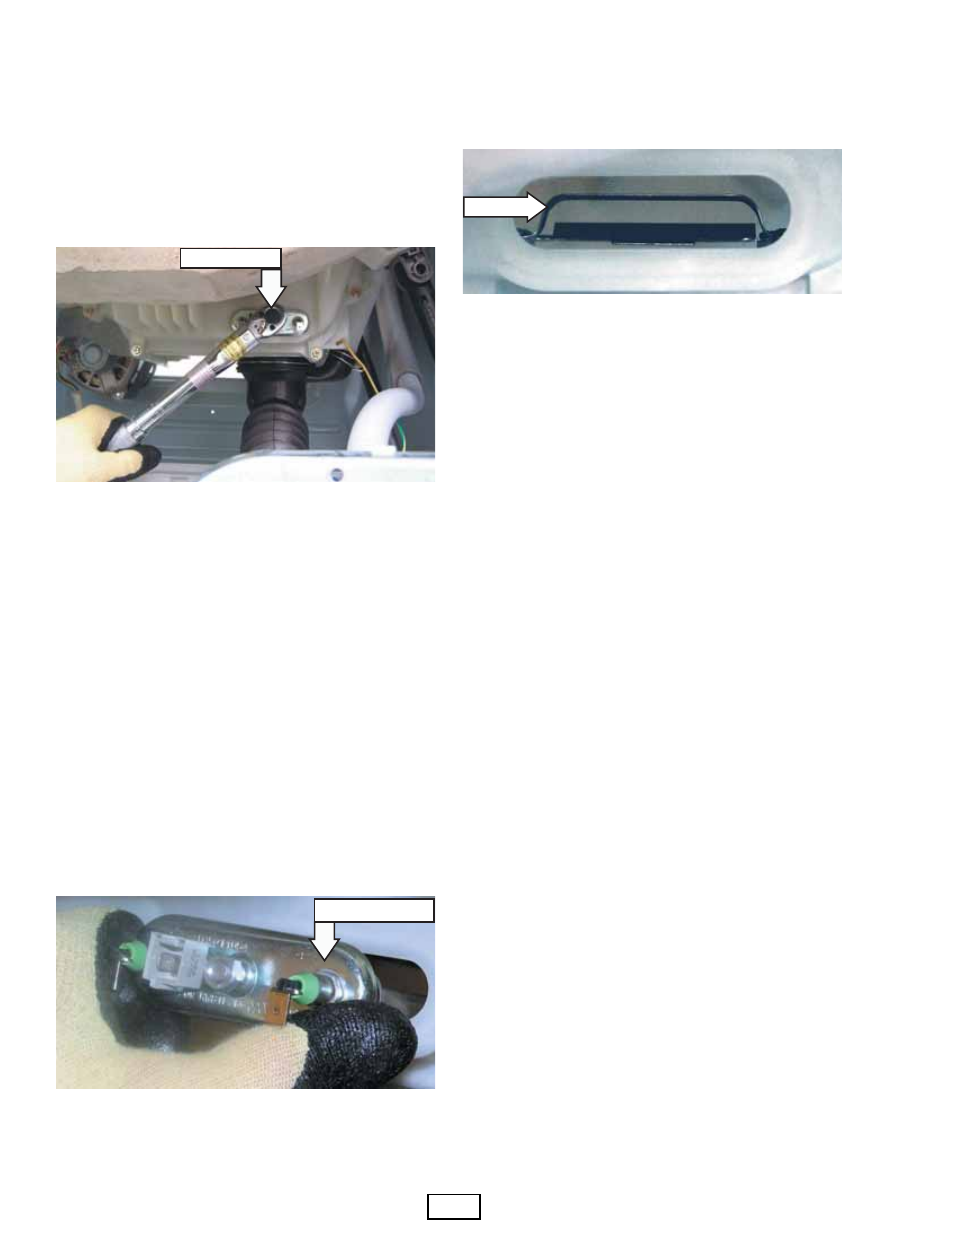
Use a torque wrench to tighten the 10-mm hex
nut to 31 in. lbs of torque.
1.
2.
CAUTION: Proper torque must be applied to the 10-
mm hex nut to assure a proper seal. Under torquing
could cause water leakage; over torquing could
cause the tub to crack.
Reconnect the wire harness to the thermistor.
To remove the heater assembly:
Remove the service panel. (See
Service Panel.
)
Drain the washer using the pump cleanout. (See
Pump
.)
Disconnect the blue and the purple wires from
the heater and the wire harness from the
thermistor.
Loosen the 10-mm hex nut until it is fl ush with
the end of the stud.
3.
1.
2.
3.
4.
Torque Wrench
(Continued Next Page)
Push inward on the 10-mm hex nut to relax the
rubber gasket.
Grasp the heater assembly and pull outward.
5.
6.
Heater Assembly Removal
Heater Assembly
To reinstall the heater assembly:
Slide the heater assembly into the tub opening
and inside the bracket attached to the outer tub.
1.
Seat the heater assembly in the tub opening.
Use a torque wrench to tighten the 10-mm hex
nut to 31-in. lbs of torque.
CAUTION: Proper torque must be applied to the 10-
mm hex nut to assure a proper seal. Under torquing
could cause water leakage; over torquing could
cause the tub to crack.
Reconnect the wire harness to the thermistor
and the blue and the purple wires to the heater.
2.
3.
4.
Bracket