4 diagnostics – Furuno 1715 User Manual
Page 28
2. MAINTENANCE, TROUBLESHOOTING
20
2.4 Diagnostics
If you feel that your unit is not working
properly, conduct the appropriate diagnostic
test, display unit or antenna unit, to find the
possible cause. If you cannot restore normal
operation, contact your dealer for advice.
Display unit
1. Turn on the power while pressing and
holding down the [MENU/ESC] key.
Continue pressing the [MENU/ESC] key
until the Installation menu appears.
SIMULATION
OFF
TEST ...
LCD PATTERN ...
MEMORY CLEAR
NMEA PORT
: IN/OUT
NMEA OUTPUT
: OFF
GPS WAAS
: OFF
GOTO RADAR SETUP...
INSTALLATION MENU
*
* The simulation provides internally
generated echoes, for use in
exhibitions, etc. "SIM" appears
at the top left corner when the
simulation mode is active.
Installation menu
2. Press ▼ to choose TEST.
3. Press ► to start the test. In a few
moments the results will appear.
ROM
OK
RAM
OK
NMEA
01
Body: 39
°
C
Program No. 0359199-**.**
Push [MENU] 3 times to exit.
* Program no. of FURUNO BlackBox GPS
GP-310B: 48502180XX
GP-320B: 48502380XX
**.** = Program version no.
GPS (XXXXXXX-XX.XX)*: OK
XX = Program
Version No.
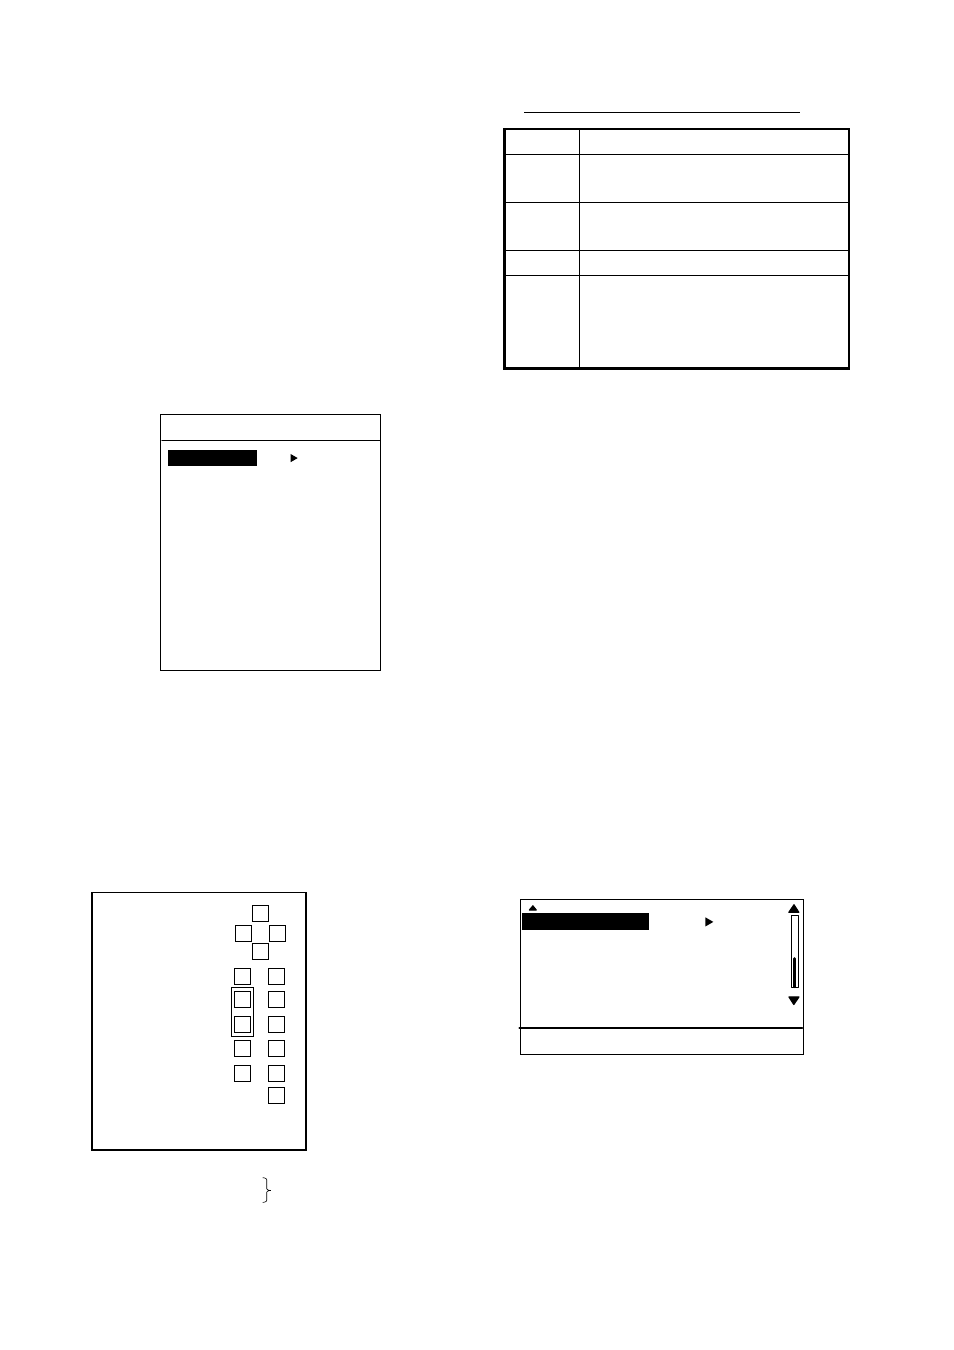
Diagnostic test results
Interpreting display unit test results
Item Results
ROM,
RAM
OK: Normal
NG: No Good
NMEA
Test connector required to test.
Normally, “01” is displayed.
Body
Temperature of display unit
GPS
Shows program no. of GP-310B
or GP-320B (if connected) and
GPS status. “OK” shown for
normal; no indication if abnormal.
4. The squares at the right side of the test
results display are for checking controls.
Press each key and the arrows on the
cursor pad one by one. A control’s
corresponding on-screen square “lights” in
black if the control is working properly.
5. To return to the Installation menu, press
the [MENU/ESC] key three times.
6. To restore normal operation, turn off the
power and then turn it on again.
Antenna unit
1. Display the installation menu as in step 1
in the display unit diagnostic test.
2. Press ▼ to choose GOTO RADAR
SETUP and then press ►. Power is
automatically reset.
3. Press the [POWER/BRILL] and [MODE]
keys to transmit.
4. Press the [MENU/ESC] key. The menu
below appears.
(3/3)
RADAR SETUP
SCANNER TEST ...
[MENU/ESC]: Exit.
Page 3/3 of user menu
5. Press ▼ to choose SCANNER TEST.
6. Press ► to start the test. In a few
moments the results will appear, similar to
those shown at the top of the next page.
7. To restore normal operation, turn off the
power and then turn it on again.