2 mounting procedure – Furuno NAVNET 1933C-BB User Manual
Page 12
1-2
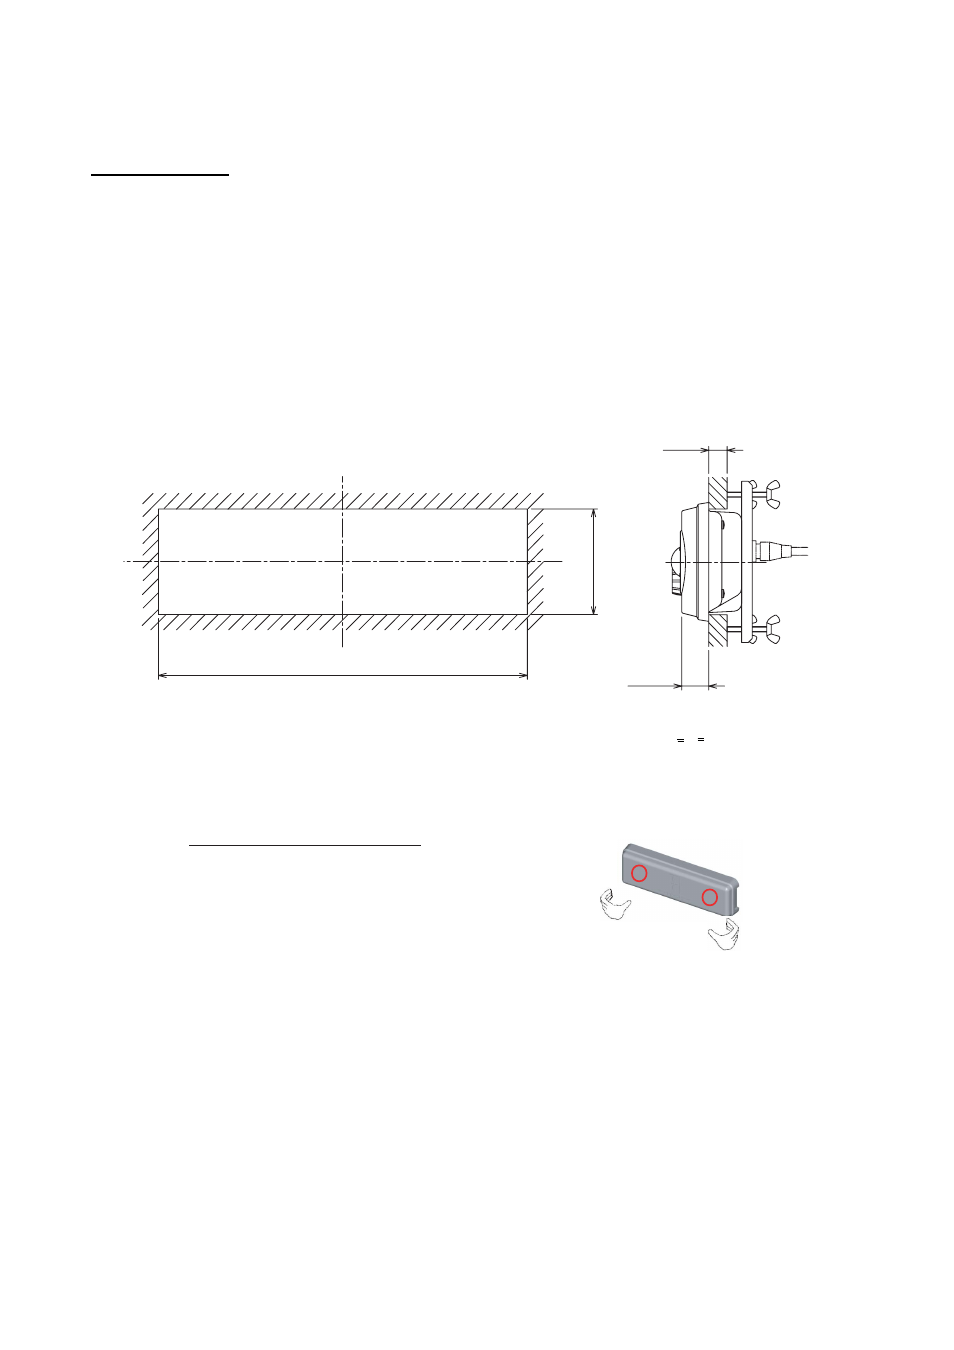
Mounting procedure
Flush mounting
Follow the procedure below to mount the control unit on a panel with accessories
FP03-10001.
1. Prepare a cutout in the mounting location, referring to the outline drawing at the end of
this manual.
2. Set the control unit to the cutout.
3. Attach the mounting plate to the control unit with four screws M4 x 10 from the rear side.
4. Screw four wing bolts into wing nuts.
5. Fasten the control unit to the mounting location with four wing bolts and wing nuts
assembled at step 4.
280±1
80±1
(A)
20.5
A: Thickness of panel
10 Flush mounting of display unit How to remove the hard cover
6. Attach hard cover to protect the control unit.
Place your thumbs at the locations shown with
circles in the illustration at right, and then lift the
cover while pressing it with your thumbs.