Copying/pasting (1), Copying to the clipboard – Fostex MR-8 User Manual
Page 70
70
MR-8 Owner’s Manual
TRK 1
TRK 2
TRK 3
TRK 4
TRK 5
TRK 6
TRK 7
TRK 8
LOCATE A
point
LOCATE B
point
Clip Board
(Virtual)
ABS ZERO
REC END
TRK 1
TRK 2
TRK 3
TRK 4
TRK 5
TRK 6
TRK 7
TRK 8
LOCATE A
point
Copying/pasting (1)
You can copy a part of the mono or stereo track(s)
and paste it to the desired position of the other
track(s). The source part is copied to the (vir-
tual) clipboard first, then pasted to the desired
position of the other track(s).
If you want to copy a part and paste it to the
same position of the other track(s), we rec-
ommend to use the other copy/paste method
described later in "
Copying/pasting (2)
" (though,
of course, you can make such a copy/paste
operation with the method described here).
You cannot copy/paste track data of a song
protected. Release the protection before mak-
ing the copy/paste operation.
If you turn off the power after copying data
to the clipboard, the data on the clipboard
disappears. Also note that you cannot undo
copying data to the clipboard.
• Copying to the clipboard
1) Load the song you want to edit.
2) Store the LOCATE A and LOCATE B points (see
page 53).
You can check the part by playing back between
the LOCATE A and LOCATE B points (see page 68).
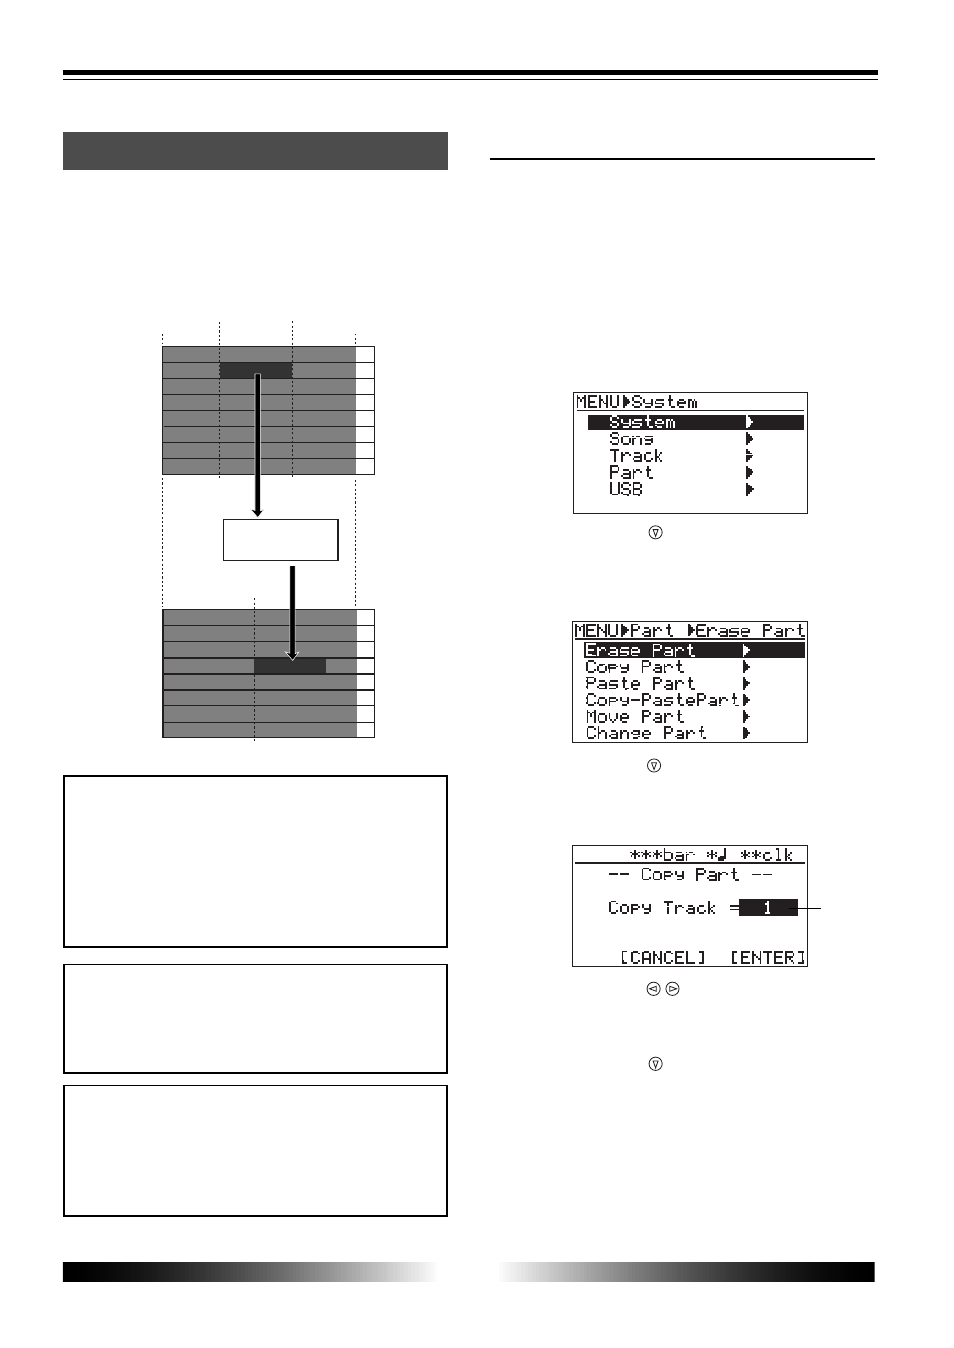
3) While the recorder is stopped, press the [MENU]
key to enter the menu mode.
The display shows the menu selection screen, in
which "
System
" is highlighted initially.
4) Use the [CURSOR ] key to highlight "Part", then
press the [ENTER] key.
5) Use the [CURSOR ] key to highlight "Copy Part",
then press the [ENTER] key.
The display now shows the screen for selecting the
track(s) of which you copy data.
6) Use the [CURSOR / ] keys to select the track(s).
You can select from among mono tracks (1 through
8) and stereo pair tracks (1/2, 3/4, 5/6 and 7/8).
7) Use the [CURSOR ] key to move the cursor to
"[ENTER]" at the lower right on the screen, then
press the [ENTER] key.
The display now shows the part edit menu selec-
tion screen, in which "
Erase Part
" is highlighted ini-
tially.
The display shows "
Please Wait!
", immediately fol-
lowed by "
Completed!
" when the MR-8 completes
the copy operation. To cancel the copy operation,
move the cursor to "
[CANCEL]
" at the lower left on
the screen, then press the [ENTER] key.
flashing