FujiFilm 40002 User Manual
Page 28
3. INSTALLATION
26
4.
Click the
[Add Port] button.
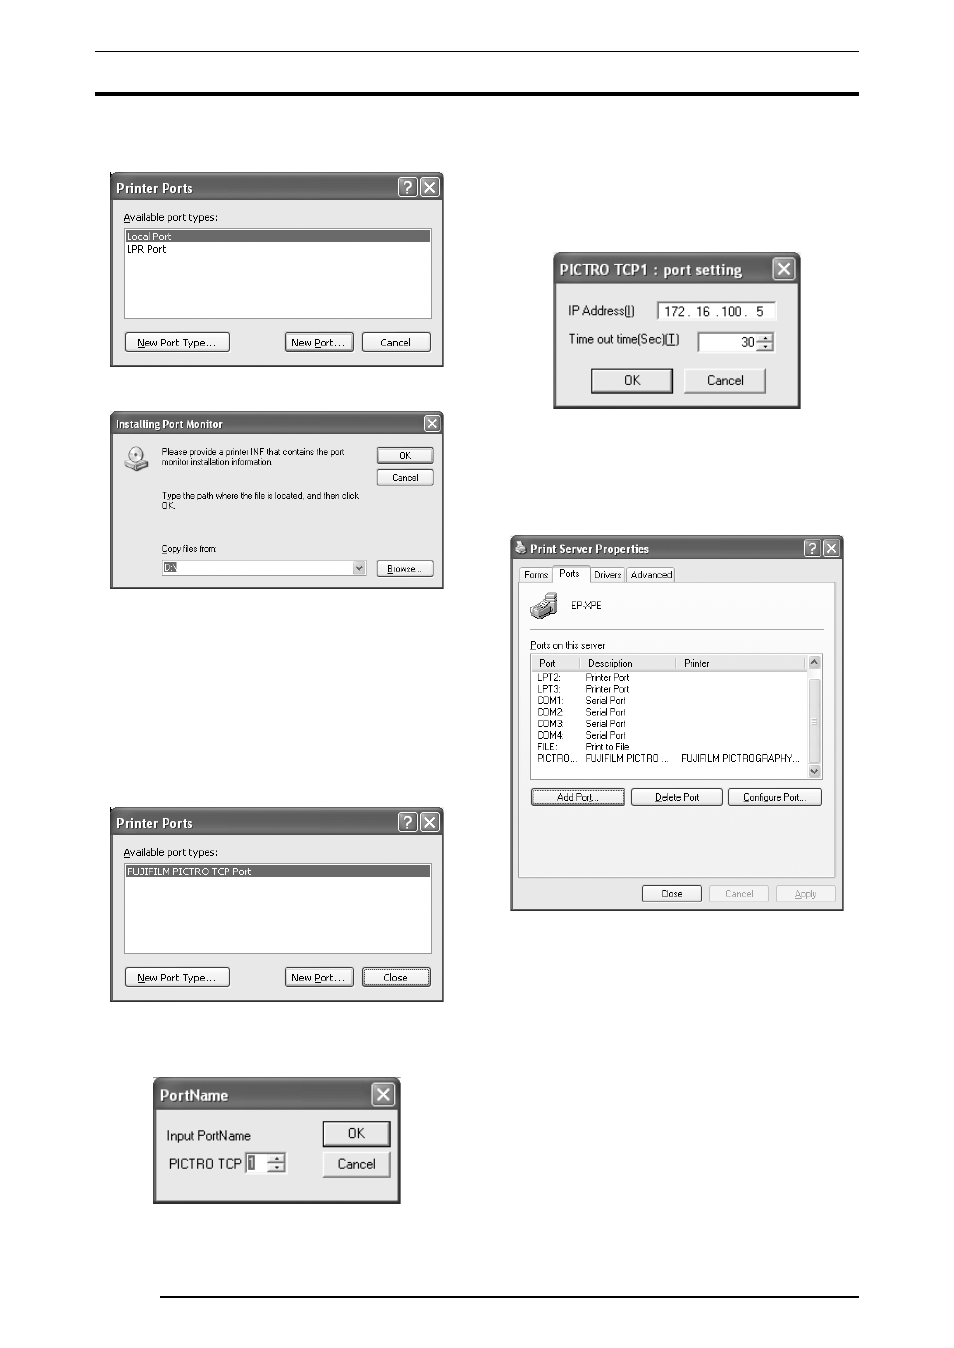
The
[Printer Ports] dialog box is displayed.
5.
Click the
[New Port Type].
The
[Installing Print Monitor] dialog box is displayed.
6.
Enter the following location in the
[Copy files from:] field.
For the CE type, enter:
E:\Driver\PG3500\Win2k_XP\English\CE (for 3500)
E:\Driver\PG4K2_4500\Win2k_XP\English\CE (for 4000
2
/
4500)
(* if your CD-ROM drive is E: drive)
For the UC type, enter:
E:\Driver\PG3500\Win2k_XP\English\UC (for 3500)
E:\Driver\PG4K2_4500\Win2k_XP\English\UC (for 4000
2
/
4500)
(* if your CD-ROM drive is E: drive)
Click the
[OK] button.
The following appears.
7.
Confirm that
[FUJIFILM PICTRO TCP Port] appears in the
[Available Port types;] field, and then click the [New Port]
button. After a file copy operation is performed, the following
dialog box appears:
8. Specify the port name as directed below:
Enter a numerical value between 1 and 99 to specify the port
name. Although the default port name (numerical value) is
displayed, you can change it by entering a new port name
(numerical value).
When the port name is determined, click the
[OK] button.
The following dialog box appears:
9. Specify the output destination IP address as directed below:
Enter the IP address of the PICTROGRAPHY network adapter
to specify the output destination, and then click the
[OK] button.
When you are returned to the dialog box shown in Step 6., click
the
[Close] button.
10. The following is displayed when the file is copied.
11. Confirm that
[PICTRO TCPx:] (x: numerical value entered as
the port name) appears in
[Ports on This Server], and then
click the
[Close] button.
This completes the installation of
[PICTRO TCP Port].