4 control unit – Furuno FSV-84 User Manual
Page 19
1-11
1.4 Control
Unit
The control unit is designed for mounting on a tabletop, with or without the KB (keyboard)
fixing plate (supplied), which mounts the control unit at an angle. If the control unit is not to
be fixed permanently, lay it atop the rubber feet (supplied as accessories). Be sure to
observe the compass safe distances noted on page ii to prevent interference to a magnetic
compass.
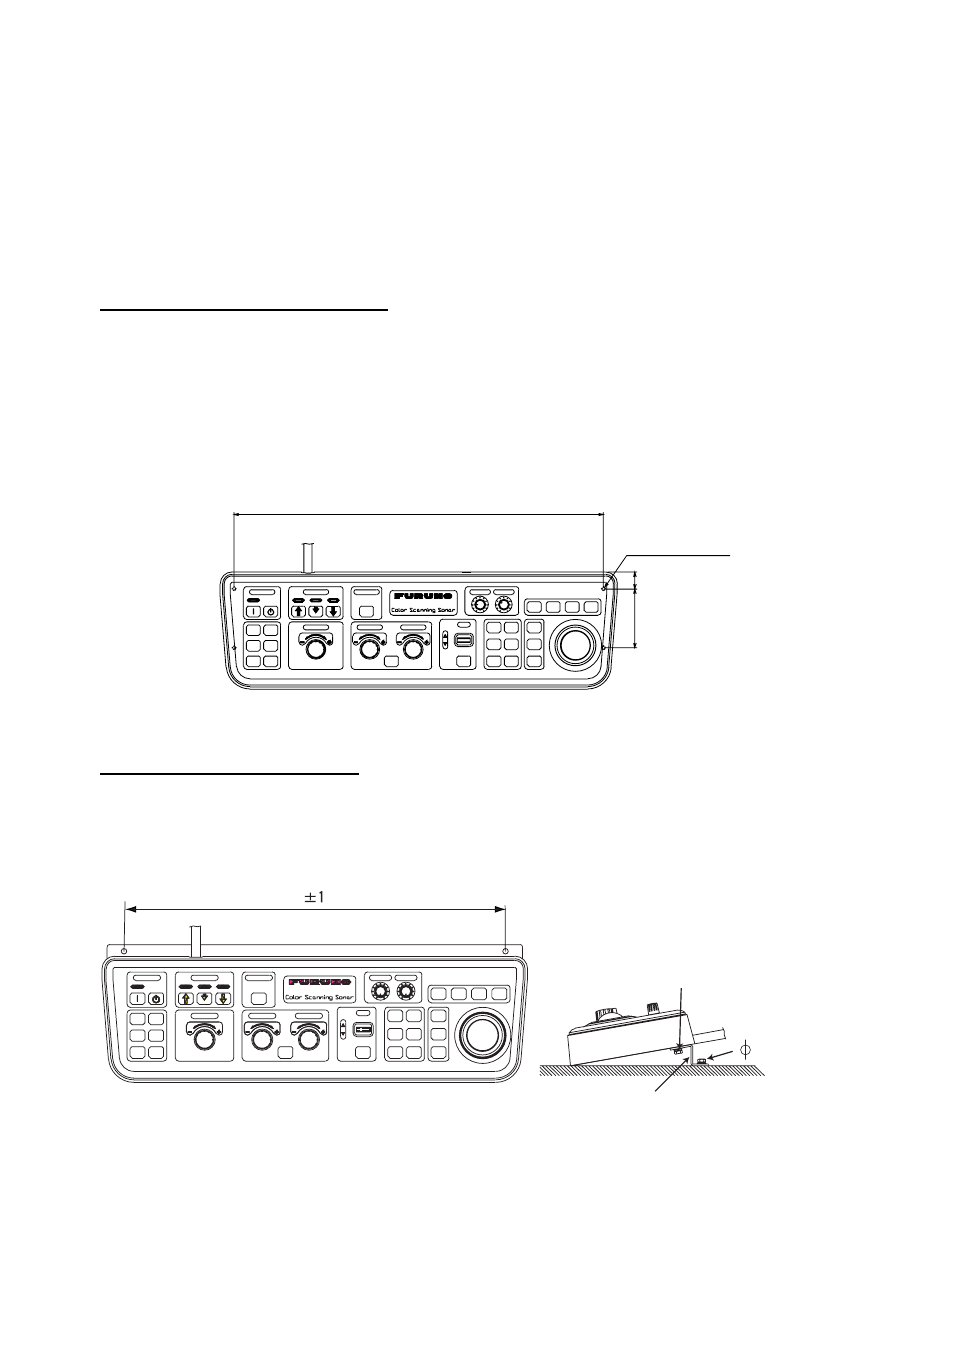
Mounting without KB fixing plate
1. Drill four mounting holes of 6 mm diameter to fasten the control unit, referring to the
outline drawing at the back of this manual.
2. Referring to the outline drawing for the control unit at the back of this manual, make a
cutout in the mounting location large enough to accommodate the name plate so the
control unit will lie flat.
3. Fix the control unit with four bolts (M5) from under the tabletop. (M5 bolts with a sufficient
length for the thickness of the tabletop should be provided locally.)
22
75
±1
467
±1
Fixing hole
φ6
FSV-84
Control unit
Mounting with KB fixing plate
1. To fix the control unit to a desired location at an angle, fasten the KB fixing plate to the
control unit and desired location with two upset screws (M5×10, supplied) and two
tapping screws (
φ6.5, local supply) as below.
KB fixing plate
Upset screw (M5x10)
Tapping screw
( 6.5)
FSV-84
450
How to attach KB fixing plate
2. Set dust cover (supplied) to the control unit.