Generation ii technical reference – Frymaster LOV M3000 User Manual
Page 41
LOV
™
Generation II Technical Reference
40
M3000 Computer Replacement
The M3000 computer is located on the front of the fryer.
Disconnect the fryer from the electrical power supply.
The controller bezel is held in place by tabs at the top and bottom. Slide the metal bezel
up to disengage the lower tabs. Then slide the bezel down to disengage the upper tabs.
Remove the two screws from the upper corners of the control panel. The control panel is
hinged at the bottom and will swing open from the top.
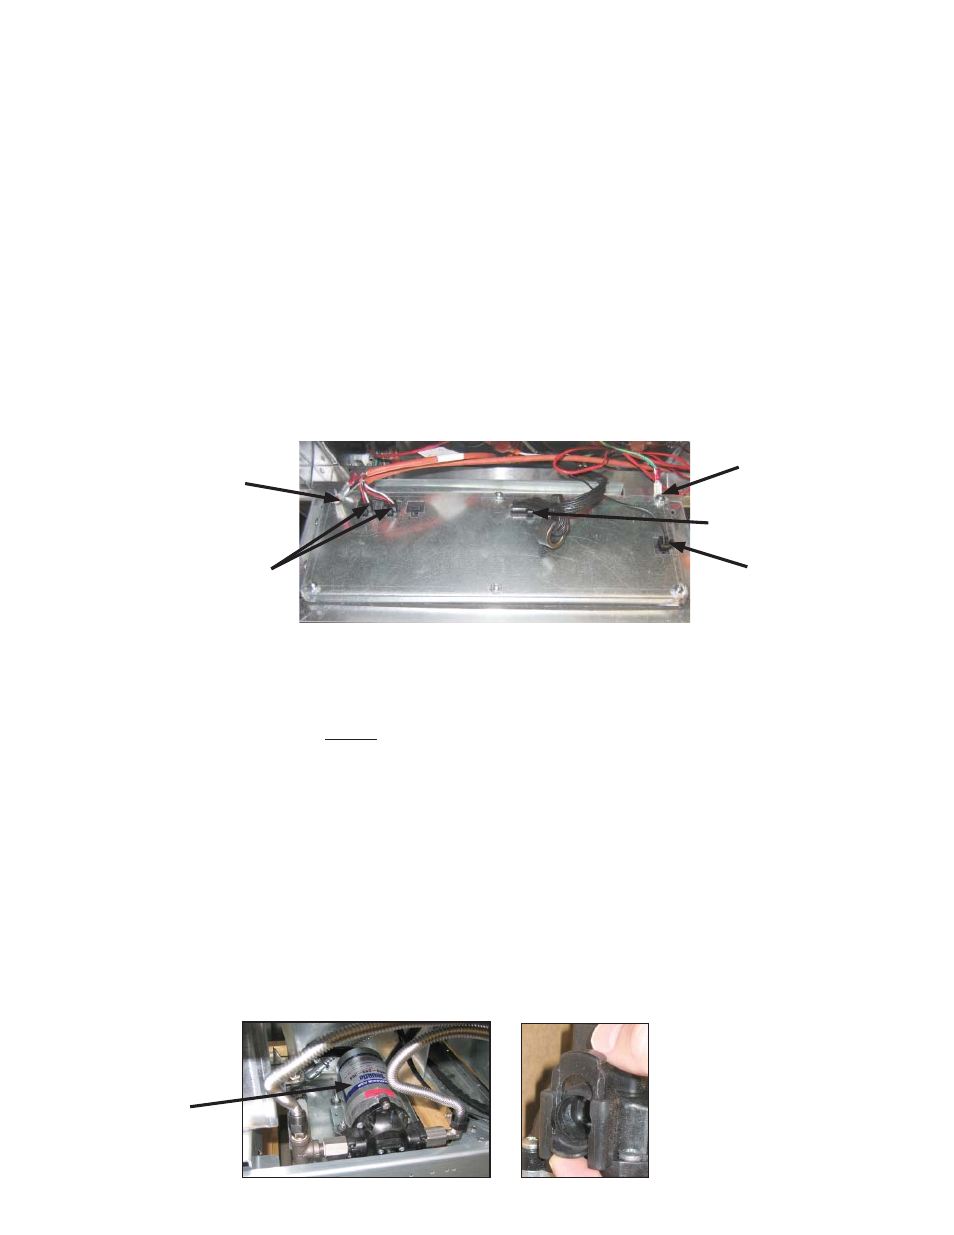
Unplug the wiring harnesses from the connectors on the back of the computer, marking
their position for reassembly, and disconnect the grounding wires from the terminals. Re-
move the computer assembly by lifting it from the hinged slots in the control panel frame.
Install the replacement computer. Reinstall the control panel assembly by reversing steps
1 thru 4.
Setup the computer following the instructions on page 4-9 in the Installation and Opera-
tion manual. Setup MUST be performed after replacement.
Cycle all power to the unit to readdress the fryer using the steps on page 37.
ATO Pump Replacement
Disconnect the fryer from the electrical power supply.
Locate the ATO pump, behind the ATO box. Mark and unplug any wires or harnesses.
Press up from the bottom on the quick disconnects to release the plumbing. The plumbing can be
pulled from the pump.
Loosen the four nuts attaching the pump to the pump tray.
Replace the defective component and reverse above steps, and then reconnect power.
1.
2.
3.
4.
5.
6.
7.
1.
2.
3.
4.
5.
Communication
Harnesses
Ground Wire
Terminal
20-Pin Connector
Locator
Wire
Ground Wire
Terminal
Quick disconnect.
ATO pump.