Firepower, a Thermadyne Company FIREPOWER FP-82 User Manual
Page 40
REPAIRS & REPLACEMENT PROCEDURES
5-8
Manual 0-2871
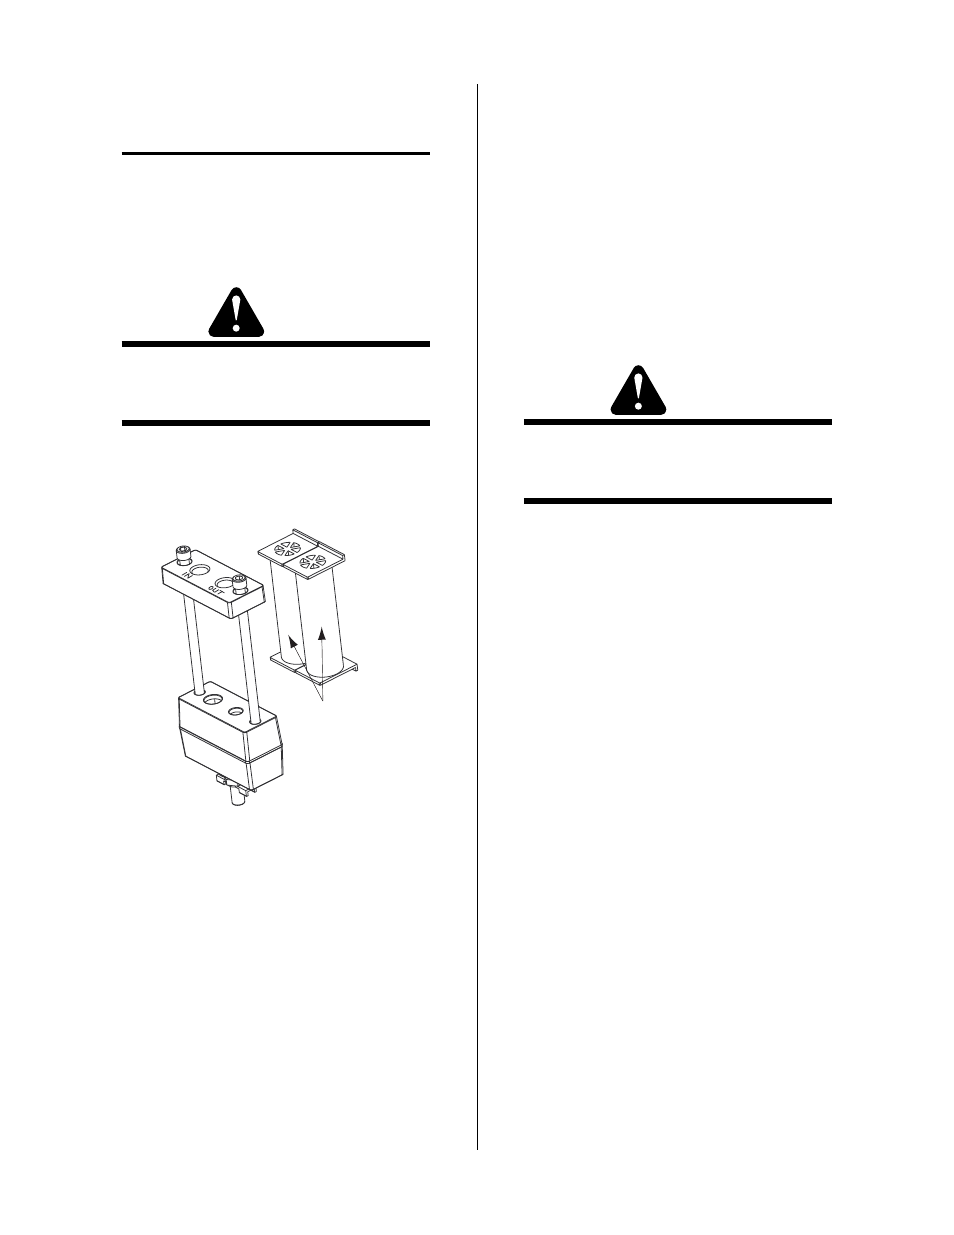
D. Optional Two-Stage Filter Element
Replacement
NOTE
The Two-Stage Air Filter has two Filter Elements.
When the Filter Elements become dirty the Power
Supply will continue to operate but cut quality may
become unacceptable.
1.
Remove power from power supply.
WARNING
Always turn off the air supply and bleed the sys-
tem before disassembling the Filter Assembly as
injury could result.
2.
Loosen the two bolts on the top of the Filter As-
sembly enough to allow the Filter Elements to
move freely.
First & Second
Stage
Cartridges
(as marked)
A-02942
3.
Slide out the old Filter Elements.
4.
Slide the replacement Filter Elements into the Fil-
ter Assembly, with the original orientation.
5.
Hand tighten the two bolts evenly, then torque
each bolt to 20 - 30 in-lbs (2.3 - 3.4 Nm).
6.
Slowly apply air pressure to the assembly, check-
ing for leaks.
E. Input Power Cable Replacement
1.
Remove the cover per subsection 5.04-A.
2.
Locate and label the input power cable connec-
tions and disconnect the cable.
3.
Unthread the retaining nut on the Input Cable
Strain Relief on the inside of the Rear Panel and
remove the Input Power Cable from the unit.
4.
Install the replacement Input Power Cable by re-
versing the above steps. The Input Power Cable
ground wire requires a ring terminal.
F. Rear Panel Replacement
WARNING
Disconnect primary input power and the gas sup-
ply at the source and bleed down the system before
performing this procedure.
1.
Remove the cover per subsection 5.04-A.
2.
Remove the primary input power cable per sec-
tion 5.07-C.
3.
Remove the Regulator/Filter Assembly per sec-
tion 5.07-A.
4.
Remove two bolts at the bottom corners of the Rear
Panel.
5.
Remove one nut on a stud on the inside of the Rear
Panel, at the rear edge of the center chassis.
6.
Replace the Rear Panel by reversing the above
steps.
7.
If not already done, attach the data tag(s), provided
with the replacement Rear Panel. Position these
as on the original Rear Panel.