Making a daisy chain – BenQ RM8602K 86" Class 4K UHD Educational Touchscreen LED Display User Manual
Page 27
27
Video wall installation guide
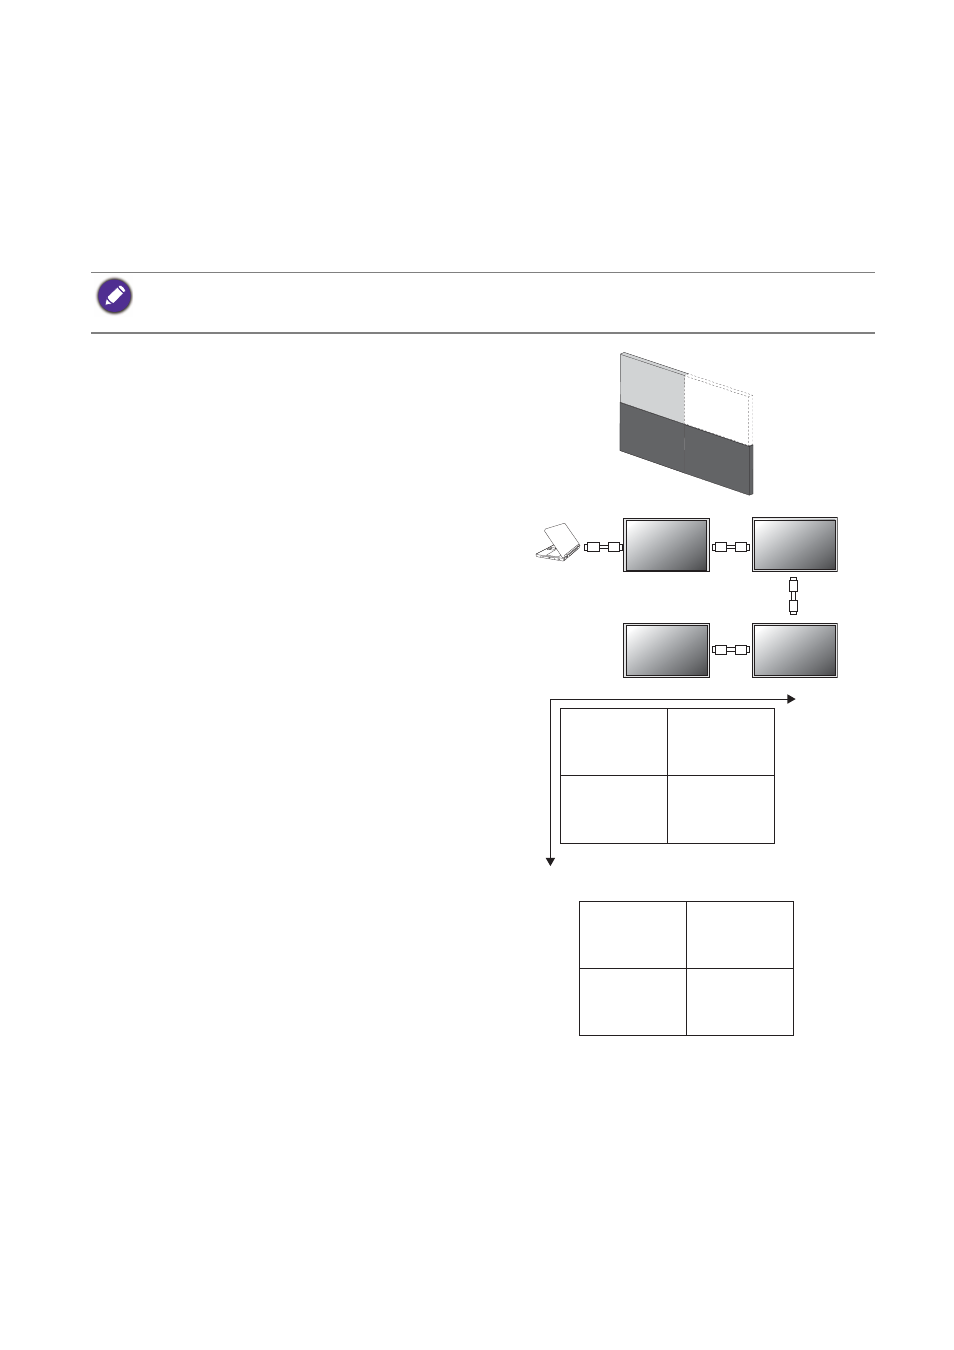
Making a daisy chain
Once you have installed the video wall, you are ready to connect all displays serially as a daisy
chain for playback or centralized management.
Follow the steps below to form a daisy chain, and refer to the mentioned sections for more
information.
In this chapter, illustrations of 4 daisy chained displays are for your reference only. You can connect more displays
if needed, as long as it is within the limit of each daisy chain to ensure picture quality. See
for more information.
1. Install the video wall. Follow the instructions in
Video wall installation guide on page 21
2. Connect the video source (e.g. computer) and
loop all displays using the required cables. See
for more information.
3. Set the horizontal and vertical position of the
display wall matrix. This helps your computer
identify how many displays are connected and how
to display the image. See
for more information.
4. Set the ID number of each display for video wall
display: PL460/PH460/PL550/PH550 on page 34
for
more information.
X
Y
1
2
4
3