Craftsman 247.88110 User Manual
Page 6
Attention! The text in this document has been recognized automatically. To view the original document, you can use the "Original mode".
Step 2.
Lower Handle
(2) Flatwashers
%" I.D.
X
1
'A"
O.D.
Hex Hd. Bolt—
--16x 1'
FIGURE 5 LOWER HANDLE ASSEMBLY
Step 1.
a. Place the lower handle in position on the frame.
b. Place two (2) flat washers %" I.D. x 114" O.D.
between the handle and frame only on the right
hand side. See figure 5.
c. Secure the right hand side of lower handle with
one (1) Hex Hd. Bolt %-16x 1" Long.
NOTE: Just run bolt in two or three threads. Do
not tighten.
d. Secure the left hand side of lower handle with
one (1) Hex Hd. Bolt %-16x %" Long.
NOTE: No washers are required for the left hand
side. Again just run the bolt in two or three
threads. Do not tighten.
^ ■
left Hand Brace
X.
Right Hand Brace
4'.
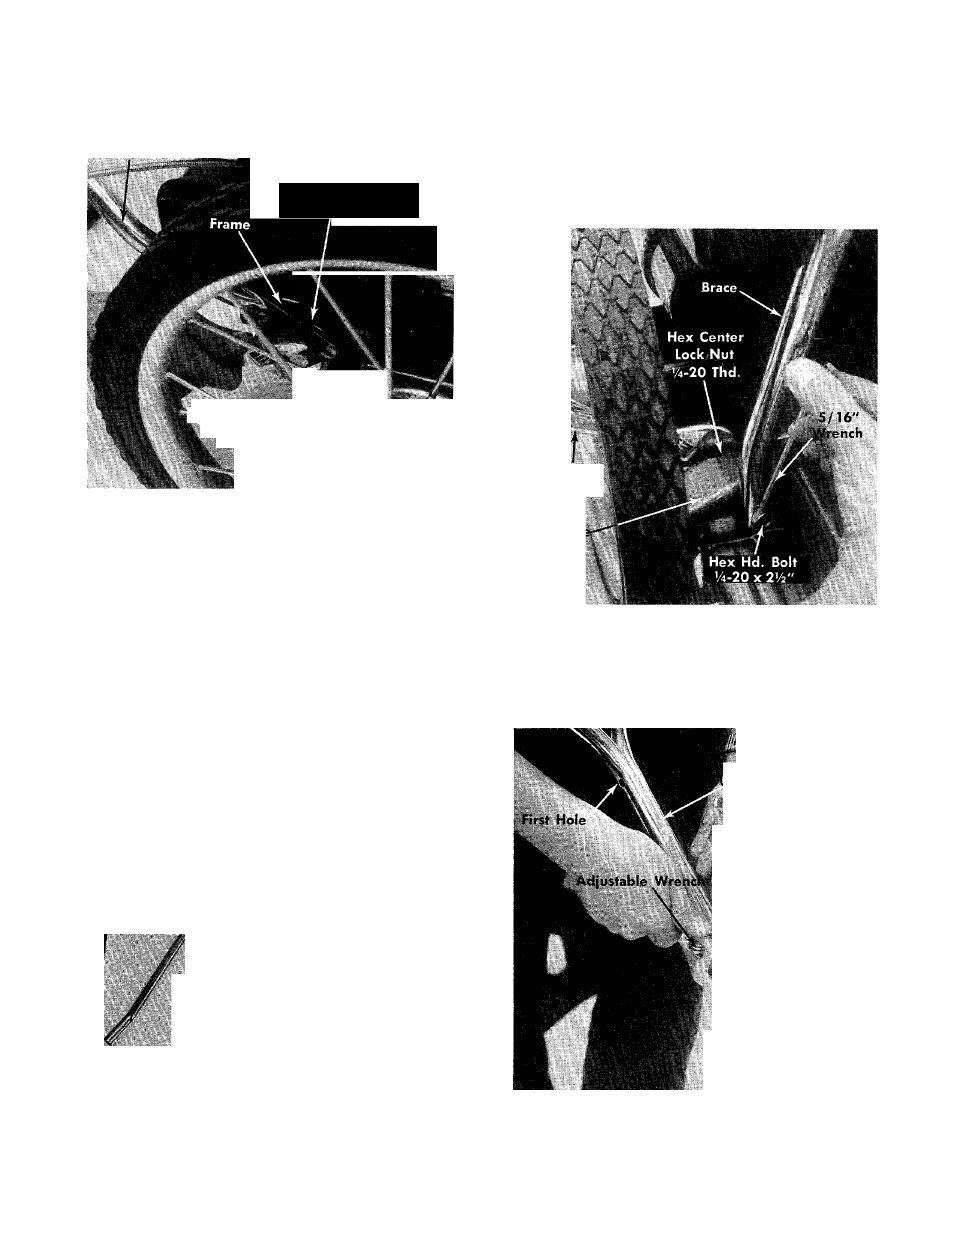
FIGURE 6. RIGHT AND LEFT HAND BRACE
a.
Place the right hand brace in position on frame
and secure with one (1) Hex Hd. Bolt 14-20 x 2Vi".
Refer to figures 6 and 7.
NOTE: Do not tighten.
Adjustable
Wrench
Fram
FIGURE 7. BRACE ASSEMBLY
b.
Place the left hand brace in position on frame
and secure with one (1) Hex Hd. Bolt 14-20 x
2
V
2
”.
Refer to figures 6 and 7.
NOTE: Do not tighten.
2) Upper Handles
Hex Center Lock Nut
U-20 Thd.
-5/16" Wrench
'Second Hole
Hex Hd Bolt 14-20 x l’/
4
"
FIGURE 8. UPPER HANDLE ASSEMBLY
c. Place the two (2) upper handles together using
the second hole. See figure 8.