2 heating element – Power Soak 34774 PS-225 Service Manual User Manual
Page 38
32
Wipe the faces of the mechanical seal parts so that they are free of debris and slide the
shaft sleeve assembly onto the motor shaft so that the protruding ceramic face of the
mechanical seal makes contact with the white face of the seal base. Place the Shaft
Seal (8) into the groove on the end of the Shaft Sleeve (9). Insert the Impeller Key (7)
into the motor shaft with the flat side of the key oriented toward the bottom of the motor
keyway. The rounded side of the key will fit into the rounded groove in the impeller.
Orient the keyway in the Impeller (6) to allign with the motor key way and slide the
impeller onto the motor shaft. Secure the impeller to the shaft with the Impeller Bolt (4),
tighten it to approximately 23 ft-lb of torque. Inspect all the mating faces in the shaft
assembly to be sure that the seals have not slipped out of position. Place the Adapter
O-Ring (11) in the groove on the raised surface of the Adapter Plate (13). Slide the
ears of the adapter plate over the studs on the Volute pump housing (1) and secure the
plate with the Washers (14) and Nuts (15). Tighten the nuts to approximately 23 in-lb of
torque. Remove the motor fan cover and spin the motor by hand to determine that the
pump impeller is not rubing on anything. Install the motor fan cover to prevent contact
with the fan during operation.
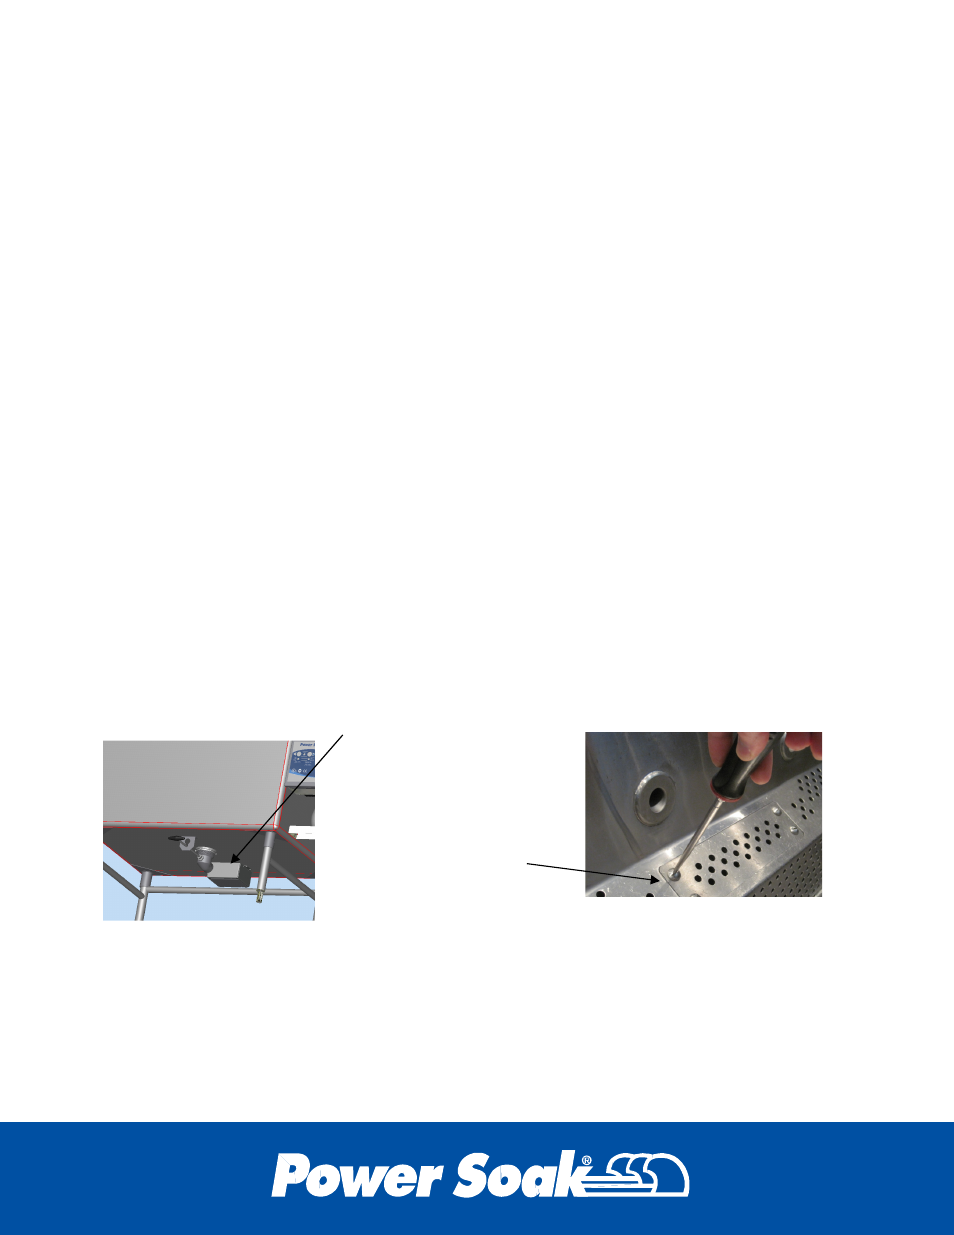
8.2 Heating Element
8.2a Disassembly
- Drain the wash tank and turn off the electrical power at the circuit
breaker in the wall mounted electrical enclosure. Remove the cover from the outside
bottom surface of the wash tank and note how the existing Heater is wired (it is helpful
to take a picture or make a sketch of the wire connections). Unbolt the cover plate
inside the wash tank on the slanted surface of the back wall. Remove the nuts from the
heater element mounting plate on the bottom side of the wash tank and unplug the
electrical wires from the terminal block. Lift the element out through the opening in the
back wall of the wash tank and remove the gasket from the mounting plate of the
element.
8.2b Inspection
– Examine the gasket for cracks or tears. Examine the wires
extending out of the base of the element. The insulation on the wires must not be
burned, cracked or missing. The connectors on the end of the wire must be free of
corrosion, crimped tight on the wire and no broken wires. Clean debris off the heating
element coils and inspect the coils for cracks or burned areas on the surface of the coil.
Replace any defective part with a new part.
Remove the cover on
the bottom side of the
tank to access the
heating element
mounting bolts and
wiring.
Remove the cover
inside the tank to
access the heating
element.