IDEC WindMSG User Manual
Page 18
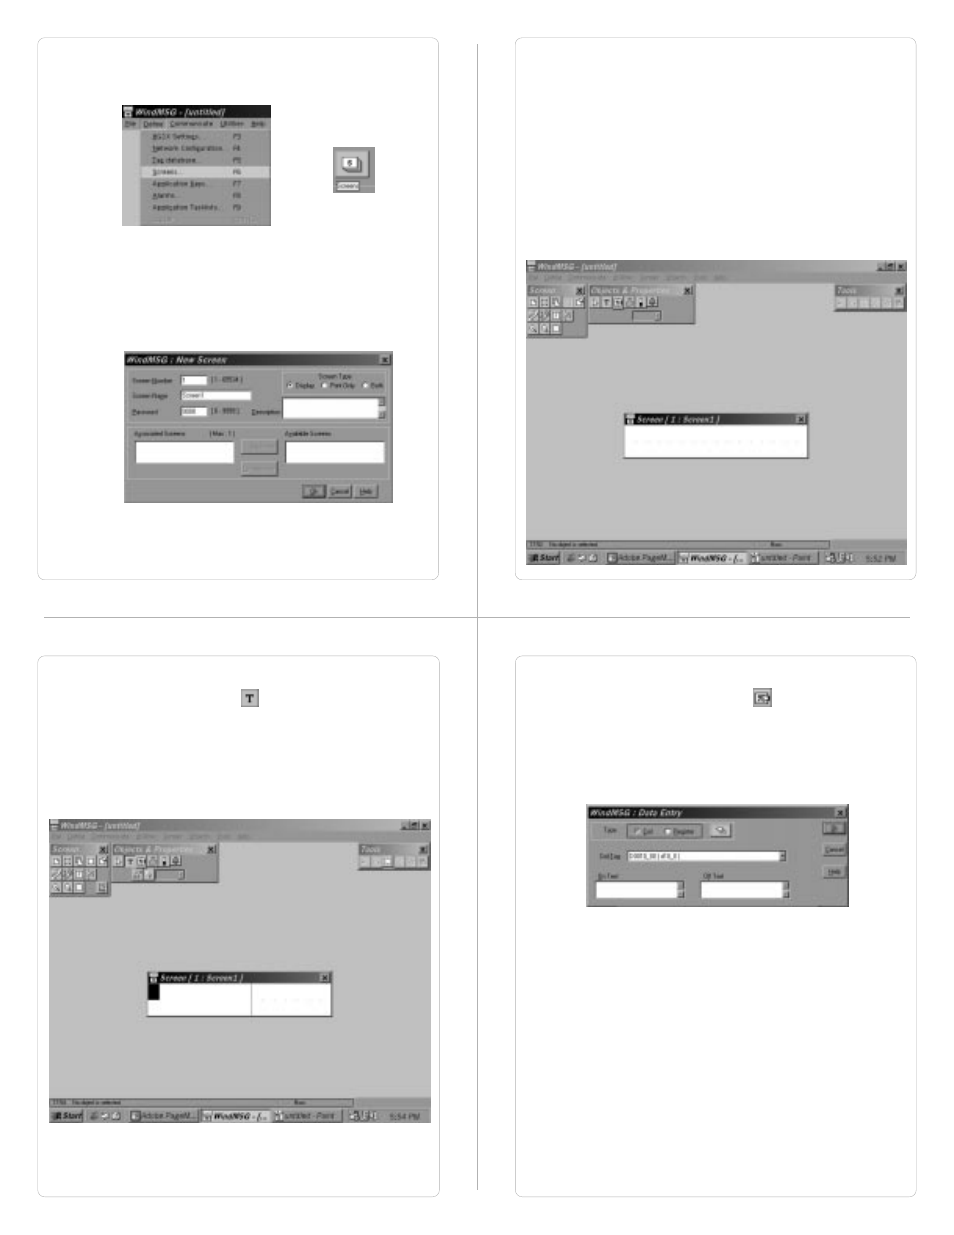
5.7
Create Screens
1.
Select
Screens.. from Define menu or Press F6 key or
click on the
Screens button.
OR
2.
In
New Screen dialog box, enter the Screen number,
Screen Name, Password. Screen Name and Screen
description information is for programmers reference only.
This information is NOT displayed anywhere on the actual
HG1X Screen. Associated Screen option is available only
when some screens have already been defined. Click
OK
to enter the
Screen Editor.
3.
In the
Screen Editor user can define Screen Objects,
Screen Keys and Screen Task-List . To place an object
click on the respective button in
Objects window. Pointer
will take the shape of the object. Click the mouse at the
required location on the screen to place the object. All the
tag dependent objects will allow user to access the Tag
data base from their dialog box. Clicking on the
Selector
button or another object button deselects the object
selected. Standard Windows operations like Copy,Cut,
Paste Objects, Redo, Undo are available in
Tools window.
Screens can also be duplicated using the duplicate button.
To exit from the
Screen Editor, click on the Close button
of
Screen Window. In the following points Screen is
explained in detail.
4.
How to define Text Object:
Click on the
Text button . The shape of the mouse
pointer will change. Now place the mouse pointer at
desired location and mark the area of text object while
holding the left mouse button. A block cursor will blink at
the location inside the text outline. Now enter text. Last
character will be overwritten If INSERT Mode (Computer
Keyboard) is disabled, else new character will not be
accepted.
5.
How to define Coil Data Entry object:
Click on the
Data Entry button . The mouse pointer will
change to the tool shape. Now place the mouse pointer at
desired location and click the left mouse button. The data
entry dialog box will appear. This box will allow user to
select between Coil and Register Data entry. If Coil data
entry is selected fields to be completed are Coil Tag and on
/ off text.