Humminbird ] 981 User Manual
Page 16
10
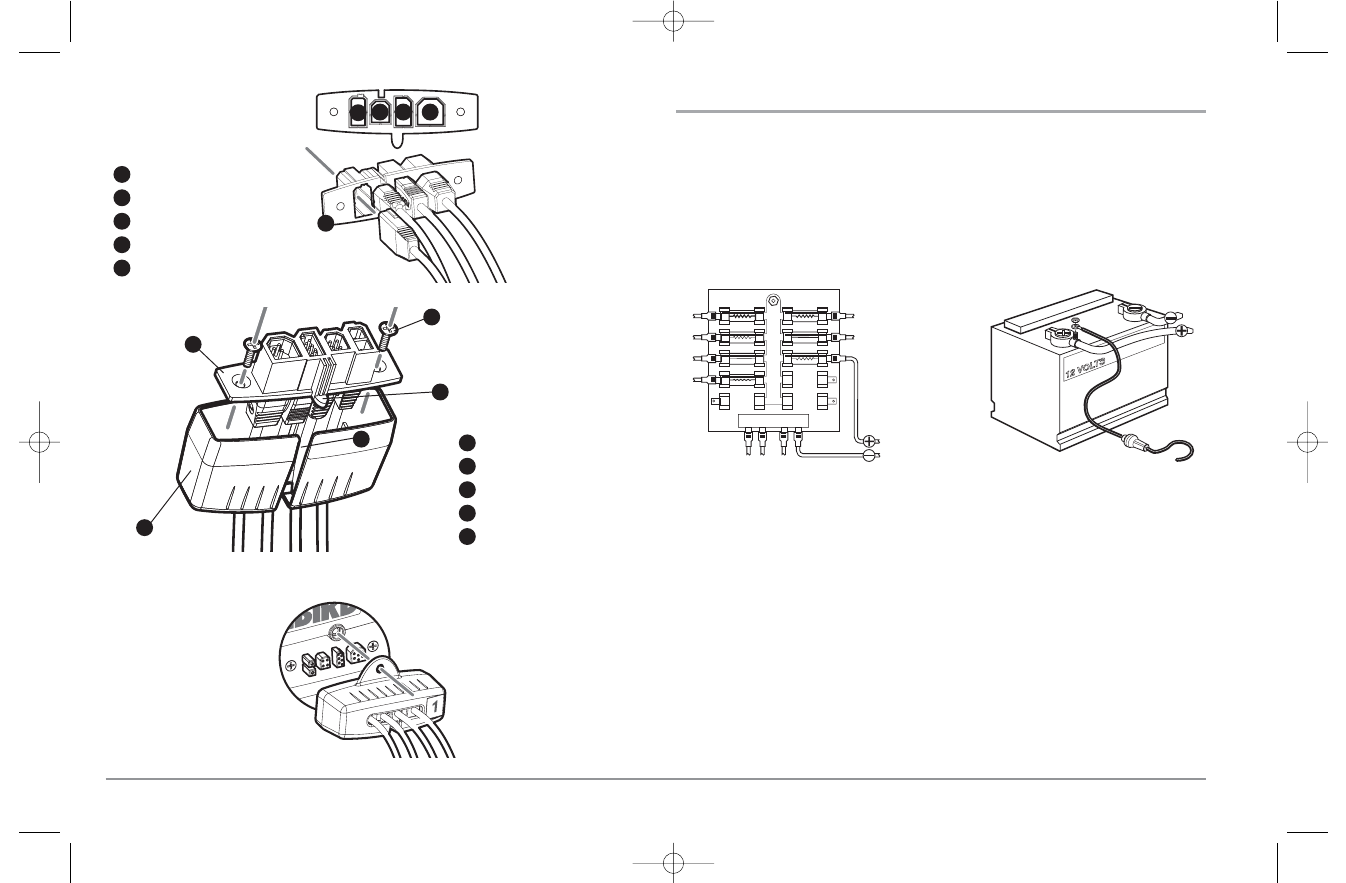
CONNECTING THE CONTROL HEAD POWER CABLE TO THE BOAT
A 6' (2 m) long power cable is included to supply power to the control head. You may
shorten or lengthen the cable using 18 gauge multi-stranded copper wire.
CAUTION: Some boats have 24 or 36 Volt electric systems, but the control head MUST be
connected to a 12 VDC power supply.
The control head power cable can be connected to the electrical system of the boat at one
of two places: a fuse panel usually located near the console, or directly to the battery.
NOTE: Make sure that the power cable is disconnected from the control head at the
beginning of this procedure.
1a. If a fuse terminal is available, use crimp-on type electrical connectors (not
included) that match the terminal on the fuse panel. Attach the black wire to
ground (-), and the red wire to positive (+) 12 VDC power.
1b. If you need to wire the control head directly to a battery, obtain and install an
inline fuse holder and a 2.5 to 3 Amp fuse (not included) for the protection of the
unit. Humminbird® is not responsible for over-voltage or over-current failures.
NOTE: In order to minimize the potential for interference with other marine electronics, a
separate power source (such as a second battery) may be necessary.
You are now ready to install the transducer. Find the section that refers to your specific
transducer installation method.
GROUND
POSITIVE
Cable Collector Insert
1
Screws
2
Cable Collector Cover
3
Tab on Insert
4
Slot on Cover
5
1
2
3
Power
1
Temperature
2
Communications
3
Transducer
4
Cable Collector Insert
5
1
2
3
4
5
5
4
Plug the Cable Connector Assembly to the Back of the Control Head
98x_Manual_531376-1_A.qxd 2/23/2005 11:39 AM Page 16