Assembly instructions – Health O Meter PROPLUS 2000KL User Manual
Page 9
8
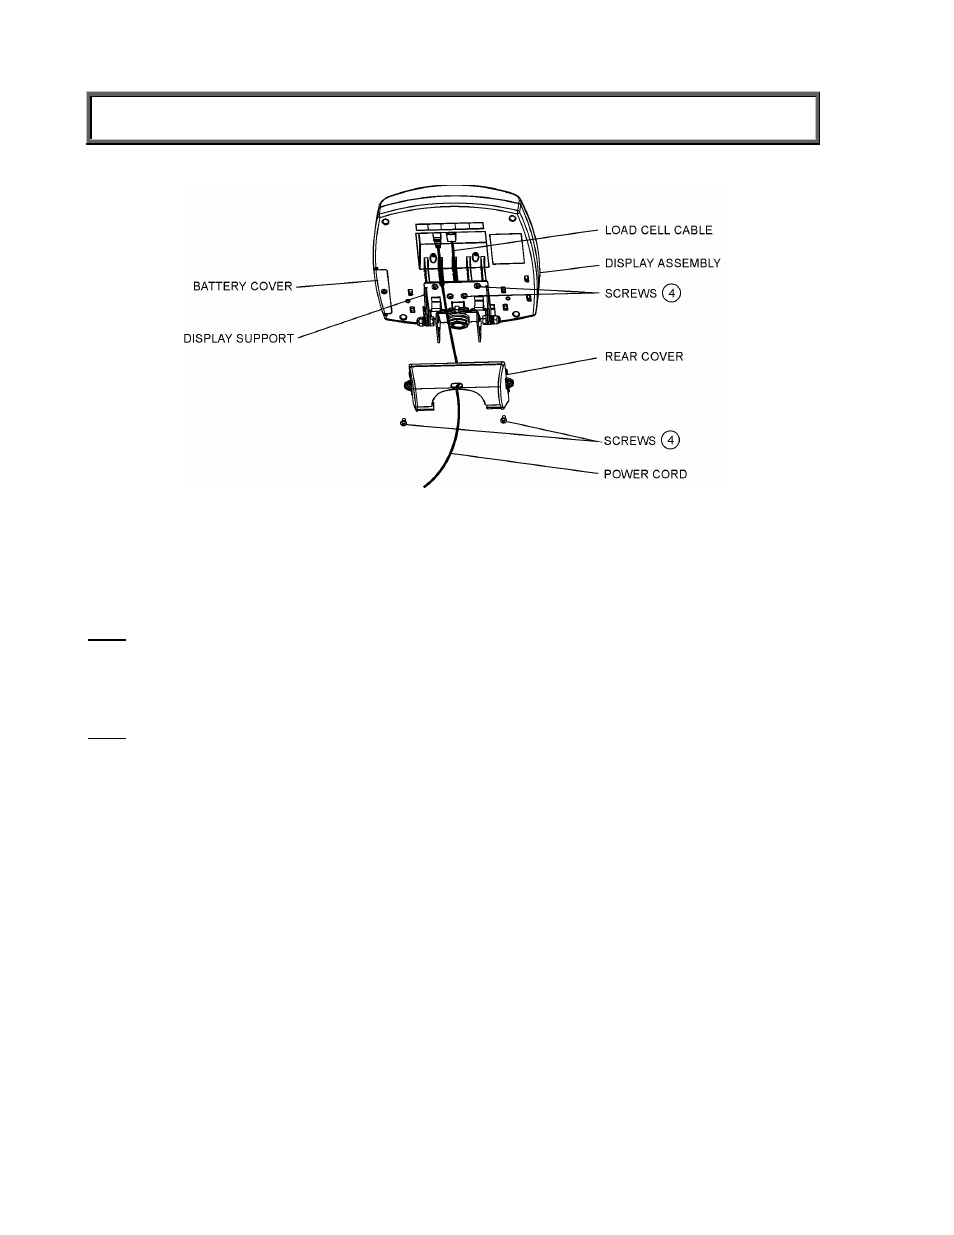
ASSEMBLY INSTRUCTIONS
Figure 4
10. Position the Display Assembly close to the Display Support. Connect the load cell cable
connector to the load cell port on the rear of the Display Assembly and insert and secure the
cable into the center channel in the display.
Note: Do not attach the power cord at this point.
11. Slide the display assembly onto the display support by inserting the two metal supports into
the two slots in the rear display assembly. Tuck the excess load cell cable in the Lifter Boom
tube.
Note: The load cell cable should now be secured in the channel between the display assembly
and the display support.
12. Insert 4 screws into the display support and tighten.
13. Connect power cord to the power port in the display assembly and insert and secure the
cable into the exposed portion of the 2nd channel from the left in the display.
14. Insert the power cord into the retaining slot on the rear cover. Align the rear cover tabs with
the slots on the rear of the display assembly. Apply pressure to snap the rear cover into
place and secure with 2 screws.