Securing liner to chimney ring, Outside air installation – Hearth and Home Technologies 4100I-GD-B User Manual
Page 13
Page 1
September 1, 2008
4100-I ACT WOOD INSERT
250-7201E
R
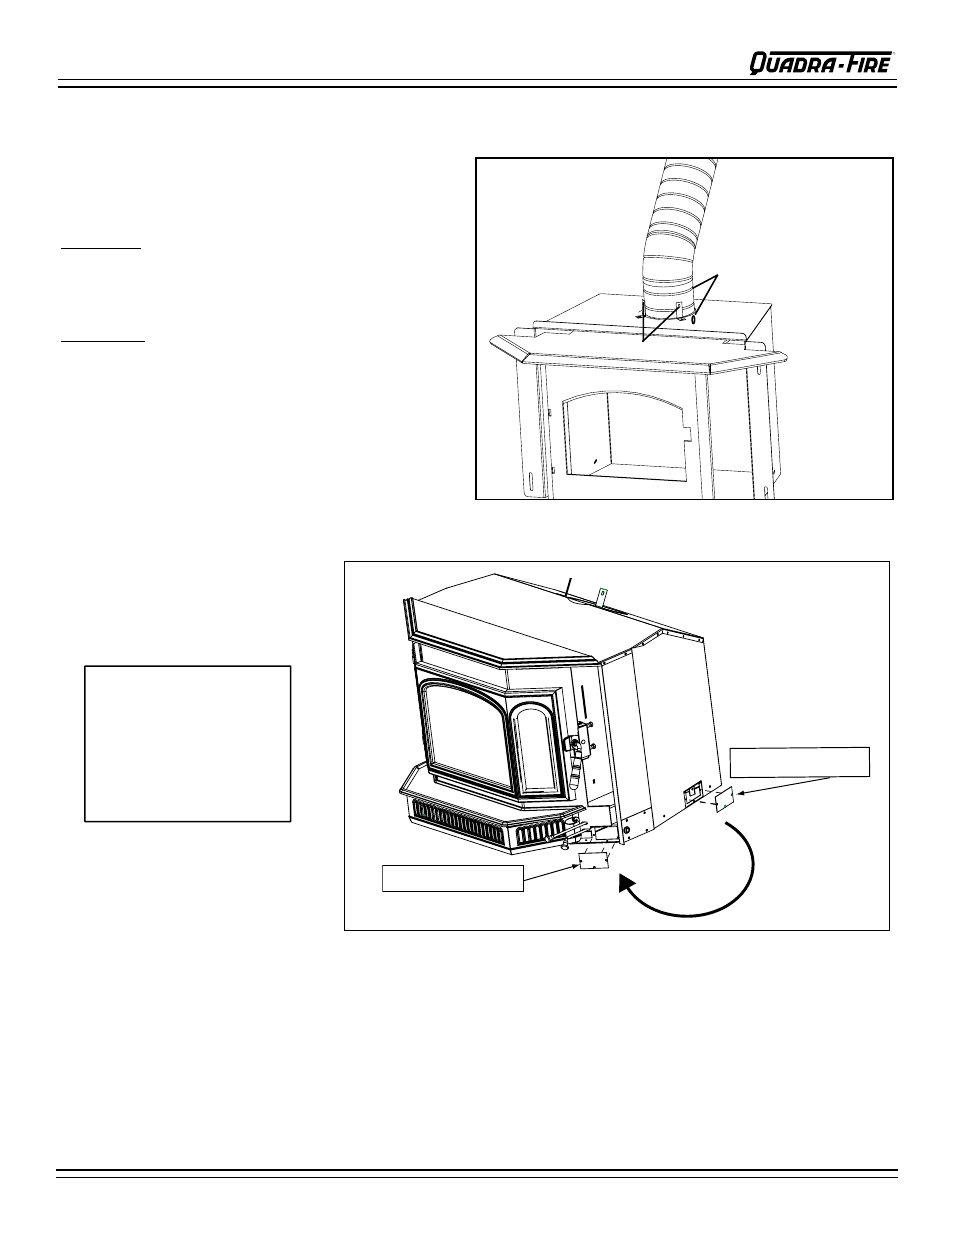
SECURING LINER TO CHIMNEY RING
There are two options to secure the liner to the chim-
ney ring:
See Figure 13A.
Option One: If there is enough room on the top of the
insert to work, hand bend the two tabs upward 90°.
Secure the liner with the supplied hex head bolts 1/4-
20-/4.
Option Two: Remove the manifold tubes, fiberboard
baffle and ceramic blanket. From inside the firebox,
pull liner down through the chimney ring below the
outer skin. There are two pre-drilled holes in the chim-
ney ring 180° apart. Secure the liner with the supplied
hex head bolts 1/4-20-/4.
NOTE: Tabs are shipped from factory in a flat position.
Bend upwards 90 degrees.
Figure 13A
Tools Needed: phillips Head Screwdriver
1. Remove three screws and cover plate from back side of insert. Save the screws.
2. Re-attach the cover plate using the same screws to front side of the insert as shown in
Figure 13B.
. Repeat same procedure for other side of insert.
NOTE: This insert requires replacement of combustion air. if your home is fairly air-tight, it is recommended that
you install outside air. if you are installing into a Mobile Home, outside air is required. See page 9.
OUTSIDE AIR INSTALLATION
Figure 13B
2. Re-install plate
1. Remove plate
Attach liner with 2 tabs
2 pre-drilled holes on
chimney ring under outer skin
(access through firebox)
IMpORTANT!
THE ZERO CLEARANCE
FIREpLACE OUTSIDE
AIR MUST BE TURNED
TO “ON”