Initial setup – Harman-Kardon AVR 245 User Manual
Page 33
33
INITIAL SETUP
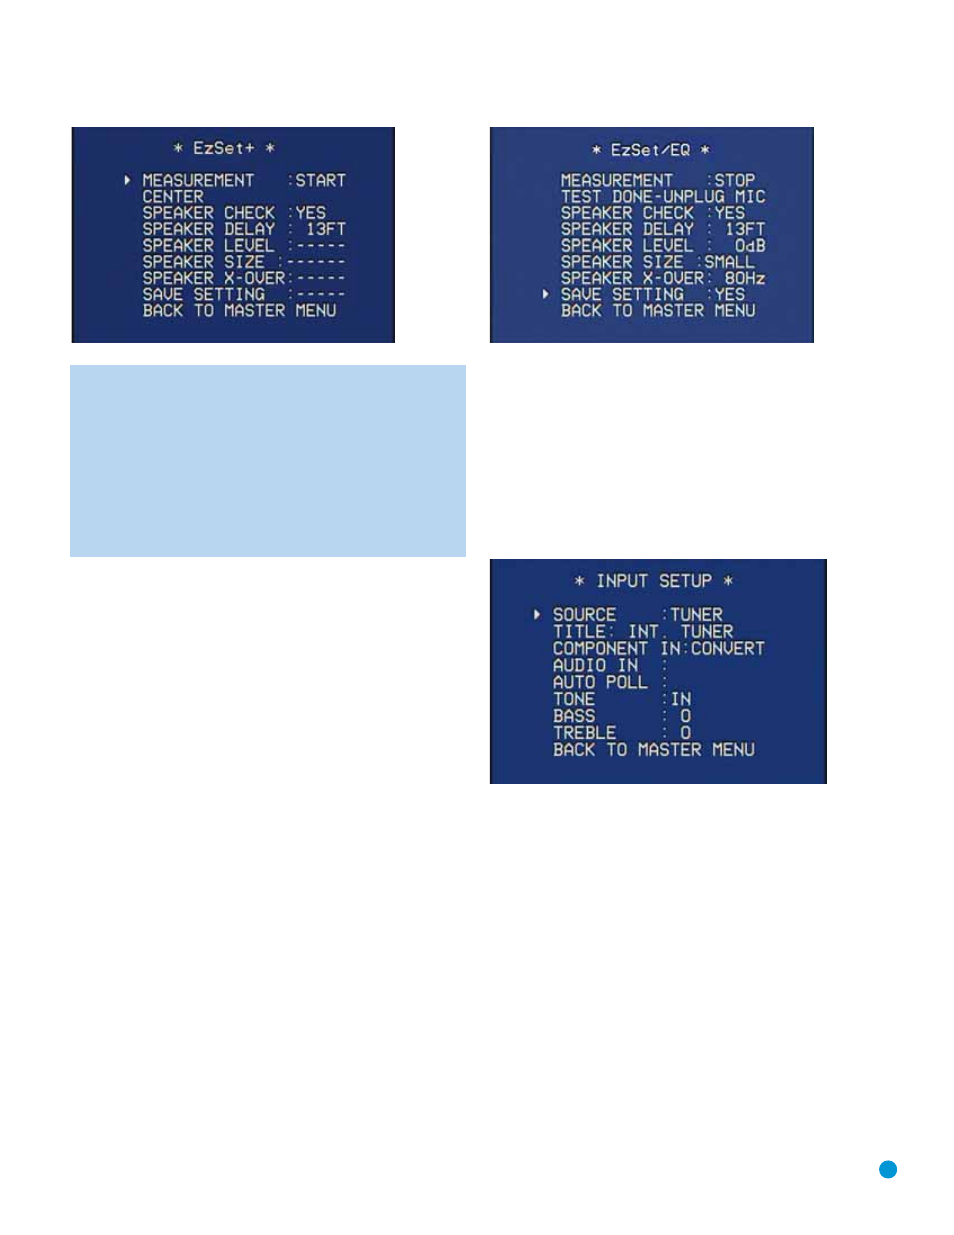
Figure 51 – EzSet+ – Speaker Delay
NOTE: The AVR 245 is also capable of setting a different type
of delay, called A/V Sync Delay. A/V Sync Delay is used to
compensate for lip sync problems that may occur when a video
display device or set-top box causes delays while digital video
signals are processed. It simultaneously adds a delay to all
speaker channels in the system. A/V Sync Delay is not set
during EzSet+. It may be set while watching a program as
follows: press the Delay Button on the remote and the first
setting displayed is A/V Sync Delay. Press the Set Button to
select it and then use the
⁄
/
¤
Buttons to adjust it.
Speaker Level: During this test, EzSet+ ensures that all speakers
sound equally loud at the listening position. During a surround sound
presentation, it is common for the surround channels to sound less
prominent, or not to be used at all, at times. By setting the baseline
channel levels correctly, the settings programmed by the director can
be even more effective.
Speaker Size: This test checks the low-frequency range capabilities
of each of your speakers to ensure that low-frequency sounds are not
sent to speakers unable to reproduce them efficiently. Each of the main
speakers in your system will be assigned a value of Large or Small,
depending solely on how it handles low frequencies.
Speaker Crossover: This test determines the lowest frequency each
of your main speakers is capable of handling effectively, in order to
set the highest frequency the subwoofer should reproduce. The system
balances the need to ensure that all frequencies are reproduced for
smooth transitions between the subwoofer and main speakers without
losing any information, against the need to avoid overtaxing smaller
satellite speakers.
When EzSet+ has finished running all of these tests, a screen similar
to the one in Figure 52 will appear. The TEST DONE-UNPLUG MIC
message will disappear after a few seconds, replaced by a speaker
channel name. You may move the cursor to that line and scroll through
the speaker channels to review the EzSet+ results. If they are satisfactory,
return the cursor to the SAVE SETTING line, and press the Set Button
to save the EzSet+ settings. If the settings are close but you would like
to tweak them, save the EzSet+ settings and then follow the instructions
in the Advanced Functions section to manually adjust the various
configuration settings. If the settings are completely unsatisfactory, use
the
‹
/
›
Buttons to select NO and press the Set Button. Check your
speaker connections and placements, then repeat EzSet+.
Figure 52 – EzSet+ – Completed
Configure Sources
In the Installation section, you physically connected various cables
between your source devices and the AVR. In this section, you will
assign the various audio and video inputs to their sources, ensuring that
the AVR uses the correct connections each time you select a source.
Press the OSD Button to view the Master Menu. The cursor will be
pointing to the INPUT SETUP line, and you need only press the Set
Button to display the Input Setup menu. See Figure 53.
Figure 53 – Input Setup Menu Screen
The first line indicates that the receiver is currently set to the tuner
source. In fact, you may hear static if the tuner is set to an unused
frequency. You will not be able to make any changes to the tuner, other
than selecting a component video input or adjusting the tone controls.
It is not recommended that you make either of these changes for
the tuner at this time.
Press the
‹
Button to view the next source. The sources will be selected
in the following order: Tape, 6-Channel Inputs, 8-Channel Inputs,
DMP/The Bridge, Video 1, Video 2, Video 3, Video 4, HDMI 2, HDMI 1,
DVD, CD and XM Radio. Pressing the
›
Button selects the sources in
the reverse order.
For each of these sources, you may adjust the following settings. At a
minimum, you should make sure that sources connected to any of the
component video or digital audio inputs have the correct settings. Other
settings are optional, and you may adjust them at a later time when you
have more experience with the AVR. Refer to the Table A4 worksheet in
the appendix that you filled out during installation as you assign inputs
to each source.