Hunter Fan WHISPERWIND2000TM User Manual
Page 16
16
41277-01 05/98
®
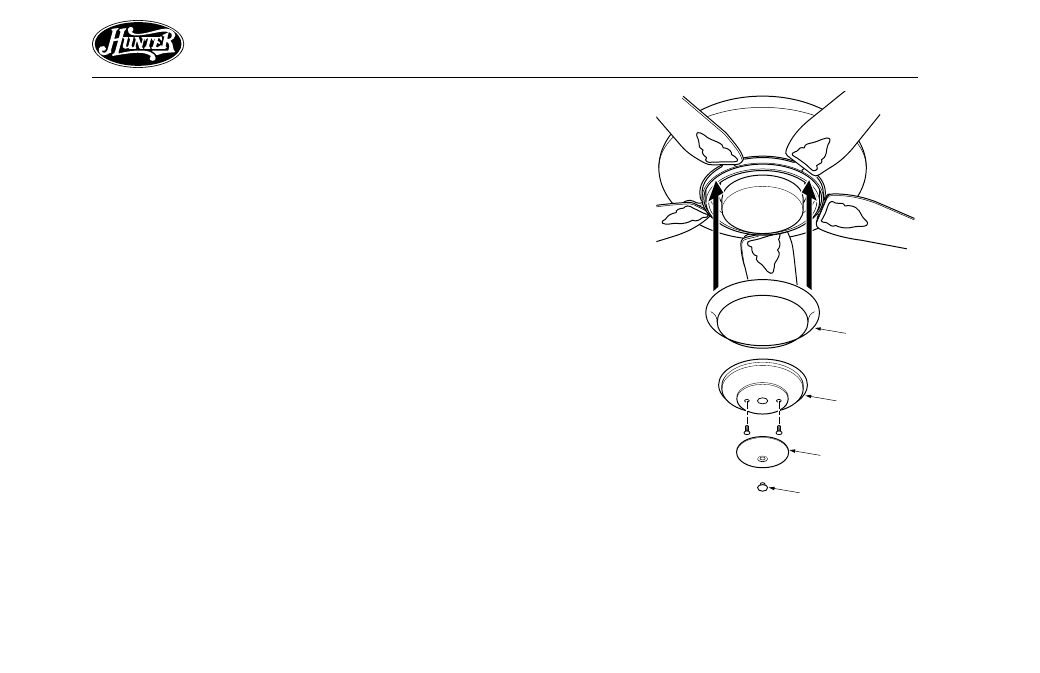
ATTACHING SPEED RING™
COVER
1. Remove plug button as shown in
Figure 6e.
2. Remove the switch housing cover
and switch housing cap by remov-
ing the two screws as shown in
Figure 6e. Do not discard the
screws, cover, or cap.
Note: If you are installing a
Hunter light fixture, proceed to
“STEP 7 – ATTACHING LIGHT
FIXTURES.” If you do not wish to
use the integral light fixture, or
purchased a fan without a light
fixture, proceed with sub-steps 3-
6.
3. Place the Speed Ring™ cover on
top of the switch housing cover
as shown in Figure 6e.
4. Return the switch housing cover
to its original position. The Speed
Ring™ cover should now sit firmly
between the switch housing and
the switch housing cover.
5. Replace and tighten the screws
you removed in sub-step 2.
6. Replace the switch housing cap
and plug button.
You are now finished installing your
Whisperwind 2000™ fan. Turn to
“OPERATING YOUR HUNTER FAN”
for additional instructions.
Figure 6e - Attaching Speed Ring™
Cover
Plug Button
Switch
Housing
Cover
Speed
Ring™
Cover
Switch
Housing Cap