Hunter Fan WHISPERWIND2000TM User Manual
Page 15
15
41277-01 05/98
®
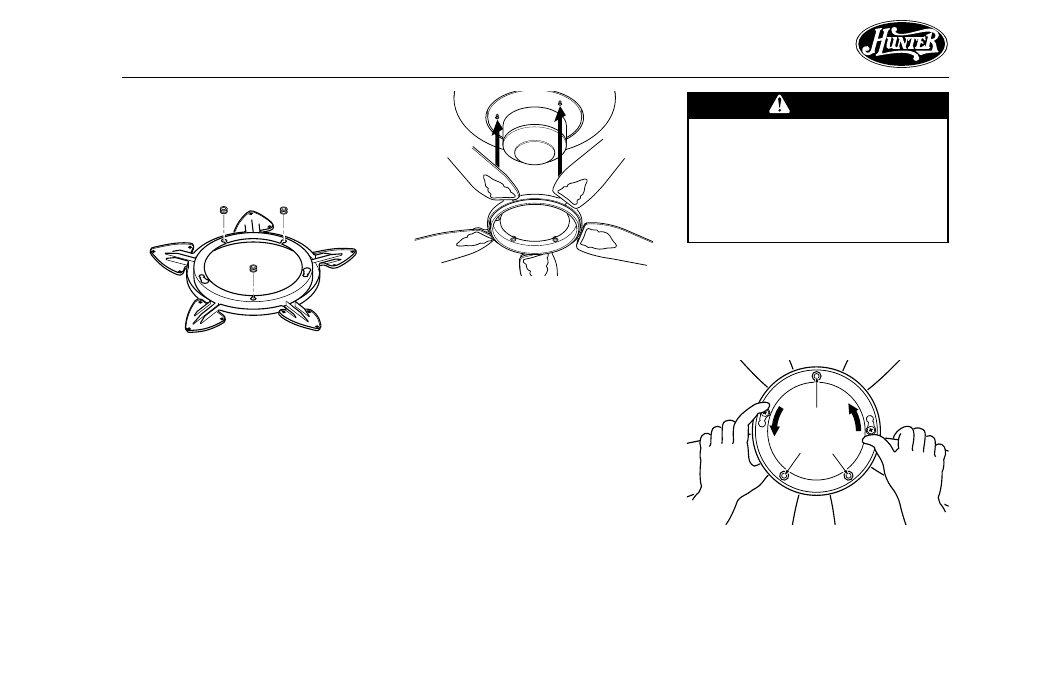
Figure 6b - Attaching Grommets to
Speed Ring™
Figure 6c - Attaching Speed Ring™ to
Motor
ATTACHING SPEED RING™ TO
MOTOR
1. Position three grommets in the
cut-out slots in the Speed Ring™
as shown in Figure 6b.
2. Lift the Speed Ring™ to the un-
derside of the motor. Align the
two grommet-and-screw combi-
nations from the motor to the
keyhole slots on the Speed Ring™
as shown in Figures 6c and 6d.
3. Place the index finger from your
left hand and the thumb from
your right hand onto the heads
of the two grommet-and-screw
combinations from the motor.
Turn the motor counterclockwise
using the two grommet-and-
screw combinations while hold-
ing the Speed Ring™ in place as
shown in Figure 6d.
Note: Make sure that the Speed
Ring™ is not resting on the screw
heads as this may cause some dif-
ficulty in turning the motor.
4. Insert and tighten three tapered
head screws as shown in Figure
6d.
Figure 6d - Turning Motor Counter-
clockwise
Screw
Locations
continued
CAUTION
Make sure that all Speed
Ring™ screws are securely
tightened. Loose screws could
cause noise, improper fan op-
eration, damage to the fan, or
possible injury.
Note: After the screws are tight-
ened, the Speed Ring™ may seem
loose. This is normal and is part
of the Speed Ring™ design to
reduce fan wobble.