Hearth and Home Technologies CASTILE-GAS-MBK User Manual
Page 34
Page 34
September 1, 2008
Quadra-Fire · Castile Gas Stove · 7023-111E
See vent graph for recommendations on page 11 before
you begin your adjustment. If your installation falls within
the range of the gray shaded area of graph, it may be
necessary to make an adjustment to the vertical damper to
improve the flame appearance in your appliance.
NOTE: In the Commonwealth of Massachusetts, the word
damper shall be replaced with the words flue restrictor.
2. Rear Vent Installations:
1. Top Vent Installations:
OPEN
CLOSED
Figure 8.24
The shutter is located on the underside of the
appliance, on the right side. To adjust the shutter, loosen
the wingnut..
Moving the shutter bolt to the right closes the shutter. Moving
the shutter bolt to the left, will open the shutter. Opening the
shutter causes flames to become shorter and blue. Closing
the shutter creates taller orange/yellow flames.
NOTE: Do not close so much as to cause a sooty flame.
Improper adjustment can cause sooting in the firebox and/or
on the outside of a house with a horizontal termination.
After adjustment, tighten wingnut to lock in place.
K. Damper Adjustment
Let appliance warm up before adjusting.
Loosen screws using a Phillips head screwdriver.
Pivot the vertical damper adjustor in 1/4 in. (6mm) incre-
ments while observing the flame activity.
Turning clockwise to open damper = less flame height and
more blue in flame color.
Turning counterclockwise to close damper = increased flame
height and more yellow in flame color.
Make adjustment until flame size and activity suits your per-
sonal preference, and then retighten screws on adjustment
control.
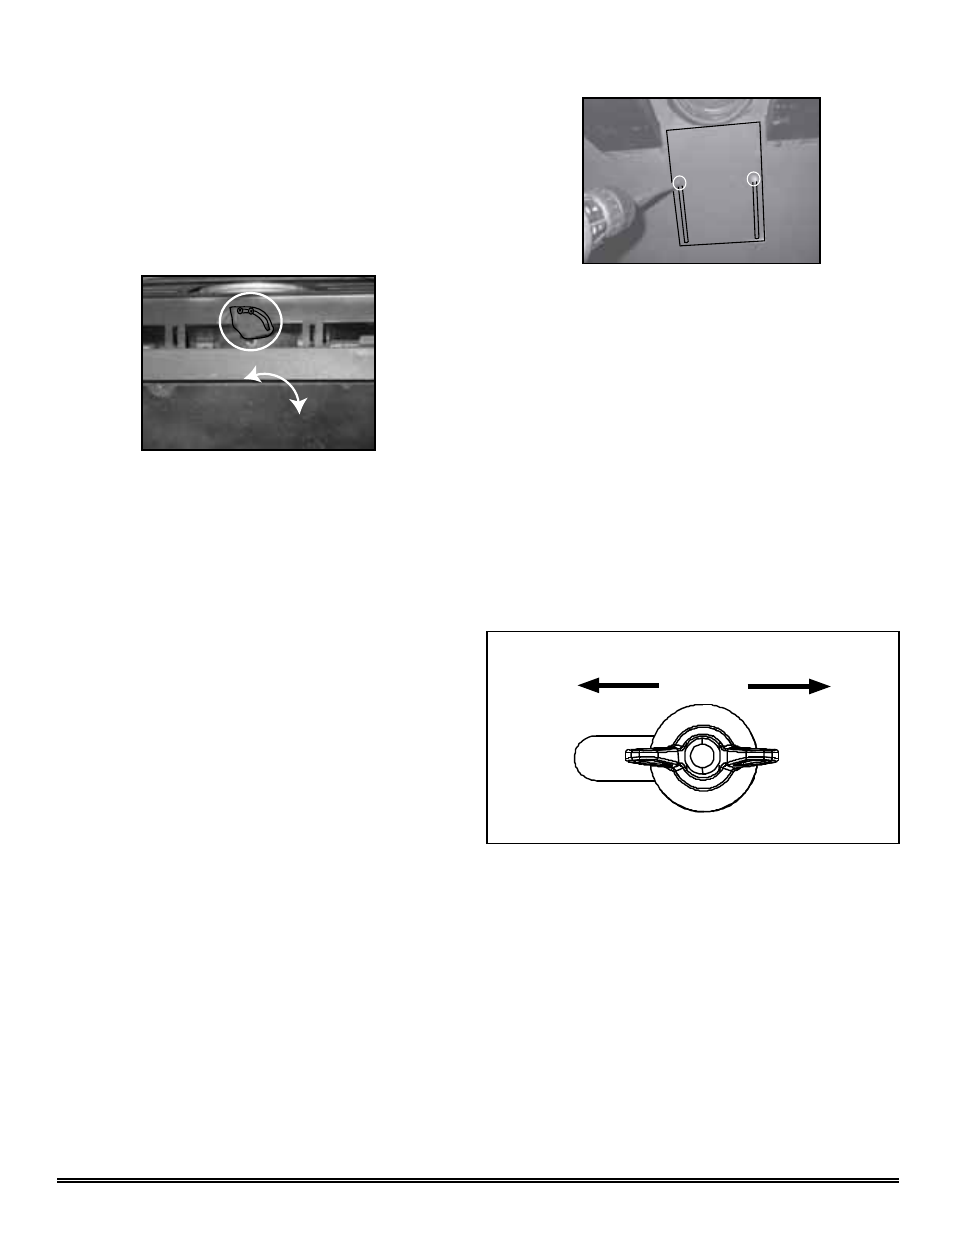
Figure 8.22
Locate the damper adjustment on the intake
plenum, accessing through the appliance front. Adjustor is
centered at the top of the appliance.
Figure 8.23
The rear vent damper is located in the back of
the firebox. It is recommended to make adjustment prior to
installation.
Remove the front, glass, logs, and brick (if installed).
Loosen screws and slide up to suggested settings (See vent
graph on page 11).
Tighten screws.
Reinstall front, glass, logs and brick (if applicable).
L. Shutter Adjustment
(For top or rear vent installations)
OPEN
CLOSE