HANNspree 37" LIQUID CRYSTAL DISPLAY TV JT02 User Manual
Front view, Making connections, Getting started
7
9
8
1
6
5
4
3
2
OSD
M a n u a l S t o r e
N a m e
S e l e c t
E x i t
C h a n n e l
MENU
A u t o S c a n
U K
AV
PC
SCART1
SVIDEO
YPbPr
SCART2
TV
SCART2-SV
HDMI2
HDMI1
JT02 37" Liquid Crystal Display TV
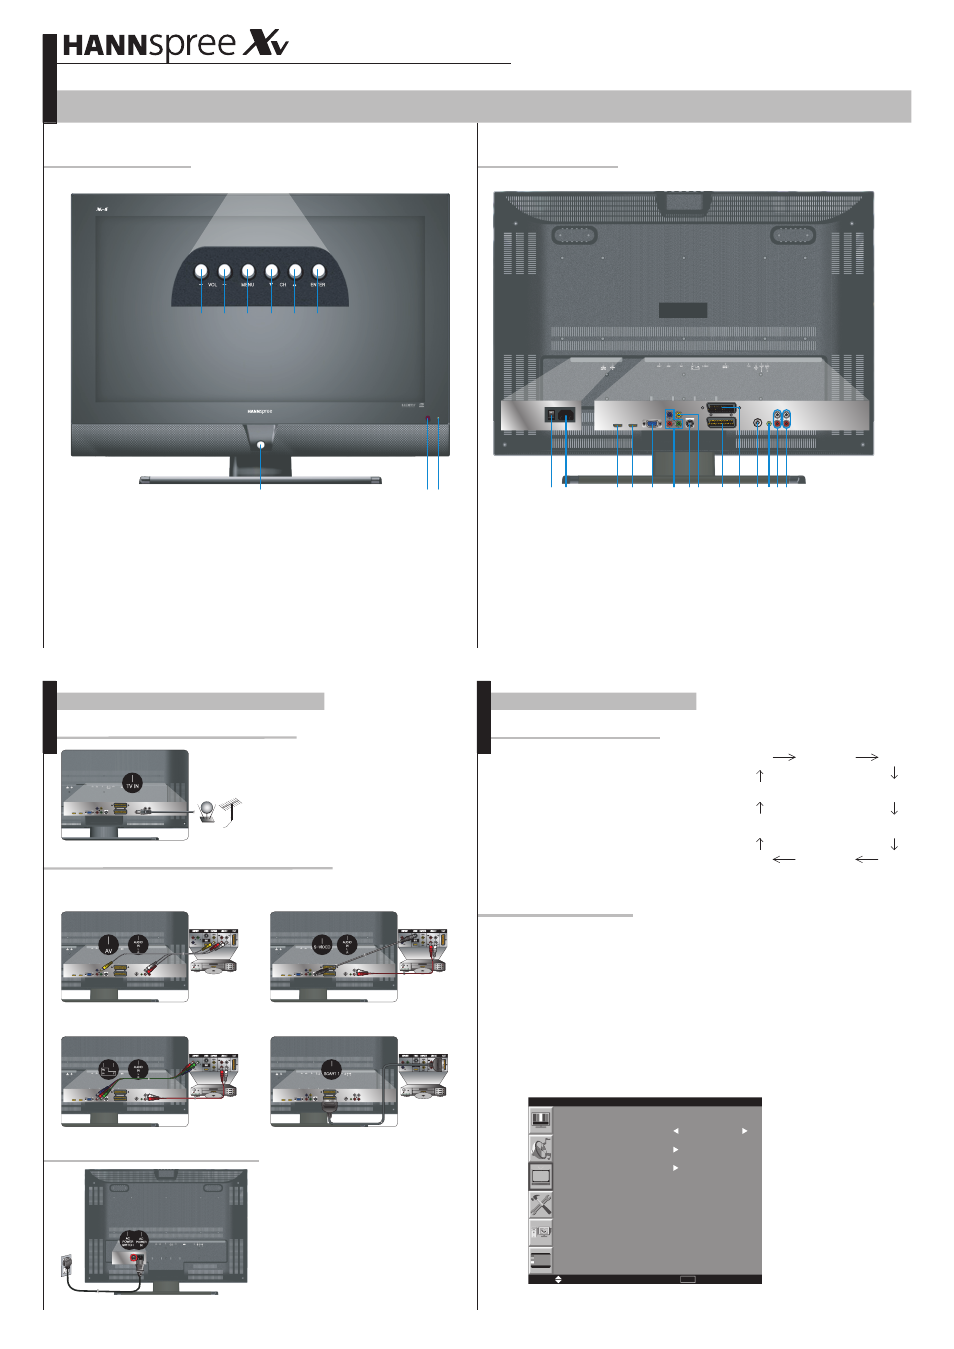
Front View
Front View
JT2002310681P
This guide is designed as a reference to help you start using your LCD TV quickly. Please refer to the User's Manual for more detailed installation and safety instructions.
© Copyright 2007 Hannspree, Inc. All rights reserved.
6. Enter button
7. Power button
8. Infrared receiver
9. Power LED indicator
1. Connect one end of the UHF/VHF (Antenna)
or CATV cable to the TV IN jack (UHF/VHF
IN jack) on the back of the TV.
2. Connect the other end of the UHF/VHF
(Antenna) or the CATV cable to the Antenna
or CATV socket.
The illustrations below show you how to connect your TV to a VCR, VCD or a DVD player.
Making Connections
Connecting the Power Cord
1. Plug the power connector into the
AC-IN input jack on the rear cover of
the TV-set.
2. Insert the three-pronged plug at the
other end of the power cord into a
power outlet.
3. Turn the main power switch on to
supply power to the TV.
With RCA AV cable
With S-Video cable
With YPbPr cable
With SCART1
1. Make sure your TV is turned on and a device
such as a DVD player is connected.
2. Press the
SOURCE button on the remote
control and use the / button to select
the required input source between PC, HDMI1,
HDMI2, TV, YPbPr, AV, SVIDEO, SCART1,
SCART2, and SCART2-SV.
3. Press enter to confirm your selection.
Follow the instructions below to automatically preset the channels for your TV
before watching it for the first time.
1. Press the "
MENU" button on your remote control or the control panel.
2. Use the / button to select Channel Menu.
3. Press the / button to select country.
4. Press the "
ENTER" button to start Auto Scan.
Getting Started
Auto Channel Scan
Selecting Input Source
Rear View
Rear View
1. AC Power Switch
2. AC power input
3. HDMI-1 Input Terminal (19 pin)
4. HDMI-2 Input Terminal (19 pin)
5. VGA (15 pin) Signal Input from
Computer
6. YPbPr/ HD Component Video Input
7. S-Video Input
8. Composite Video input
9. SCART 1 Input
10. SCART2 / SCART2-SV Input
11. RF Antenna / Cable TV Input
12. Audio Input for VGA
13. Audio Input for AV, S-Video or YPbPr/
HDMI-DVI components (L/R)
14. Audio Output for AV, S-Video or YPbPr
components (L/R)
Note: After performing Auto Scan, you need not do it again when turning
on your TV next time.
Auto Scan
Quick Start Guide
Connecting to Antenna/Cable TV
Connecting to VCR, VCD or DVD Player
1 2
3 4
5
6
7 8
9 10 11121314
1. Volume down button
2. Volume up button
3. OSD Menu button
4. Channel down button
5. Channel up button