Installation instructions, Inst alla tion instructions, Installation preparation (cont.) – GE Profile 30 Inch Electric Cooktop Owners Guide User Manual
Page 18: Preparing for ductwork venting, Preparing the countertop, Preparing the countertop (cont.), Rough preparation of junction box
18
49-2001160 Rev. 0
Installation Instructions
INSTALLATION PREPARATION (Cont.)
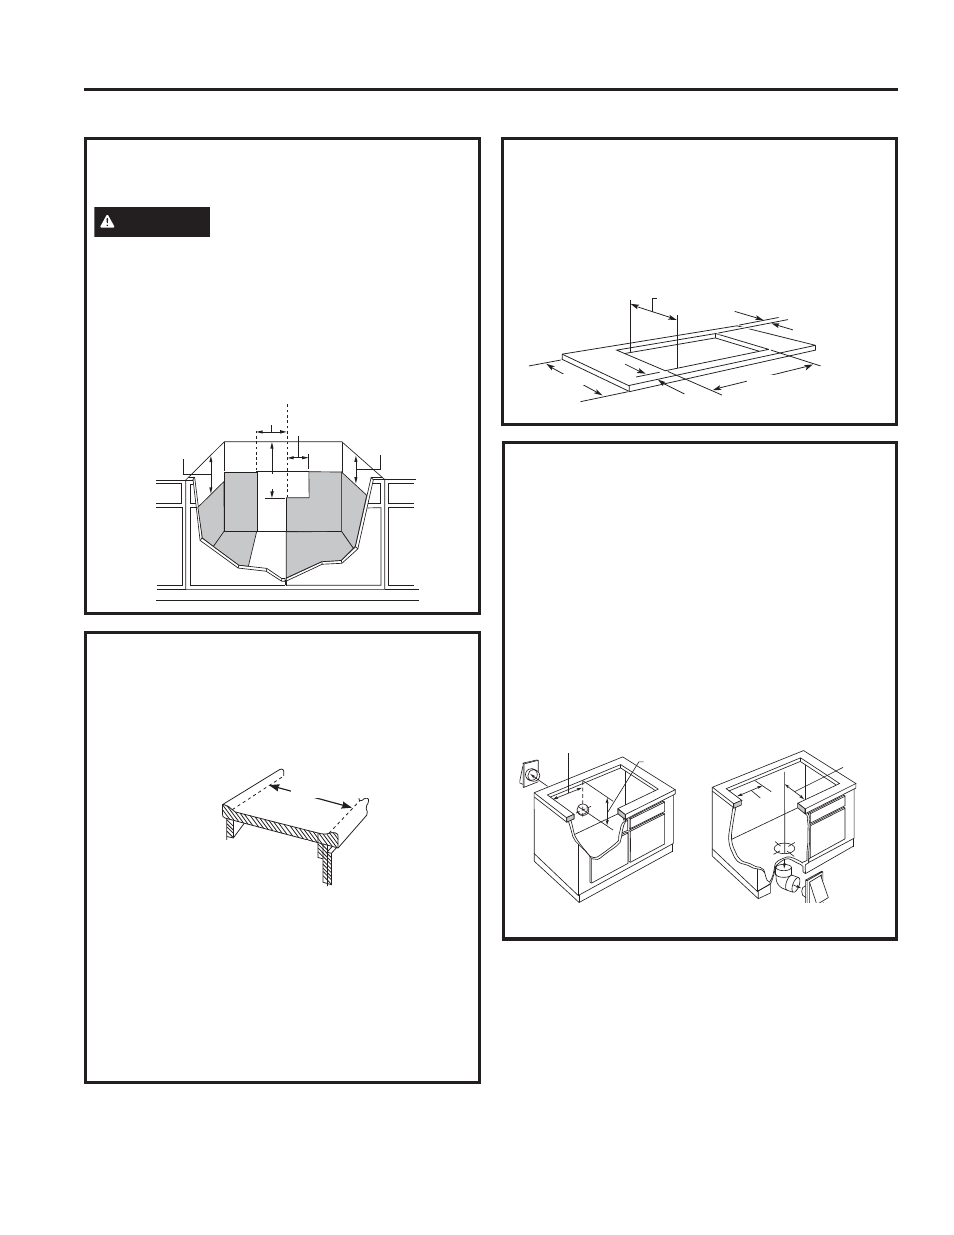
5. PREPARING FOR DUCTWORK
VENTING
NOTE:
'XFWZRUN0867EHYHQWHGWRRXWVLGH'2
NOT vent into a wall, ceiling, crawlspace, attic or
any concealed space.
Cut hole in cabinet wall or floor as appropriate for
your installation. Make sure exhaust duct is located
between wall studs or floor joists.
NOTE:
When cutting or drilling into wall or ceiling,
do not damage electrical wiring and other hidden
utilities. Make sure that any opening/cutout in the
wall behind the appliance and in the floor under the
appliance are sealed properly.
20 5/8" ±1/8"
1 7/8"min.
25"
28 7/8" ±1/8"
2 3/8"
min.
9
1
»
8
”
18
3
»
4
”
10
1
»
8
”
6
1
»
8
”
Rear Wall Venting
'RZQZDUG9HQWLQJ
INST
ALLA
TION INSTRUCTIONS
4. PREPARING THE COUNTERTOP
The countertop must have a deep flat surface
to accommodate the cooktop and the vent.
Countertops with a rolled front edge and backsplash
may not provide the flat surface area required.
A 1/2” wide flat area is required around the edge
of opening for support of the unit. The cooktop
unit must be level and sit squarely into countertop
opening.
Carefully cut countertop opening according to the
GLPHQVLRQVVKRZQLQWKHLOOXVWUDWLRQ%HVXUHWKDW
opening is cut squarely, with sides parallel to each
other and rear exactly perpendicular to sides.
4. PREPARING THE COUNTERTOP
(CONT.)
For island installation, maintain 1 7/8” minimum
from cutout to front edge; 2 3/8” minimum from
cutout to back edge; and 6” minimum from cutout to
side edges of countertop.
25” min. flat
surface area
required
3. ROUGH PREPARATION OF
JUNCTION BOX
CAUTION
FOR PERSONAL SAFETY,
REMOVE HOUSE FUSE OR OPEN CIRCUIT
BREAKER BEFORE PREPARING JUNCTION BOX.
Install an approved junction box within shaded area
shown in diagram. Junction box must be at least
»´EHORZWRSRIFDELQHW
Run conductors from residence wiring to junction box
according to local electrical codes.
16"
9"
4"
20”
10
1
»
2
”
C
L