Accessing fax settings – Epson AcuLaser CX11NF User Manual
Page 7
Accessing Fax Settings
7
Accessing Fax Settings
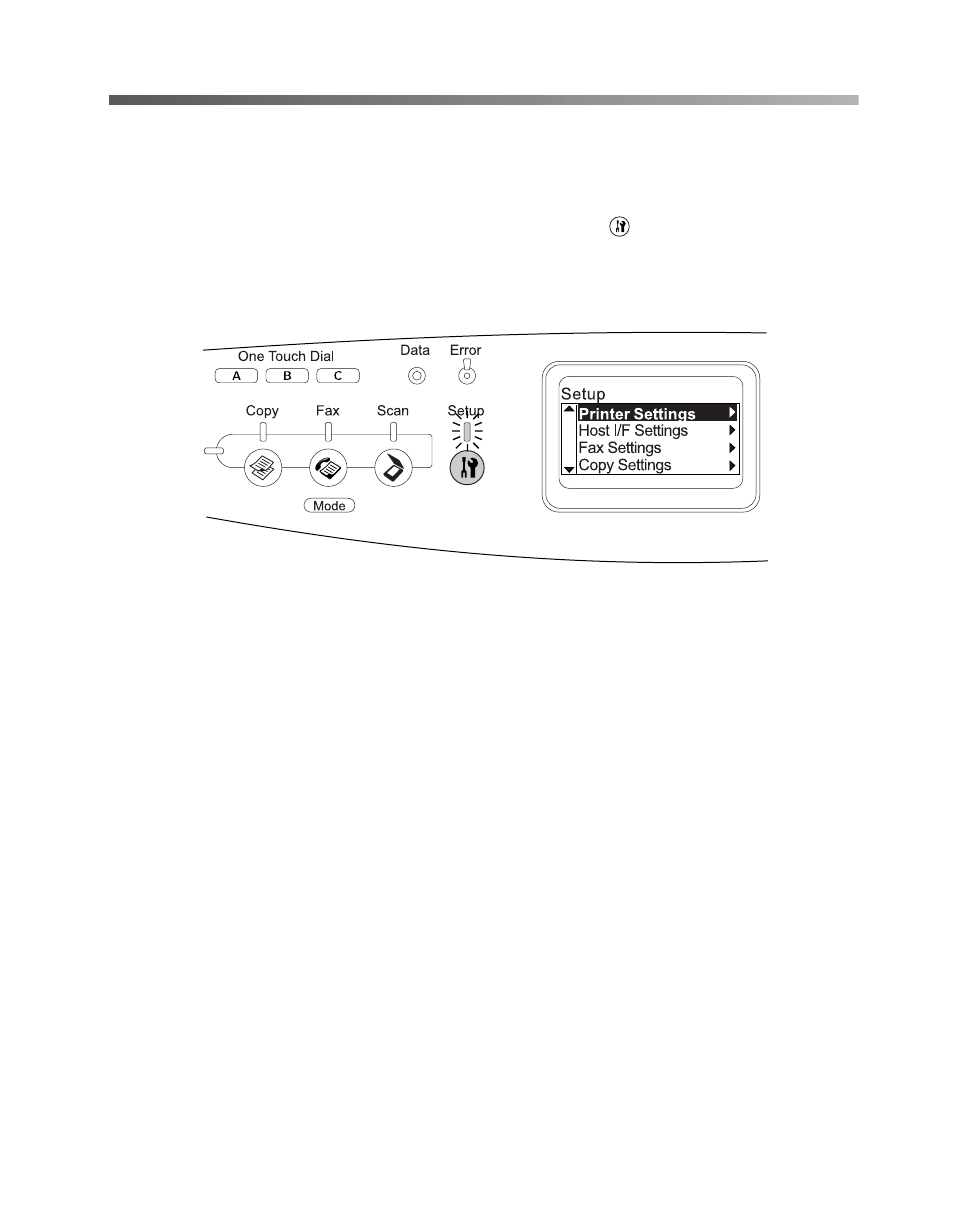
You can access the Fax settings through the Setup menu in the LCD screen.
1. Make sure the CX11NF is turned on, then press the
Setup
button.
The Setup light turns on and the LCD screen displays Setup Mode for a few
seconds, and then changes to the Setup menu.
2. Use the
d
button to select the Fax Settings menu, then press the
r
button to view
the items in the menu. You can select the following from the Fax Settings menu:
■
■
“Transmission Settings” on page 42
■
“Reception Settings” on page 43
■
“Speed Dial Settings” on page 43
■
■
■
“Fax Factory Settings” on page 44
3. Use the
u
and
d
buttons to scroll through the items, and then press the
r
button
to carry out the operation indicated by the selected item, or to view the settings
available for the item.
- Stylus Pro 7800 (11 pages)
- Stylus Pro 4000 (49 pages)
- Stylus Photo R300 (2 pages)
- Stylus Pro 7000 (147 pages)
- AcuLaser C3000 (316 pages)
- Stylus Pro 7900 (24 pages)
- Stylus Pro 4450 (21 pages)
- 1000 (272 pages)
- T034120 (4 pages)
- T580300 (4 pages)
- 300 (91 pages)
- B 510DN (190 pages)
- B 510DN (218 pages)
- Stylus NX510 (8 pages)
- Stylus Photo RX580 (95 pages)
- T549300 (4 pages)
- B 500DN (168 pages)
- AculaserCX11NF (5 pages)
- 480SXU (24 pages)
- 4500 (317 pages)
- STYLUS RX500 (99 pages)
- 2100 (13 pages)
- Stylus NX215 (2 pages)
- T098320 (4 pages)
- T041020 (4 pages)
- R210 (8 pages)
- All-In-One Stylus Photo RX600 (164 pages)
- 777I (53 pages)
- T033120 (4 pages)
- Stylus CX7000F (8 pages)
- 60 (113 pages)
- T034220 (4 pages)
- WorkForce 40 Series (36 pages)
- T054220 (4 pages)
- Stylus CX3200 (11 pages)
- Stylus CX7800 (18 pages)
- T060220 (4 pages)
- 2500 (180 pages)
- AcuLaser CX11N (32 pages)
- AcuLaser CX11N (4 pages)
- 2000P (16 pages)
- T606600 (4 pages)
- Stylus CX6000 (18 pages)
- FS-4000DN (2 pages)
- MSDS T544700 (4 pages)