Euro-Pro 9110 User Manual
Page 14
9
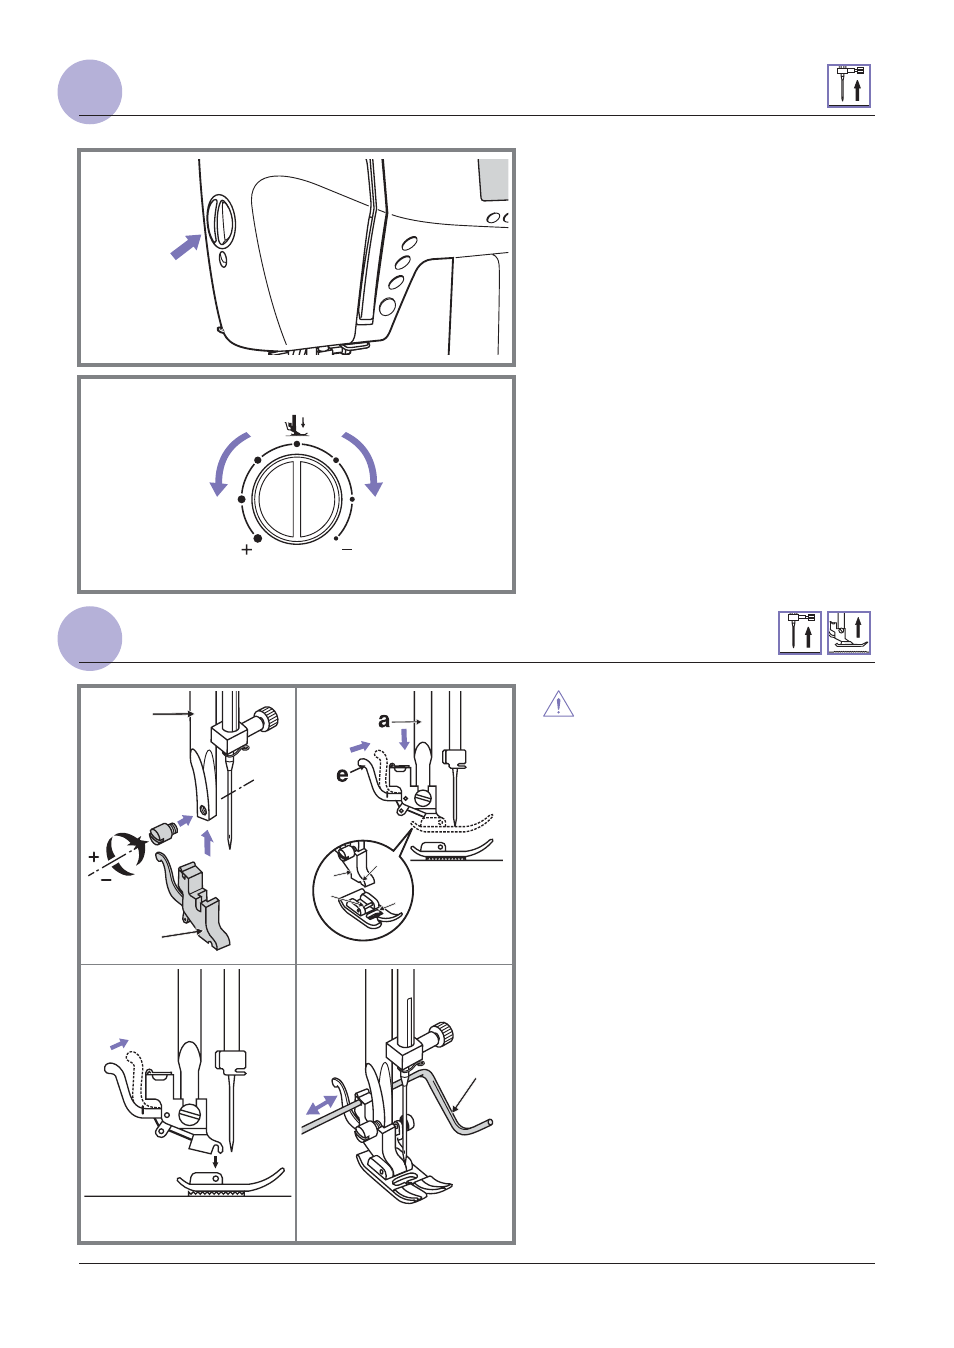
CHANGING THE PRESSER FOOT
CHANGING THE PRESSER FOOT
(1)
Raise the presser foot bar (a). Attach the
presser foot holder (b) as illustrated.
(2)
Lower the presser foot holder (b) until
the cut-out (c) is directly above the pin (d).
Raise the lever (e).
Lower the presser foot holder (b) and the
presser foot (f) will engage automatically.
(3)
Raise the presser foot.
Raise the lever (e) and the foot will
disengages.
(4)
Attach the seam guide (g) in the slot as
illustrated. Adjust according to need for
hems, pleats, etc.
Attention: Turn power switch to off
(
) when carrying out any of the
above operations!
"O"
Attaching the presser foot holder
Attaching the presser foot
Removing the presser foot
Attaching the seam guide
b
d
c
f
e
1
2
3
g
4
b
a
ADJUSTING THE PRESSER FOOT PRESSURE
The presser foot pressure dial is on the
left of the face plate.
The presser foot pressure of the
machine has been pre-set and requires
no particular readjustment according to
the type of fabric.
For sewing very thin fabric, loosen the
pressure by turning the screw
counterclockwise, and for heavy fabric,
tighten by turning it clockwise.
ADJUSTING THE PRESSER FOOT PRESSURE