PLANET KVM-1610 User Manual
Page 10
10
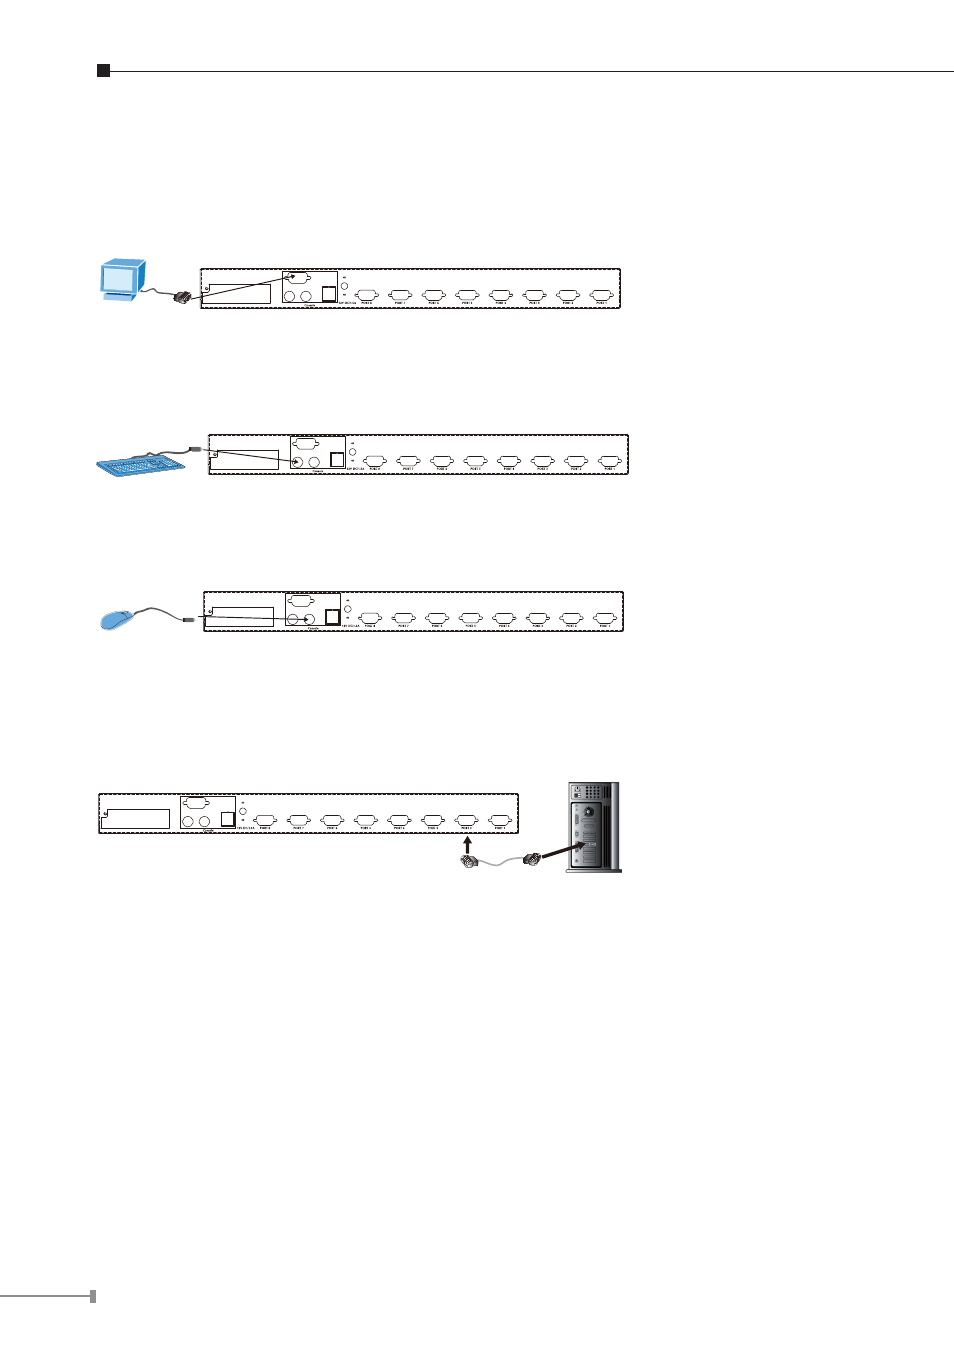
Step 2 Connecting Monitor to the KVM Switch
Connect the monitor to the KVM Switch. Using the attached cable, or the one
included with your monitor, connect it to the HDDB-15 female port on the back of
the KVM unit labeled with the monitor symbol at the CONSOLE port connector.
Step 3: Connecting Keyboard to the KVM Switch
Connect the keyboard and mouse to the KVM Switch. If you have an AT type
keyboard, you will need an AT to PS/2 adapter.
Step 4: Connecting Mouse to the KVM Switch
Connect the mouse to the KVM Switch.
Step 5: Connecting VGA/Mouse/Keyboard port of PC(s) to the KVM Switch
Install the Master KVM to the 3-in-1 cable (same as the cable for connecting the
KVM to the PC) in the middle of the Slave KVMs.
The rear side of PC
Step 6: Check Again
Double-check all of the connections. You can check the color of keyboard and
mouse connector to make sure the keyboard and mouse cables go to the correct
ports.
Step 7: Connecting Other PCs
Repeat step 5 for the remainder of the computers.
Step 8: Connecting KVM Power
Attach the power supply to the KVM unit and plug the other end into an electrical
receptacle. Now you will see the LED for Port 1 light up, and you will hear a beep.
Switch on your monitor.