Sip proxy mode – PLANET VIP-192 User Manual
Page 71
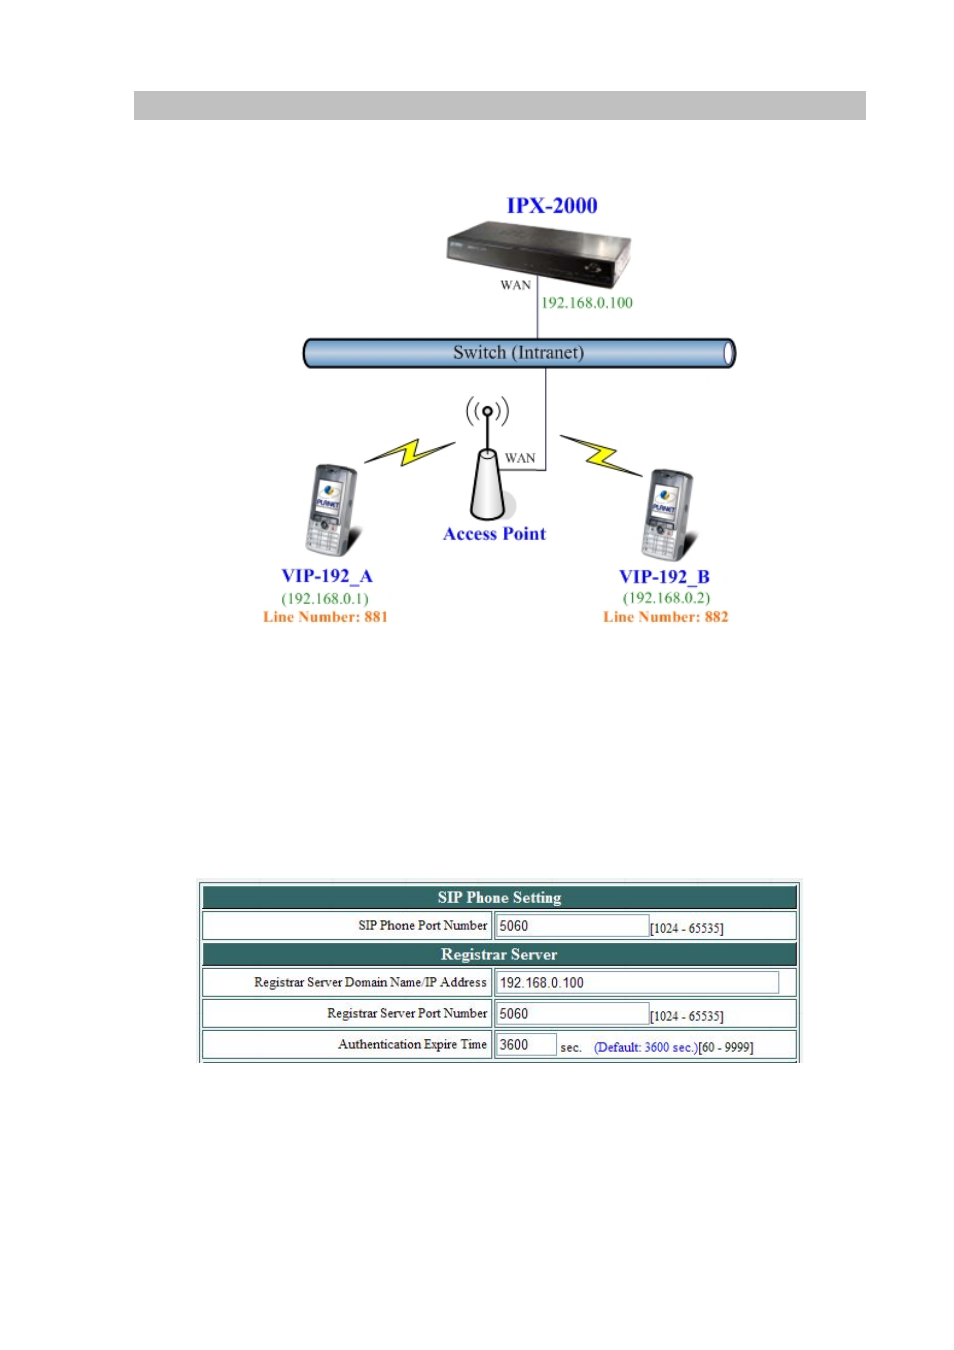
SIP Proxy mode
In the following sample, we’ll introduce how to integrate the Wi-Fi Phone with our IP PBX system
IPX-1804.
Figure 116. Topology of instruction example - Proxy mode
To connect to a SIP server, you can carry out the following steps:
1. Make sure the VIP-192_A was connected to an Access Point, and set the static IP address as
192.168.0.1
2. Login the VIP-192_A via web browser, and browse to “SIP Settings” page. Set the Register Server
as
192.168.0.100
, and press the Submit button to affect the settings.
Figure 117. SIP setting screen
3. Browse to “SIP Account Settings” page and fill in the corresponding information as the followings.
Press the Submit button to affect the settings, and the “Register Status” field will show Register to
mean VIP-192_A has register to SIP server (IPX-1804) successfully.
71
- VIP-156 (68 pages)
- VIP-156 (68 pages)
- VIP-156 (75 pages)
- VIP-156 (76 pages)
- ATA-150 (36 pages)
- ATA-150 (51 pages)
- FRT-420SN (2 pages)
- FRT-420SN (80 pages)
- ICF-1600 (34 pages)
- ICF-1600 (63 pages)
- ICF-1800 (2 pages)
- ICF-1601 (42 pages)
- ICF-1700 (32 pages)
- ICF-1700 (115 pages)
- IPX-1900 (14 pages)
- IPX-1900 (84 pages)
- IPX-2000 (51 pages)
- IPX-1980 (12 pages)
- IPX-1980 (89 pages)
- IPX-1500 (85 pages)
- IPX-2000 (14 pages)
- IPX-2100 (12 pages)
- IPX-330 (20 pages)
- IPX-330 (102 pages)
- IPX-330 (16 pages)
- IPX-300 (20 pages)
- IPX-300 (96 pages)
- IPX-300 (82 pages)
- MCU-1900 (2 pages)
- MCU-1900 (27 pages)
- SIP-50 (27 pages)
- UP-120 (15 pages)
- UP-121 (11 pages)
- VGW-400FO (80 pages)
- VGW-400FO (12 pages)
- VIP-400FO (130 pages)
- VIP-101T (34 pages)
- VIP-880 (93 pages)
- VIP-193 (2 pages)
- VIP-193 (83 pages)
- VIP-251T (2 pages)
- VIP-251T (57 pages)
- VIP-254NT (2 pages)
- VIP-254NT (57 pages)