Pre-operation information, Pre-operation – SAF-HOLLAND XL-AS11406OM CBX/CB Series Fixed Frame Top Mount Trailer Air Suspension User Manual
Page 16
16
XL-AS11406OM-en-US Rev B · 2012-06-29 · Amendments and errors reserved. © SAF-HOLLAND, Inc.
Pre-Operation Information
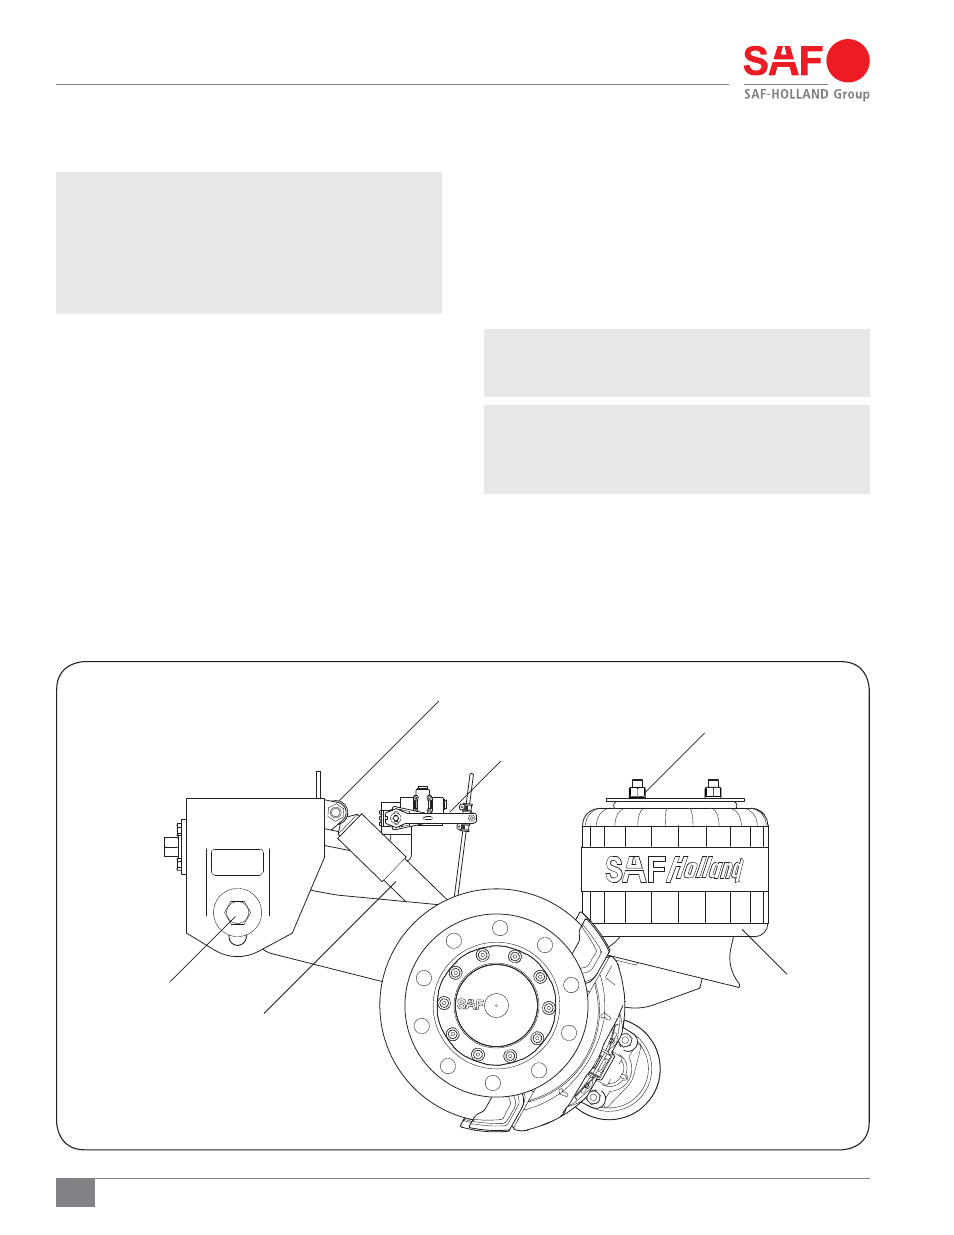
Figure 23
15. Pre-Operation
NOTE: In the United States, workshop safety requirements
are defined by federal and/or state Occupational
Safety and Health Act. Equivalent laws may exist
in other countries. This manual is written based
on the assumption that OSHA or other applicable
employee safety regulations are followed by the
location where work is performed.
1. With the vehicle on a level surface, bring air system to
operating pressure (above 85 psig/5.9 bars).
2. Shut off the vehicle and visually check all air control system
fittings for air leaks by applying a soapy water solution and
checking for bubbles at all air connections and fittings.
Examine the air springs
(Figure 23) for equal firmness.
3. Check the shock absorbers for proper installation and make
sure that the upper and lower 3/4" shock absorber nuts
BSFUPSRVFEUPGUMCT /tN(Figure 23).
4. Verify that the 1/2" air spring mounting nuts are torqued
UPGUMCT /tN
BOEUIFBJSTQSJOH
NPVOUJOHOVUTBSFUPSRVFEUPGUMCT /tN
(Figure 23).
5. With the suspension at full capacity, check that there is a
1" (25 mm) minimum clearance around the air springs.
6. The suspension’s ride height should be within ±1/4" (6 mm)
of the recommended design height. For proper ride height,
refer to Section 12.
7. Verify that the 1-1/8" pivot nuts are torqued to
GUMCT /tN(Figure 23).
IMPORTANT: The SwingAlign™ design maintains proper
alignment under correct torque without
welding; DO NOT weld
(Figure 23).
NOTE: SwingAlign™ pivot connections are on roadside
and fixed alignment pivot connections are on
curbside. For SwingAlign™ Connection Axle
Alignment procedure, refer to Section 13.
"*3413*/(.06/5*/(/65
611&34)0$,"#403#&3/65
)&*()5$0/530-7"-7&
"*3413*/(
1*705#0-5
4)0$,"#403#&3