Ride height adjustment – SAF-HOLLAND XL-AS11406OM CBX/CB Series Fixed Frame Top Mount Trailer Air Suspension User Manual
Page 13
13
XL-AS11406OM-en-US Rev B · 2012-06-29 · Amendments and errors reserved. © SAF-HOLLAND, Inc.
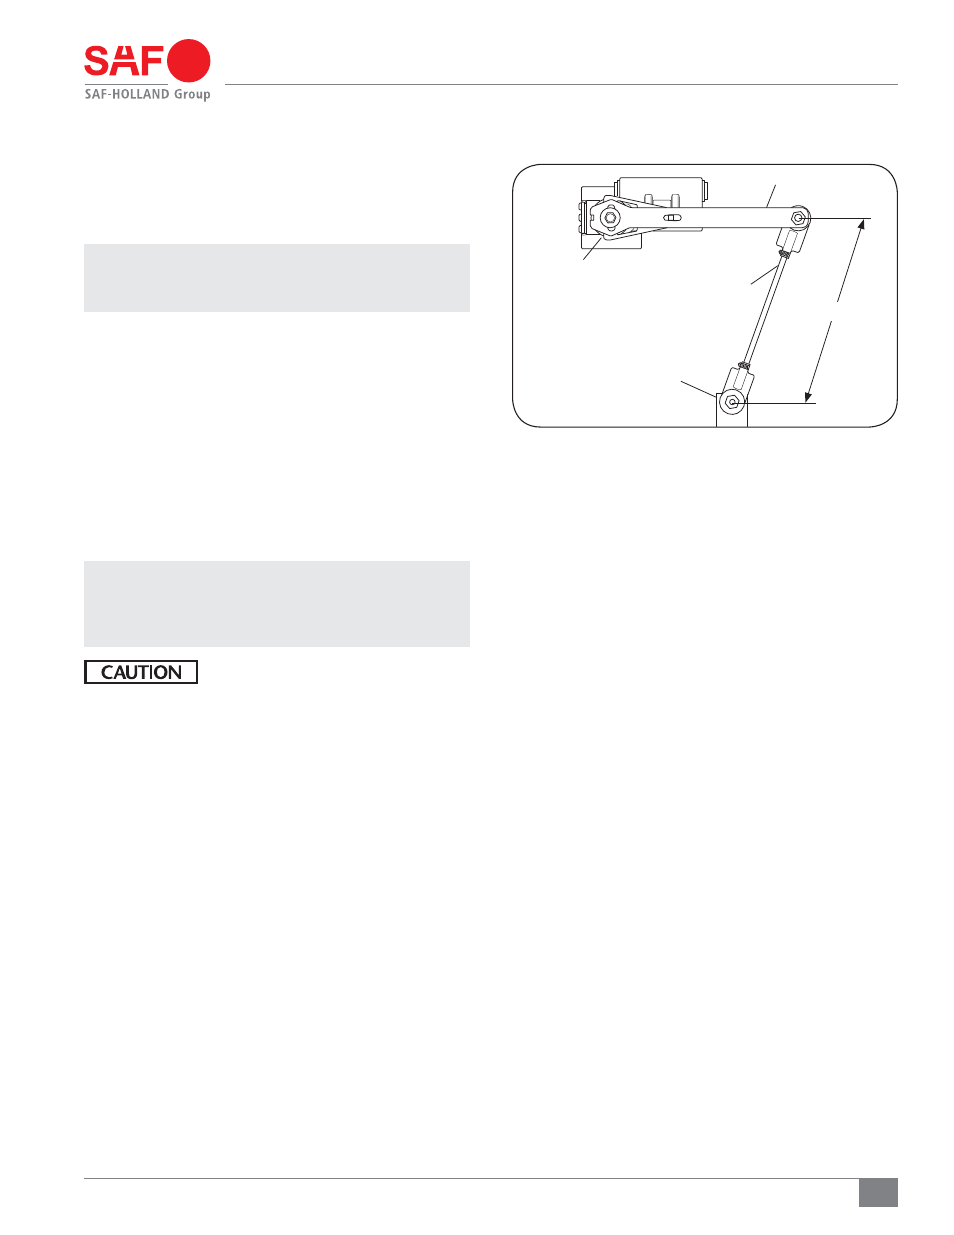
Figure 19
Ride Height Adjustment
7. Measure distance “B” between the valve arm and mounting
bracket holes to determine linkage length
(Figure 19).
8. Adjust linkage to required length and install the hardware
into the upper and lower connections
(Figure 19).
5PSRVFIBSEXBSFUPJOMCT /tN
NOTE: It may be necessary to cut linkage rod to achieve
proper length. Be sure to de-burr rod to prevent
link end damage.
9. Raise the trailer approximately 2" (50 mm) above ride
height and remove jack stands.
10. Slowly lower the trailer so that the trailer suspension is
fully collapsed.
11. Apply air to the trailer and allow the suspension to return
to ride height.
12. With the suspension at rest, measure the ride height.
Ride height must be within 1/4" (6 mm) of the
suspensions specified ride height.
13. Spray a soapy water mix on all air line connections to
check for air leaks and verify fittings are tight.
IMPORTANT: It is the responsibility of the air system
installer to secure all air lines and check
for air leaks. If air leaks are detected,
repair as required.
Failure to eliminate air leaks could
compromise the suspension performance
which, if not avoided, could result in
component or property damage.
14. Remove wheel chocks.
B
-*/,"(&
$0/530-"3.
)&*()5
$0/530-
7"-7&
-08&3"9-&
.06/5*/(
#3"$,&5