Step 5 – set up test pressure in gauge, Step 6 – run test, Step 7 – test passes – Retrotec Commercial 441 and 451 DucTester User Manual
Page 52
Page 52 of 56
©Retrotec Inc. 2015
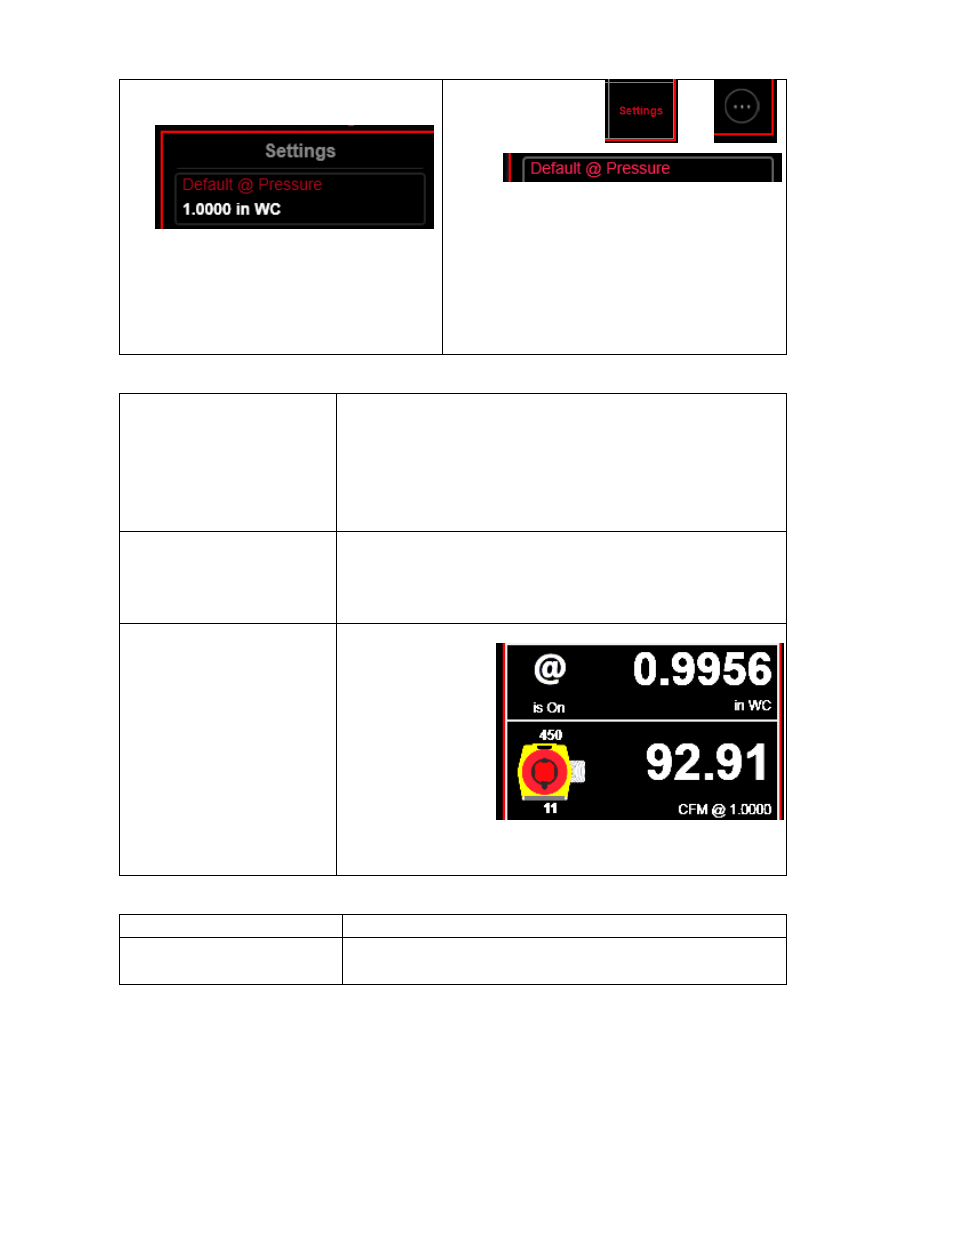
Step 5 – Set up Test Pressure in Gauge
□ Default in gauge must match the
specified Test Pressure
If not, tap [Settings]
and
,
tap
then [Set] value to specified Test
Pressure.
Since you must not exceed the test
pressure, the actual pressure will be lower
but entering this default will ensure that
all results are displayed at the exact
pressure entered.
Step 6 – Run test
□ [Set Speed] to 1%
then Jog up to the
Test Pressure.
WARNING: To prevent over-pressurizing, slowly increase
fan speed using Set Speed. Jog the speed up 1% at a
time until a CFM value appears on the display. Continue
to increase fan speed up to but do not exceed the
Pressure Class. If you do not reach the Pressure Class,
results will still be calculated at for that Pressure Class.
□ Tap “@” on the
display and “CFM/ @
Test Pressure” will
appear.
Measure the CFM at the exact test pressure by tapping
“@” on the display and CFM @ the Pressure Class will
appear. In our example we set the Default pressure to 2
in WC.
□ CFM at specified test
pressure is displayed
□ Passes if value is
lower than that
specified
The Flow is
displayed as:
In this example
the flow is 92.91
CFM at 1.0000
inches of Water
Column.
If the total
leakage is lower
than or equal to the value specified, the duct is in
compliance. If it fails.
Step 7 – Test Passes
□ Complete test reports
Complete test reports and obtain witness’s signature.
□ Remove temporary
seals.
Remove temporary blanks and seals.