Canon i-SENSYS MF244dw User Manual
Page 46
Select [Start] > [Control Panel] > [Printers and Faxes].
2
Click [Add a printer] or [Install a printer] → proceed according to the displayed add
printer wizard.
3
Click [Add a local printer] (or [Add a local printer or network printer with manual
settings]).
4
Select [Create a new port] → select [Standard TCP/IP Port] from [Type of port] → click
[Next].
When selecting a temporary port, select [Use an existing port] → temporary port ([LPT1] etc.) → proceed to step
5
Click [Finish].
The procedure for adding the port is finished. Install the driver.
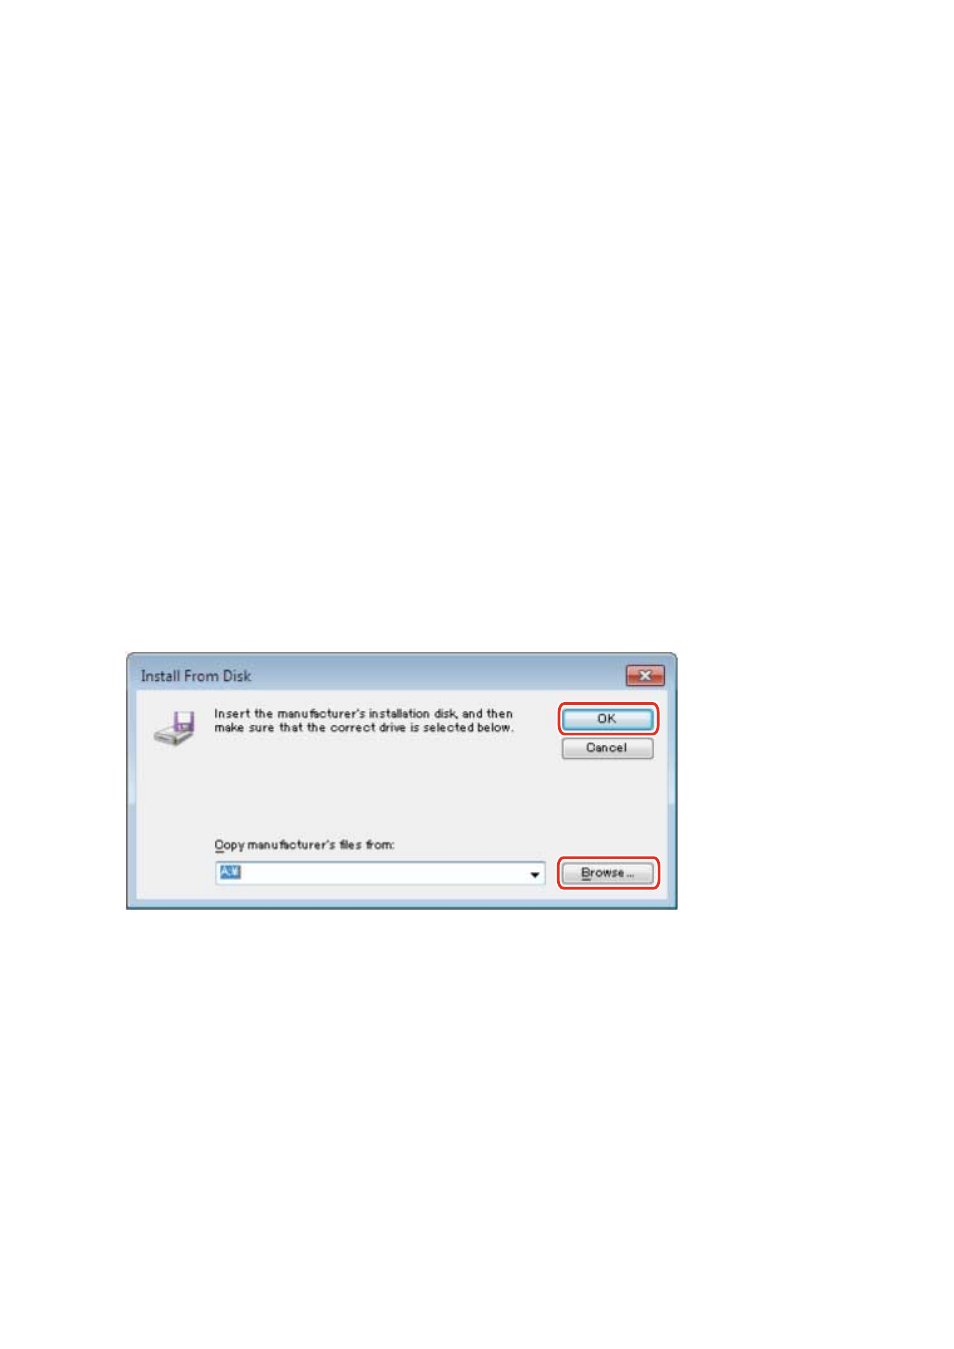
6
In the [Add a printer] screen, click [Have Disk].
7
Click [Browse] → select the folder where the prepared inf file is stored → click [OK].
8
Select the device from [Printers] → click [Next].
9
Install the driver according to the instructions on the screen → click [Finish].
The installed device is displayed in [Devices and Printers], [Printers and Faxes], or [Printers] in the Windows
Control Panel.
In Windows 10, the installed device is displayed in [Settings] > [Devices] > [Printers & scanners] > [Printers].
Installation Without Using the Installer
44