Installation and assembly – MCZ Boxtherm 60 Pellet User Manual
Page 23
21
3-INSTALLATION AND ASSEMBLY
SETTING UP THE CLADDING
The product must be fully tested before the cladding is applied. The company cannot be held liable for any damage to the
cladding should operating anomalies arise, which were not verified before the cladding was applied to the product.
IT IS MANDATORY to check the tightness of all the pipes through which smoke passes (smoke fitting, gaskets and flue coupling)
before setting up the cladding.
READ THE "OPERATION TEST" CHAPTER BEFORE STARTING ANY PRODUCT CLADDING OPERATION.
The product and the cladding parts must be fastened together WITHOUT COMING INTO CONTACT WITH THE STEEL STRUCTURE in
order to prevent heat from being transmitted to the marble and/or stone and to allow for normal thermal expansion. Pay attention to the
wood finishes, such as beams or shelves.
It is recommended to set up the counter hood made of 15 to 20 mm thick fireproof plasterboard with a freestanding frame made of a
galvanised profile to prevent bearing the weight on the cladding components (wooden beams or marble lintels), which do not have a
freestanding structure and in order to intervene easily in case of anomalies and/or future maintenance. Dry mount the hearth
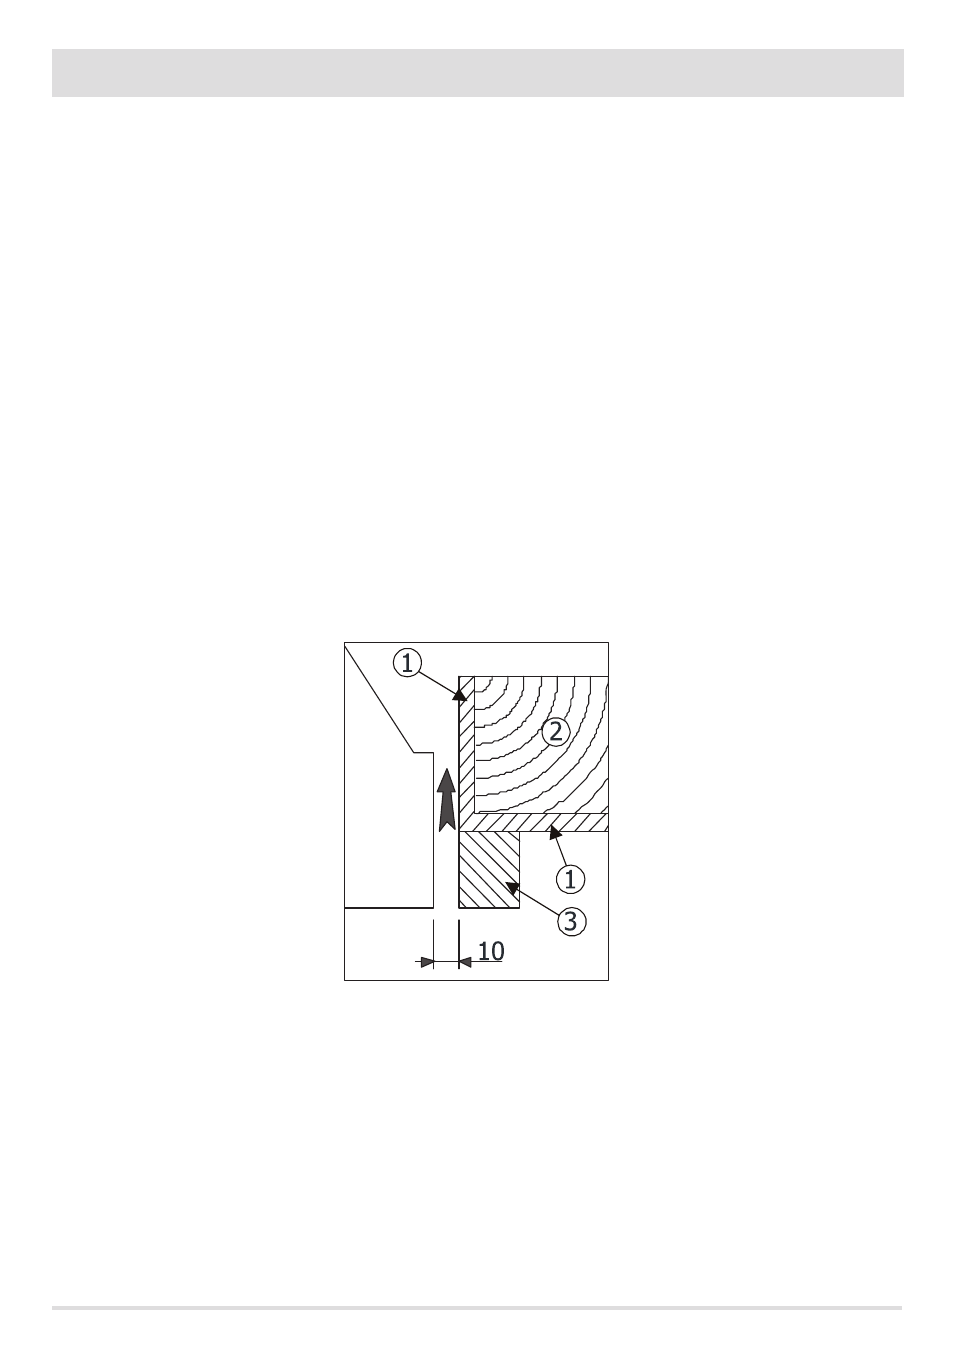
of the cladding, leaving a 1 cm gap between the insert and the hearth for insulation.
WOODEN BEAM INSULATION
If you wish to mount a wooden beam, it must be protected with adequate insulation from the hot parts in order to prevent the risk of fire
or damage to the cladding.
STANDARD CLADDING ASSEMBLY
The installation guide found in each specific cladding must be referred to for the assembly of MCZ product specific claddings.
1 - INSULATION APPLIED OR TO BE APPLIED
2 - WOODEN BEAM
3 - MARBLE OR OTHER MATERIAL
Technical Dept. - All rights reserved - Reproduction is prohibited