Epson DLQ-3500 User Manual
Page 11
Continuous Paper (2/4)
EPSON DLQ-3500 Quick Guide
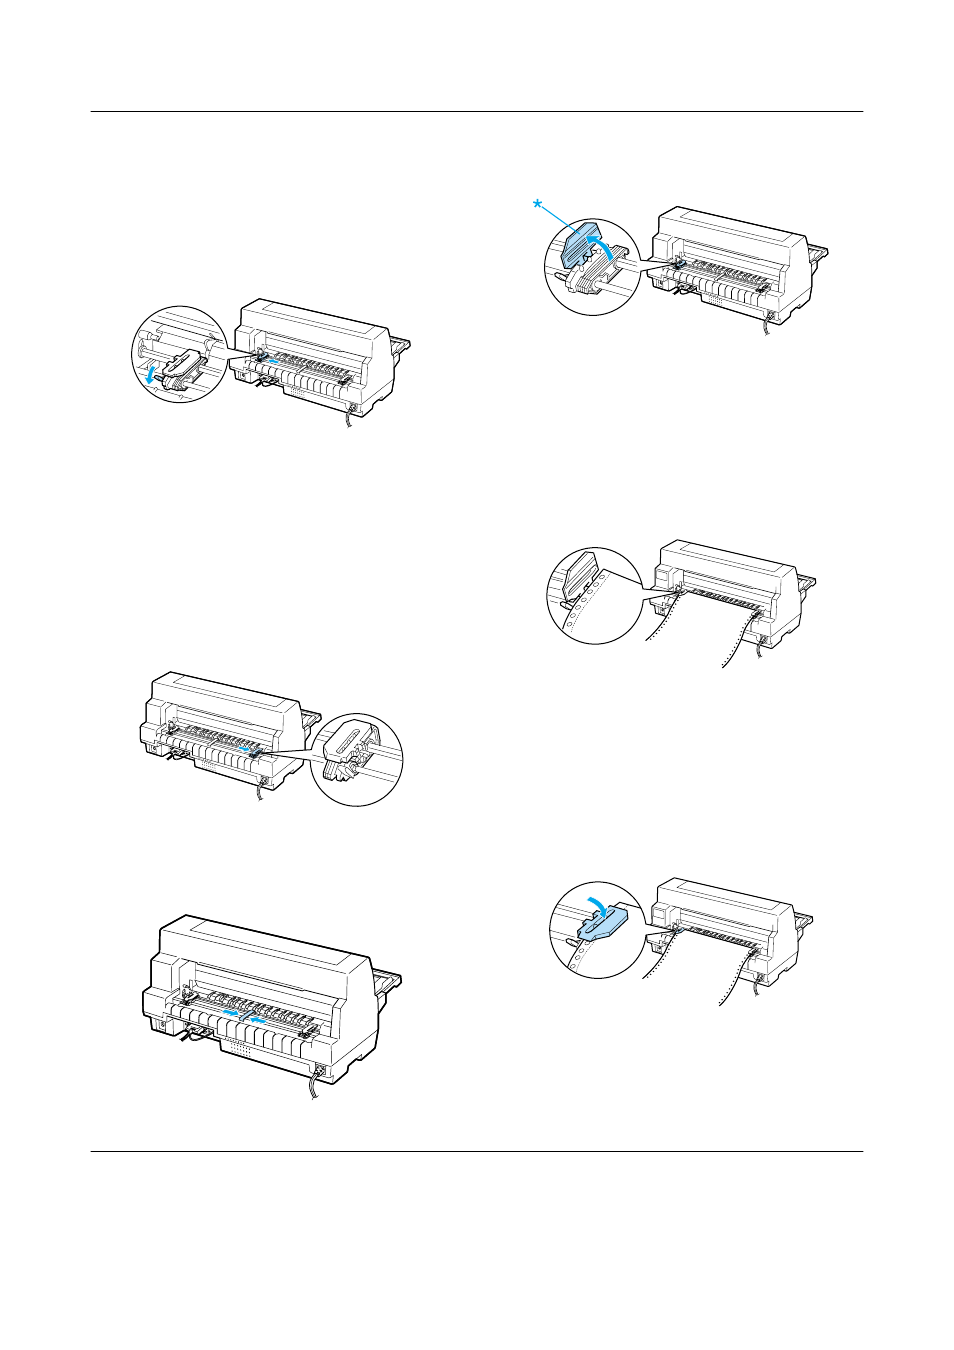
4. Position the left sprocket so that the
sprocket pins are to the left of the arrow
mark on the back of the printer. Then
push down the lock lever to lock the
sprocket in place.
Note:
Printing starts at the arrow mark on the back
of the printer.The unprintable area is to the
left of the arrow mark.
5. Slide the right sprocket to roughly match
the width of your paper, but do not lock
it.
6. Slide the center paper support to the
middle of the two sprockets.
7. Open the sprocket covers.
* sprocket cover
8. Fit the first three holes of the continuous
paper over the sprocket pins on both
sides. Be sure to position your paper
supply so that the printable side faces
up.
c
Caution:
Make sure the first sheet of your
continuous paper has a clean,
straight edge so that it can feed
smoothly into the printer.
9. Close the sprocket covers.
- Stylus Pro 7800 (11 pages)
- Stylus Pro 4000 (49 pages)
- Stylus Photo R300 (2 pages)
- Stylus Pro 7000 (147 pages)
- AcuLaser C3000 (316 pages)
- Stylus Pro 7900 (24 pages)
- Stylus Pro 4450 (21 pages)
- 1000 (272 pages)
- T034120 (4 pages)
- T580300 (4 pages)
- 300 (91 pages)
- B 510DN (218 pages)
- B 510DN (190 pages)
- Stylus NX510 (8 pages)
- Stylus Photo RX580 (95 pages)
- T549300 (4 pages)
- B 500DN (168 pages)
- AculaserCX11NF (5 pages)
- 480SXU (24 pages)
- 4500 (317 pages)
- STYLUS RX500 (99 pages)
- 2100 (13 pages)
- Stylus NX215 (2 pages)
- T098320 (4 pages)
- T041020 (4 pages)
- R210 (8 pages)
- All-In-One Stylus Photo RX600 (164 pages)
- 777I (53 pages)
- T033120 (4 pages)
- Stylus CX7000F (8 pages)
- 60 (113 pages)
- T034220 (4 pages)
- WorkForce 40 Series (36 pages)
- T054220 (4 pages)
- Stylus CX3200 (11 pages)
- Stylus CX7800 (18 pages)
- T060220 (4 pages)
- 2500 (180 pages)
- AcuLaser CX11N (32 pages)
- AcuLaser CX11N (4 pages)
- 2000P (16 pages)
- T606600 (4 pages)
- Stylus CX6000 (18 pages)
- FS-4000DN (2 pages)
- MSDS T544700 (4 pages)