Entering characters, Convenient operations and setups, Using character keyboard – Casio PCR-365A User Manual
Page 60
60
Example:
Input "
Apple Juice
",
enter "DBL SIZE", "A", "SHIFT", "p", "p", "l", "e", "SPACE", "SHIFT", "J", "SHIFT", "u", "i", "c", "e"
-
.
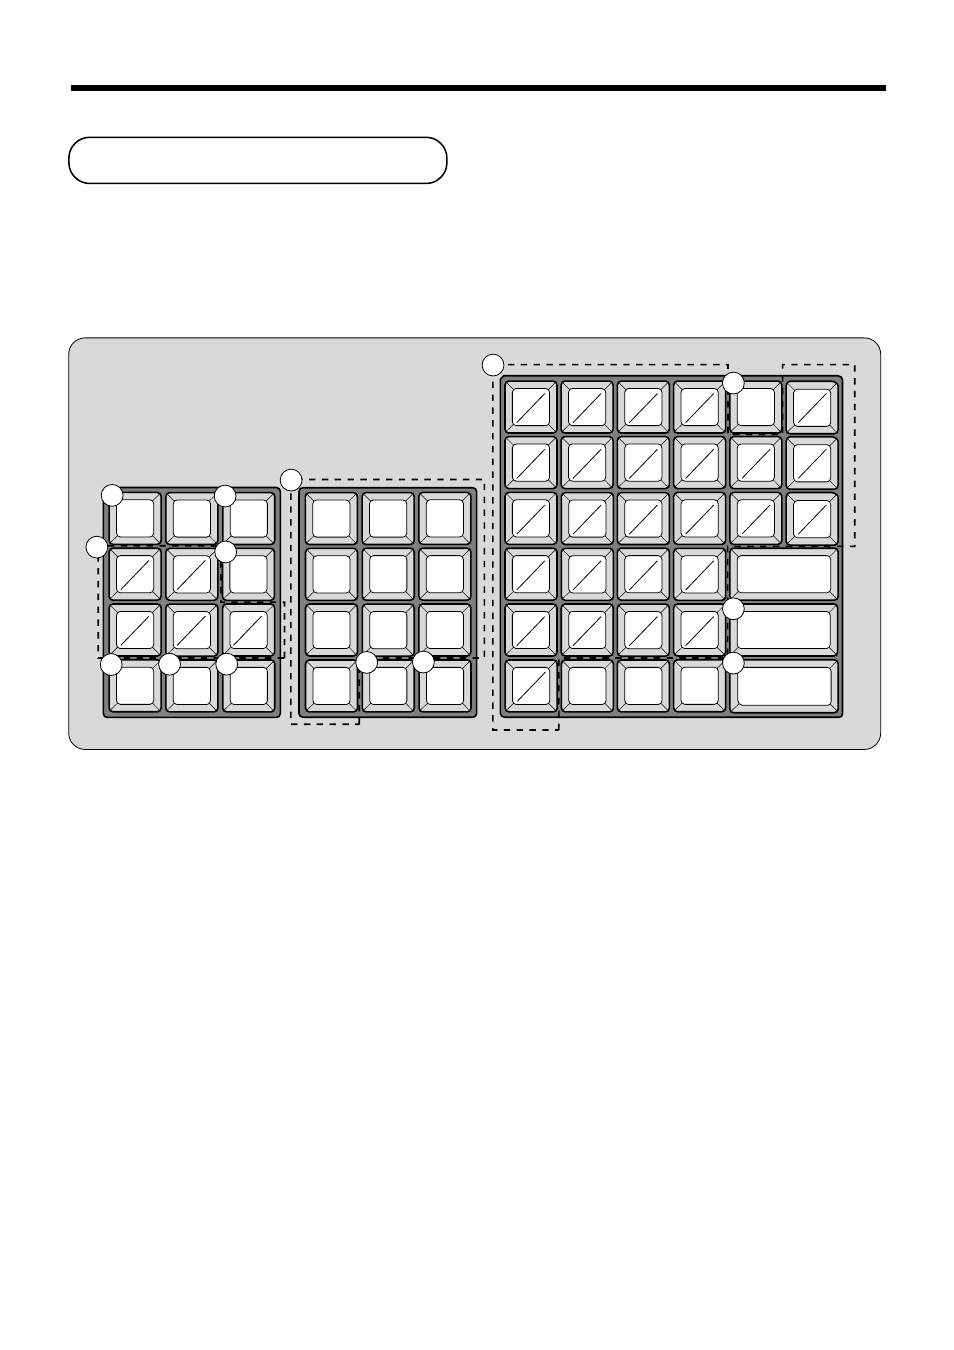
1 Feed key
Hold this key down to feed paper from the printer.
2 Character shift key
Pressing this key shifts the character from the uppercase
letter to lower case letter and returns to the uppercase
letter in sequence.
3 Alphabet keys
Used input to characters.
4 PLU/Subdepartment key
Use this key to input PLU/Subdeparment numbers.
5 Double size letter key
Specifies that the next character you input to a double size
character. You must press this key before each double size
character.
6 Space key
Set a space by depression.
7 Clear key
Clears all input characters in the programming.
8 Numeric keys
Used to enter program codes, memory number and
character codes.
9 Character fixed key
Enter when the alphabetic entry for a descriptor, name or
message has been completed.
0 Backspace/Character code fixed key
Registers one character with code (2 or 3 digit).
Clears the last input character, much like a back space
key.
A Department shift key
Use this key to shift the department key number from 1
through 24 to 25 through 48, 49 through 72 or 73 through
96.
B Program end key
Terminates the character programming.
C Character enter key
Registers the programmed characters.
Entering characters
In this section, the method to enter descriptors or messages (characters) to the cash register during programming is
described.
Characters are specified by character keyboard or by codes. In the first half of this section, the usage of character
keyboard is described. In the latter half, inputting method by character code is described.
Using character keyboard
FEED
DEPT
SHIFT
C
PLU/
S.DEPT
DBL
SIZE
SPACE
CHAR.
SHIFT
7
8
9
4
5
6
1
2
3
0
00
•
#-1
#-2
A
B
C
D
E
F
G
H
I
J
K
L
M
N
O
P
Q
R
S
T
U
V
W
X
Y
Z
a
b
c
d
e
f
g
h
i
j
k
l
m
n
o
p
q
r
s
t
u
V
w
x
y
z
1
2
3
4
5
6
7
8
9
0
1
5
6
10
2
7
12
11
13
3
3
8
4
9
Convenient Operations and Setups