Water tank lid, Water tank lid assembly, Suprema 2001 - operation & service manual – Everpure 2001 User Manual
Page 47
SUPREMA 2001 - OPERATION & SERVICE MANUAL
Suprema 2001 - Operation & Service
July 6, 2001
Page 47 of 60
INSTALLING THE WATER TANK
1. Align the tank assembly on its mounting rail, and slide it into the cabinet.
2. Connect the water tank harness to the rear board.
3. Connect the temperature probe harness to the rear board.
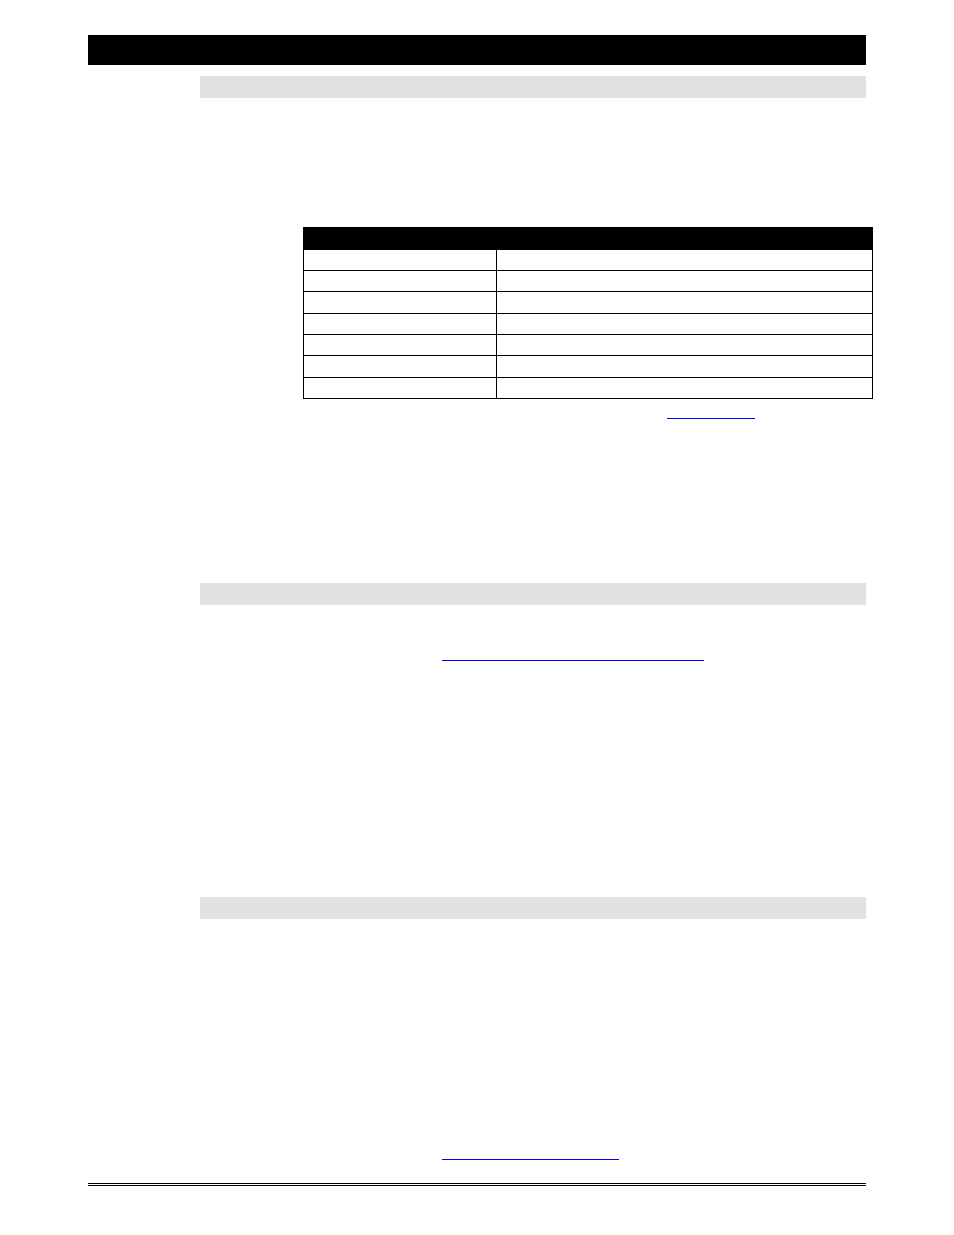
4. Connect the wires identified in the table below.
WIRE
CONNECTED TO:
#1-2
on General Harness
Whipper Motor
#8-1
on General Harness
Whipper Motor
#11-1
on Tank Harness
Wire
#3-2 on Fuse Box Harness
#6
on Tank Harness
Inlet Valve
#1-2
on Tank Harness
Inlet Valve
#11
on Fuse Box Harness
Stud
#3 on Heater Relay
#13-1
(ground wire)
Ground Stud on Rear Board Cover
*
For more information about wiring, consult the
of this manual.
5. Connect the inlet valve hose to the bottom of the tank using a hose clamp.
6. Connect the hot water hose to the hot water valve.
7. Connect the chocolate hose fitting to the whipper assembly.
8. Install the valve cover.
REMOVING THE WATER TANK LID ASSEMBLY
1. Remove the water tank from the coffee maker.
a) Refer to the "
Removing The Water Tank Assembly
" in this manual.
2. Disconnect wires #9 and the wire from the thermal cut-off switch going to
the heater element.
3. Disconnect the 3-position wiring receptacle from the water level switch.
4. Disconnect wire #14 going to thermal cut-off switch.
5. Remove the lid assembly.
a) Press the lock latch on the lid to free it.
b) Lift the assembly up and out of the water tank.
INSTALLING THE WATER TANK LID ASSEMBLY
1. Lower the lid assembly into the water tank.
a) Slide the back of the lid into the tank first, and push the front down until
the latch engages.
2. Connect wires #9 and the wire from the thermal cut-off switch to the
heater element.
3. Connect the 3-position wiring receptacle to the water level switch.
4. Connect wire #14 to thermal cut-off switch.
5. Re-install the water tank.
a) Refer to the "
" instructions in this manual.