Bottom pause delay, Canceling messages, Messages on / off – Everpure 2001 User Manual
Page 23: Suprema 2001 - operation & service manual, Setting bottom pause delay, Canceling messages (messages on, off or "active")
SUPREMA 2001 - OPERATION & SERVICE MANUAL
Suprema 2001 - Operation & Service
July 6, 2001
Page 23 of 60
SETTING BOTTOM PAUSE DELAY
This feature allows a delay in the position of the bottom pause to obtain maximum
vacuum and capacity in the brewer. For example, if this setting is at 0.5 seconds, the
bottom pause will occur 0.5 seconds after the switch reads the pause position on the
cam. The piston will stop lower in the cylinder, creating more vacuum and increasing
the quantity of liquid that can be pulled into the cylinder.
1. To set the "
DELAY PAUSE
", press the "
UP
" button on the hidden menu
scroll buttons and scroll until the following message appears,
a) Press the "
START
" button to enter the set mode.
b) Using the hidden setting adjustment buttons, increase or decrease the
timing for the bottom pause delay.
c) To exit the "
SET DELAY PAUSE
" mode and proceed to the next setting,
press the "
UP
" or "
DOWN
" scroll buttons.
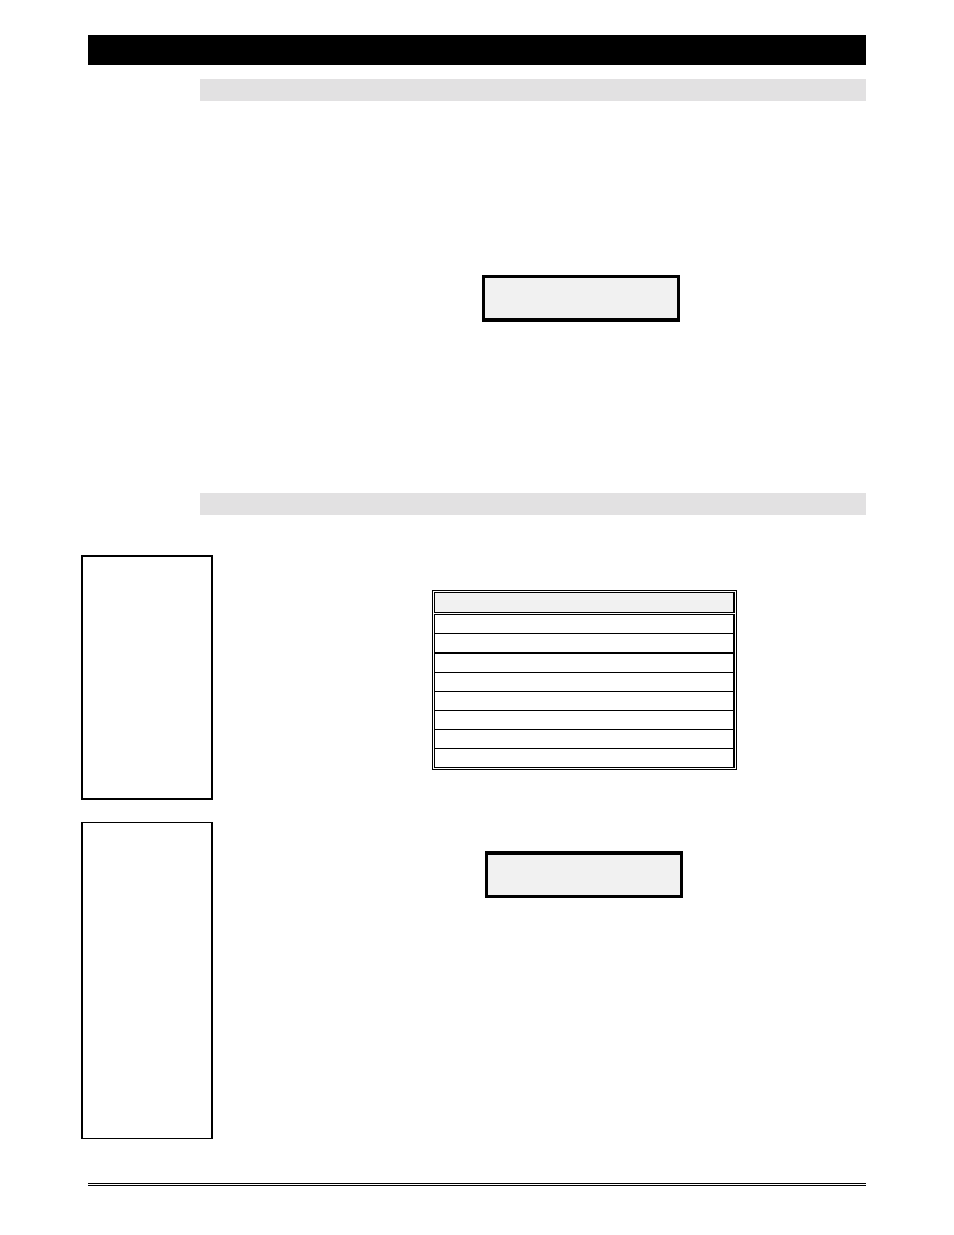
CANCELING MESSAGES (MESSAGES ON, OFF or "ACTIVE")
The following is a list of all the cancelable messages in this version of software. Most
of these messages can also be programmed to be "active", meaning they will disable the
unit until the message has been cleared. Use this chart as a quick reference.
CANCELABLE MESSAGES
Refill Large Hopper
Refill Small Hopper
Refill Chocolate
Empty Grounds
Call Key Operator
Service Message
Custom Messages
Temp. Too Low
1. To cancel one of the passive messages, or to make the message "active",
press the "
UP
" button on the hidden menu scroll buttons until the
following message appears,
a) Press the "
START
" button to enter the set mode.
b) Scroll through the messages by pressing the "
START
" button.
c) To cancel a message or to make it "
ACTIVE
", once it is displayed on the
LCD press either one of the two hidden setting adjustment buttons to
switch it to "
OFF
" or "
ON
-
ACTIVE
".
d) Press “
START
” to save the settings.
e) To enable a message again, repeat the above procedure and switch the
message to "
ON
" (either passive or active).
f) To exit, press one of the hidden scroll buttons.
DELAY PAUSE
PRESS
MESSAGES ON/OFF
PRESS
!
Note:
The upper half of
the display
indicates which
message is to be
canceled, and the
lower half of the
display indicates
the status of the
message (
ON
-
PASSIVE
,
ON
-
ACTIVE
,
or
OFF
). All new
units are factory
set with every
message set to
“
ON
-
PASSIVE
”.
!
Note:
Each of the
messages in the
table can be
individually set to
“
ON
-
ACTIVE
”.
Please be aware
that if a message
is set to “
ON
-
ACTIVE
”, the
function
corresponding to
that message will
be disabled when
the message
appears. Make
sure to inform the
caretaker of the
proper procedure
required to clear
the messages.