SMA SWR 850 User Manual
Page 8
GB
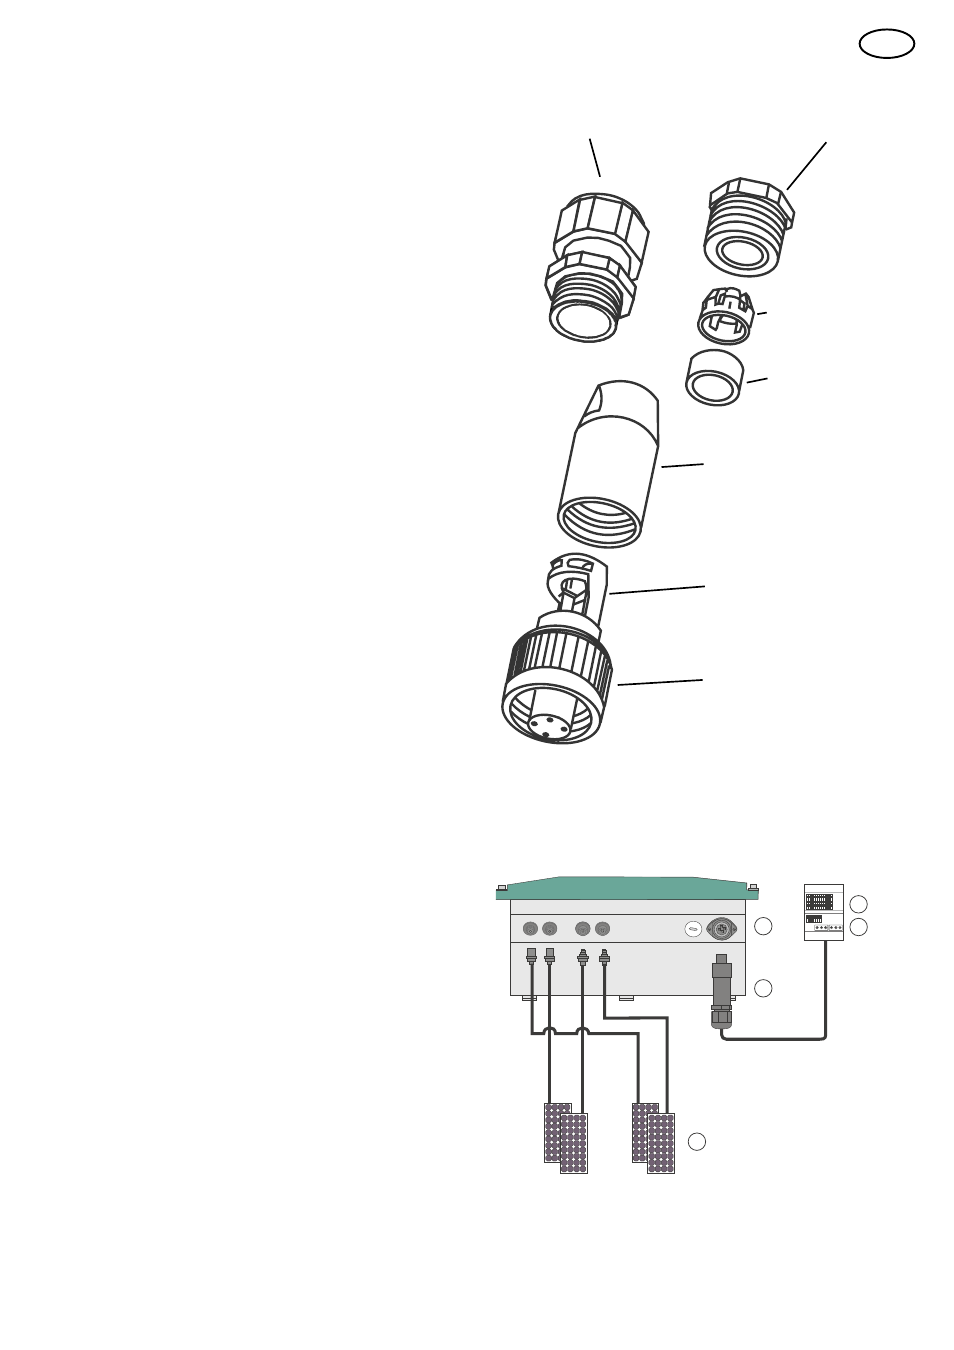
Choose the PG13.5 or PG16 fastening clamp depending
on the cross-section of the AC cable.
1. Push the rubber ring into the fastening case (only for
PG13.5).
2. Put the cable through the PG 13.5 or 16 cable seal with
the fastening case and through the socket tube.
3. Connect the wires of the AC cable as follows:
- Protective Earth (PE) to the terminal with the
"ground" symbol
- Neutral wire to the terminal marked with "1"
- Phase L to the terminal marked with "2"
- The terminal marked with "3" is not used.
4. Make sure that all wires are firmly connected.
5. Push the socket tube firmly onto the socket.
6. Screw the cable seal firmly onto the socket tube.
7. For cables that require the PG16 gland: Tighten the bolt
of the PG16 gland.
The AC connector socket is now ready to use.
Seal the AC connector socket in case you do not insert it in-
to the Sunny Boy immediately.
1. Disconnect the circuit where to connect the Sunny Boy
(open the circuit breaker of the supply lead).
2. Check the open circuit voltage of the PV strings and
connect them to the Sunny Boy by firmly plugging the
Multi-Contact connectors onto the openings at the bott-
tom of the Sunny Boy.
3. Assemble the AC plug connector.
4. Connect the AC plug to the socket on the bottom of the
Sunny Boy. Carefully insert the plug into the opening,
turn the plug with light pressure until it sinks into the so-
cket. Tighten the plug by the bolt of the gland.
5. Connect the AC voltage by closing the circuit breaker of
the supply lead.
Preparation of the AC plug connector
Commissioning the Sunny Boy
Socket
Socket tube
Rubber ring
for PG13,5
Fastening Case
for PG 13,5
Cable Seal PG16
Cable Seal PG13,5
Threaded ring
2
3
String 2
String 1
Sunny Boy
(bottom view)
4
5
1
AC house distribution