ShoreLand'r SLB30BAL User Manual
Page 4
Midwest Industries, Inc. Ida Grove, IA 51445 800-859-3028
www.shorelandr.com
0004297
Page
4
of
11
2/09/2011
AXLE
Place one of the spring bracket bushings (Ref. #35) into the rear of the spring bracket and
secure with a 9/16” x 3 1/4” hex bolt and hex lock nut. Repeat in other spring bracket.
Position the rear axle under the frame, then hook the hook loop of the spring around the
bushings just installed. If the axle is positioned too low, the hooks will not hook around the
bushings.
Raise the front of the springs up so they align with the rear hole in the axle rocker arm. Secure
in place with a 9/16” x
3-1/4” hex bolts and lock nuts.
Install another spring bracket bushing in the front hole on the rock arm assembly. Secure with
a 9/16” x 3-1/4” hex bolt and lock nut. Tighten.
Hook the hook end of the springs mounted to the front axle over the bushing in the rocker arm
assembly. Swing the front of the spring up and attach the front mounting hole in the spring
bracket with another 9/16” x 3-1/4” hex bolt and lock nut.
Tighten all axle U-bolts and spring bolts.
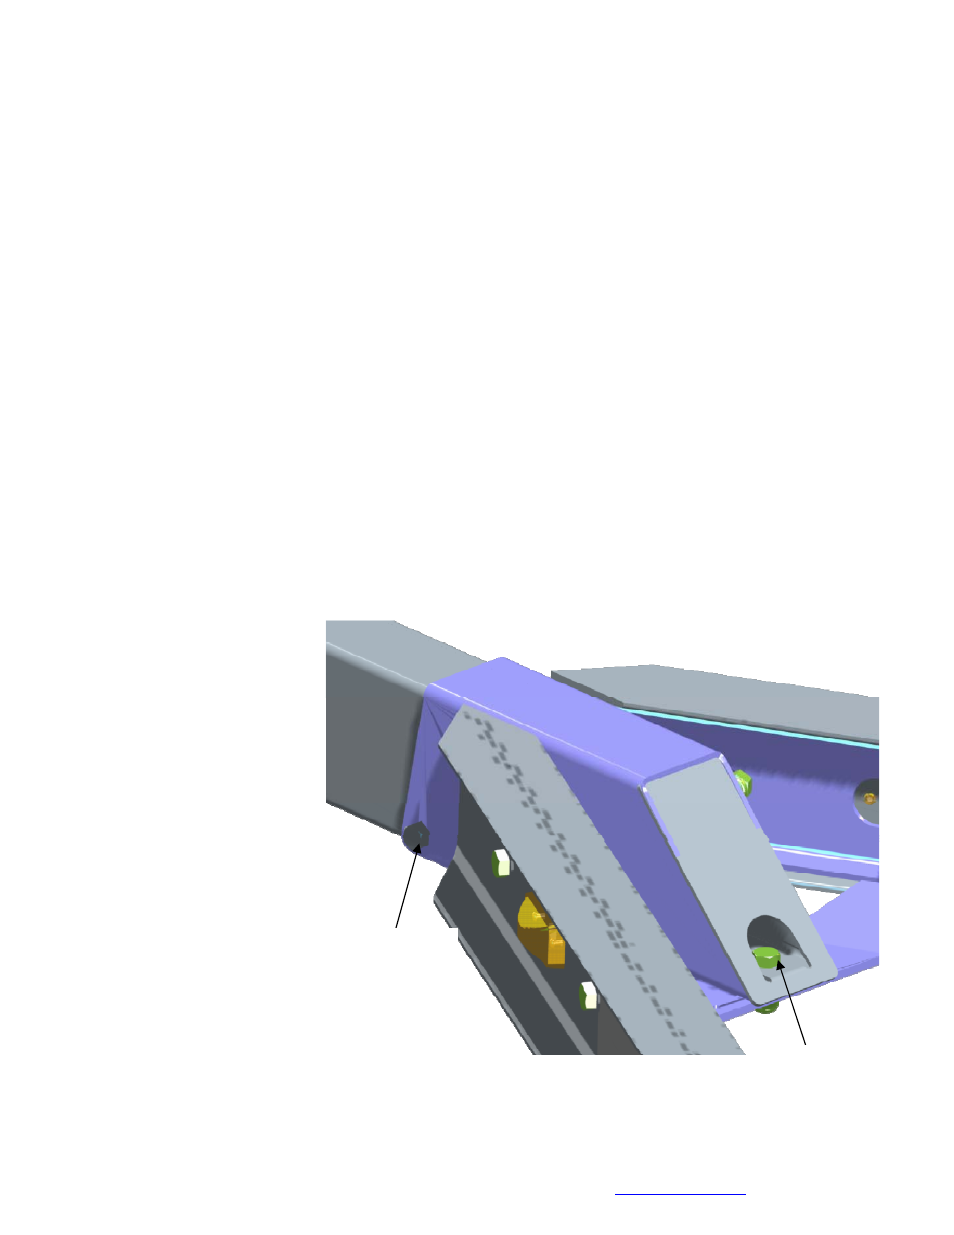
Tongue
Remove the tongue from it’s shipping position, reverse it and re-insert it into the front of the
tongue channel. Align the
holes in the tongue with
the holes in the tongue
channel. Secure with a 1/2”
x 4 1/4” hex bolt and 1/2”
lock nut in the front cross
hole. Remove the wire
harness from the rear of
the tongue. Place the wire
harness and the brake line
through the hole in the
tongue cover plate. Secure
the tongue cover plate in
position with a 1/2” x 1-1/2”
hex bolt and 1/2” lock nut.
Tighten. Plug the tongue
wire harness ends into the
frame harnesses by
matching colors and ends.
Push the extra wire into the
rear of the tongue.
1/2” X 4 1/4”
Hex Bolt
1/2” X 1 1/2”
Hex Bolt