Grass Valley CopperHead PowerWafer User Manual
Page 32
28
Camera Unit and Power Supply Installation
Mounting the Copperhead Camera Unit with the PowerWafer
Mounting the Copperhead Camera Unit with the PowerWafer
When mounting the CopperHead Camera Unit, always position the camera so that the
battery mounting plate at the rear of the camera is easy to access. Insure that the camera is
well supported and stable. If a battery is mounted remove it and put it to one side. The
camera model shown here is for illustrative purposes only - your camera may differ.
The PowerWafer allows the camera and Camera Unit to be powered via hybrid fiber cable,
which is powered from the CopperHead Base Station or MPS External Power Supply.
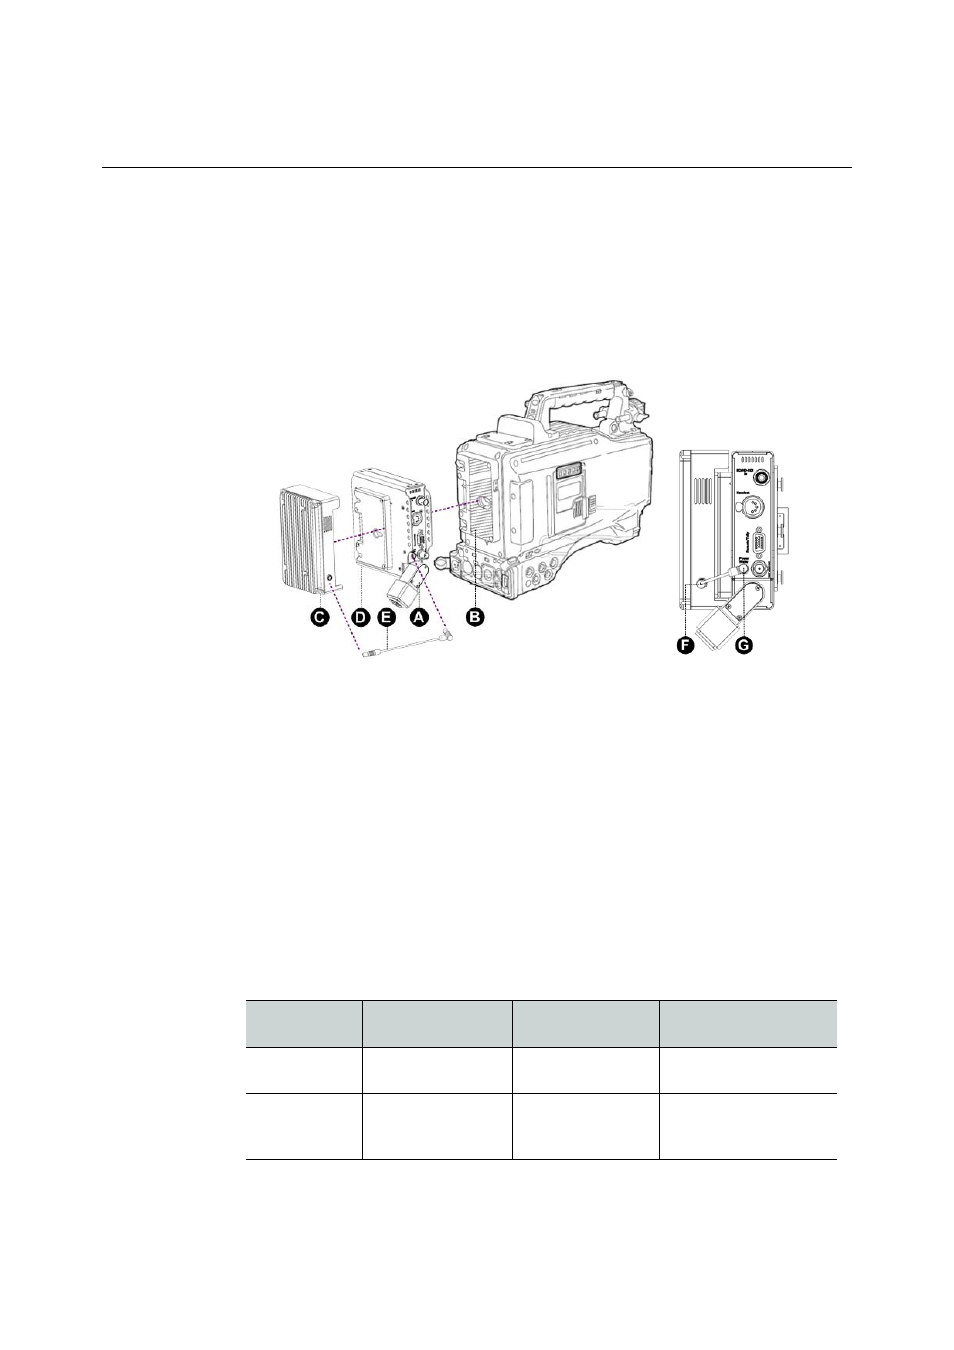
Fig. 4-1: The PowerWafer Unit and the Cable
To attach the PowerWafer Cable
1 Attach the CopperHead Camera Unit A to the camera battery mounting plate B. The
mounting is mechanically identical to attaching a battery.
For instructions for attaching the required cables between the camera and the Camera
Unit, refer to any of the CopperHead User Guides.
2 Mount the PowerWafer C to the CopperHead Camera Unit battery mounting plate D
exactly as you would mount the battery to the camera.
3 Connect the supplied PowerWafer connector cable E. (model CH3CP-INF-FAG2)
between the PowerWafer C and the PowerWafer connector on Camera Unit A.
4 For best results, plug the straight connector F into the PowerWafer and the connector
with the Right Angle G into the Copperhead Camera Unit.
The following table summarizes the various fiber cable connection options between the
Copperhead Base Station and Camera Unit.
Cable Type
Base Station Power
Camera Unit Power
Distance Range Between
Camera and Base
Tactical Fiber
12VDC
Local Battery or AC
Power
Up to 10 KM
SMPTE Hybrid
Fiber
120/220VAC with
Internal Camera
Power Supply
PowerWafer
Adaptor
240 meters