Eneo HDR-5004AH1.0 User Manual
Page 11
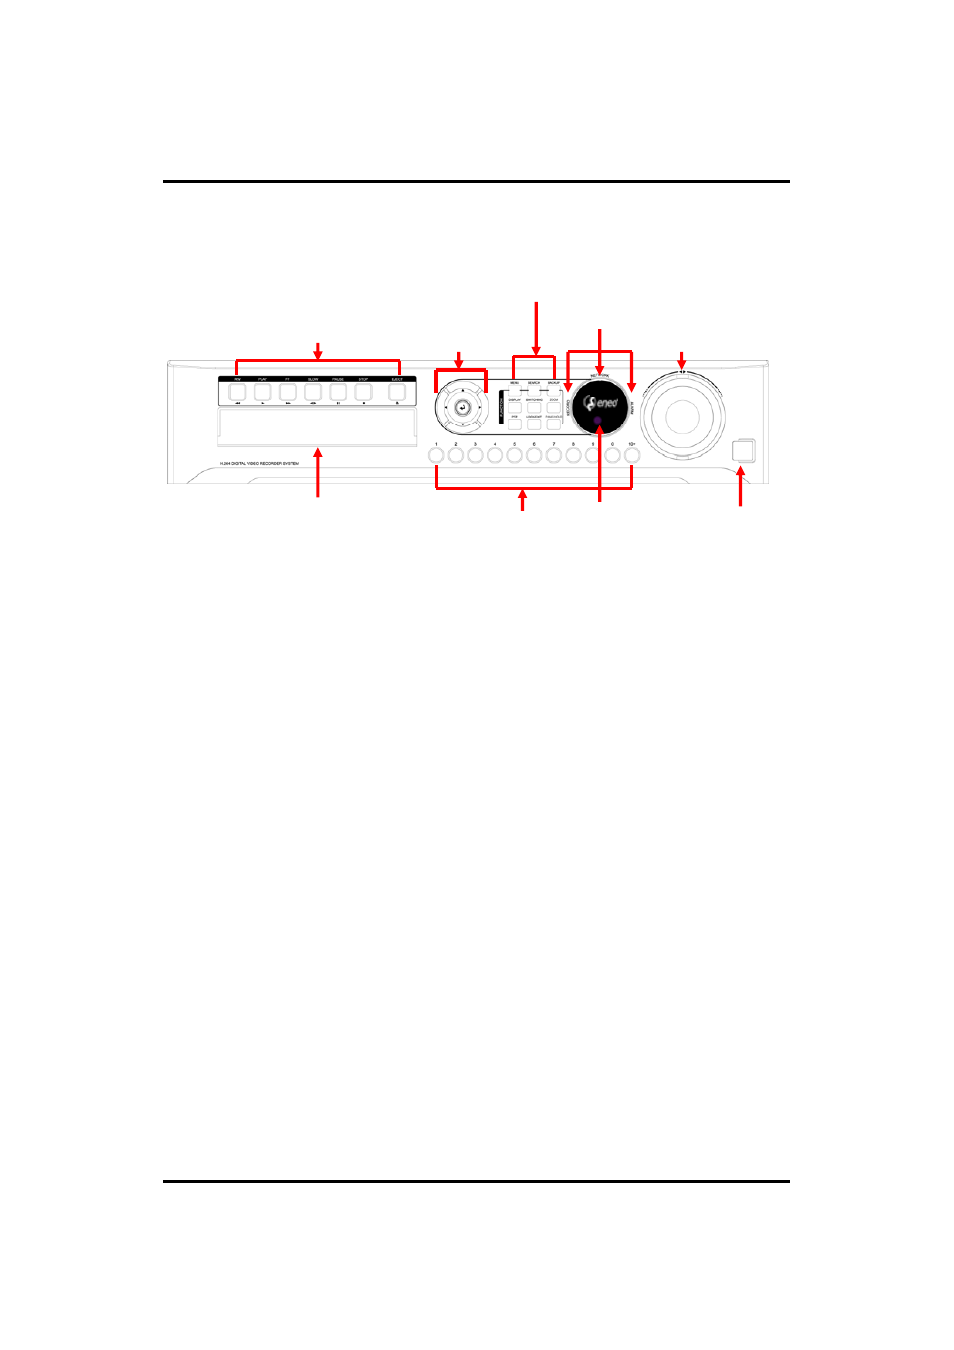
[Front Panel]
CH 1 Product Introduction
4. Status Ramps
1. Playback Buttons
5. Jog Shuttle
2. Enter & Arrow Keys
3. Function Keys
1. Playback buttons
: It will be used on playback. If you press these buttons in live
mode, it will be automatically changed to the Instant Play mode. ‘Stop’ button
7. IR Window
6. USB
9. Backup Device
8. Number Buttons
ode, t w be auto at ca y c a ged to t e sta t ay ode. Stop butto
changes from the play mode to the live mode.
2. ARROW, ENTER
: This button is used to change settings for the product in
MENU Mode or used in Search Mode.
3. Function keys
1) MENU : It will move to the setup screen from the live mode.
2) SEARCH : It will change to the playback mode from the live mode.
3) BACKUP : It will move to the backup screen from the live or play mode.
4) DISPLAY : It will change the screen splitting sequentially from 1 to 20 It can be
4) DISPLAY : It will change the screen splitting sequentially from 1 to 20. It can be
adapted both live and play mode.
5) SWITCHING : It will change to switching mode except 20 splitting.
6) ZOOM : It will go to the digital zoom directly.
7) PTZ : It will change to the pan, tilt and zoom control mode from the live mode.
8) LOCK/EXIT : If you want move to the upper menu or exit without saving, press
this button. On playback, it will disappear the search list for the better
viewing. On live viewing, it performs the system lock.
9) PANIC : This button is used in emergency status If you push this button
9) PANIC : This button is used in emergency status. If you push this button,
the DVR starts to record with maximum speed regardless of setting value.
4. Status lamps
POWER : Blue color back light. Power indicator.
RECORD : Red. Indicate the recording.
NETWORK : Green. Lit on connecting the network
ALARM : Red. It will be lit on when the events happen
5. Jog Shuttle
: You can use this wheel for fast retrieving and playback back and pro.
If you hold the shuttle push the 10+ button while grabbing the shuttle
11
If you hold the shuttle, push the 10+ button while grabbing the shuttle.
6. USB ports
: These USB ports are for mouse and USB devices.
7. IR Window
: the window for remote controller