Permanent mounting – Airmar 200WX—Ultrasonic WeatherStation® Instrument User Manual
Page 12
12
Permanent Mounting
1. Place the mounting hardware at the selected location. Orient any cable exit in the
direction that you want the cable to travel.
2. Position the mounting hardware at a 90° angle to the mounting surface. If
necessary, use shims to make the mounting surface level (see Figure 4).
3. Mark the holes for the screws (see Figure 1). If the cable will pass through the
center of the mount, also mark that hole.
NOTE: If you are using a ratchet mount, be sure you have purchased an
extension with a cable pass-through.
4. Drill the holes for the mounting screws and the cable exit if necessary. If the
cable is to be fed through a deck, install a high quality deck gland.
5. Using purchased screws, fasten the mount in place.
6. Screw an extension tube onto the antenna mount if desired (see Figure 4).
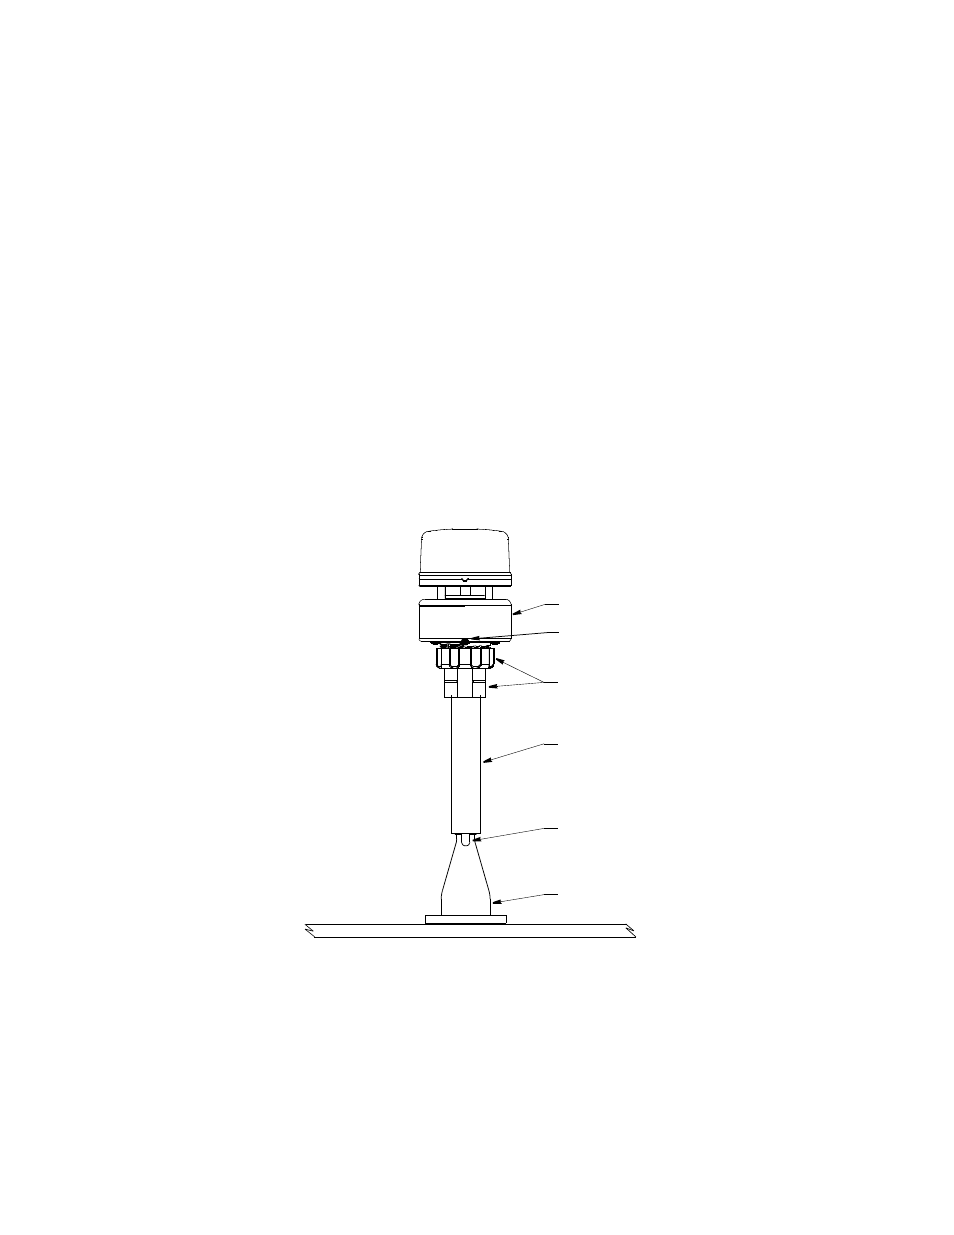
Figure 4. Installation
(150WX shown)
nut assembly
WeatherStation
extension tube
antenna mount
cable exit
alignment
(some installations)
(most installations)
(some installations)
indentation
lower housing
Copyright © 2007 - 2011 Airmar Technology Corp.