Airmar Portable Survey—M191 User Manual
Installation instructions owner’s guide, Portable survey transducer, Tools & materials
17
-2
28
-0
1 re
v.
0
3
10
/20
/10
Portable Survey Transducer
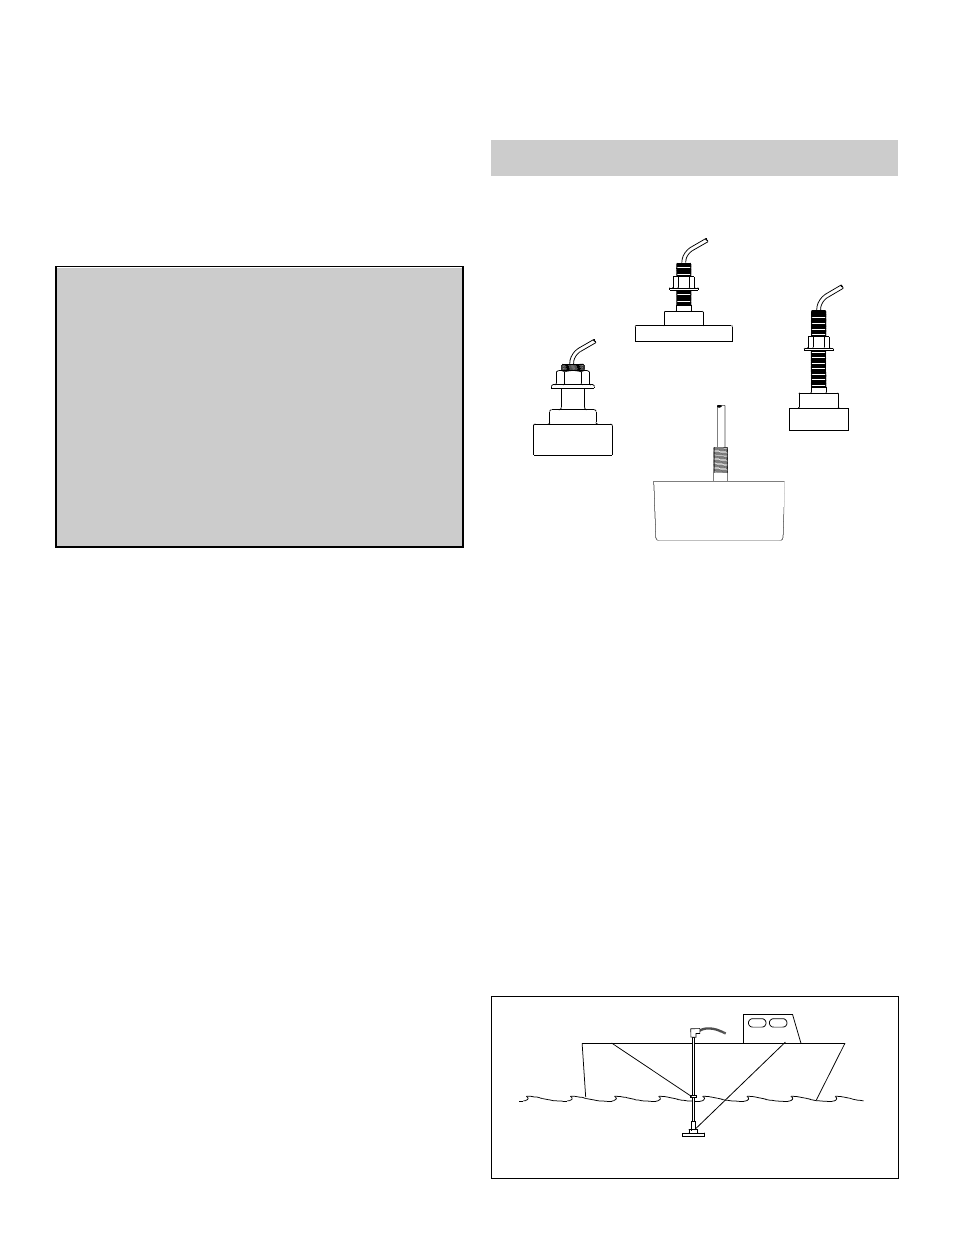
Models: M191, SS510, SS538, SS549
Applications
• Over-the-side mounting recommended
Tools & Materials
Safety goggles
Dust mask
Silicone lubricant or petroleum jelly (Vaseline
®
)
Pipe: 1-1/4 - 2" diameter
• long enough to adjust the depth of the transducer below the
water surface
• threaded at each end to match the pipe coupling and elbow
Right-angle pipe elbow (with removable plate)
Pipe coupling(s)
Pipe coupling adaptor:
M191, SS510
1/2" x 14NPS threads
SS538, SS549
3/4" x 14NPS threads
Cable ties (some installations)
Chains or cables or lines
Clamps
Water-based anti-fouling paint (mandatory in salt water)
Mounting location
• Locate the transducer at a sturdy support on the side hull near
the center (see Figure 1) This location will minimize noise from
the propeller, bubbles caused by the boat’s travel, and the
effect of heave.
• The transducer must be fully submerged in water and not
subjected to air bubbles or turbulent water flowing under the
face. Mount the transducer 1m (3’) below the water surface.
Installation
1. Apply silicone lubricant or petroleum jelly to the threads of the
pipe at both ends to facilitate disassembly.
2. Twist the right-angle pipe elbow onto the upper end of the pipe.
The elbow will prevent the pipe from dropping off, protect the
cable, and can be used to orient the transducer.
3. With the appropriate pipe coupling adaptor in place, twist the
pipe coupling onto the opposite end of the pipe.
4. Guide the transducer cable through the pipe.
Alternately, after the transducer is attached, attach the cable to
the outside of the pipe using cable ties.
5. Apply silicone lubricant or petroleum jelly to the transducer
stem. Thread the transducer stem into the pipe coupling.
6. Attach chains, cables, or lines to the pipe near the transducer
that will support the pipe from the force of the water when the
boat is underway (see Figure 1).
7. Clamp the pipe to the gunnel. Be sure the pipe and thus the
transducer is perpendicular to the water surface.
Record the information found on the cable tag for future reference.
Part No._________________Date___________Frequency________kHz
SS549
Figure 1. Over-the-side installation
SS538
Copyright © 2006 - 2010 Airmar Technology Corp.
SS510
RV Hydro Surveyor
INSTALLATION INSTRUCTIONS
OWNER’S GUIDE &
WARNING: Always wear safety goggles and a dust
mask to avoid personal injury.
CAUTION: Never pull, carry, or hold the transducer by
the cable as this may sever internal connections.
CAUTION: Never use solvents. Cleaners, fuel,
sealants, paint, and other products may contain strong
solvents, such as acetone, which attack many
plastics, greatly reducing their strength.
IMPORTANT: Read the instructions completely
before proceeding with the installation. These
instructions supersede any other instructions in your
instrument manual if they differ.
M191