Airmar SS200—No Fairing User Manual
Installation instructions owner’s guide, Thru-hull with stem & no fairing depth transducer
Follow the precautions below for optimal
product performance and to reduce the risk of
property damage, personal injury, and/or death.
WARNING: Always wear safety goggles and a dust
mask when installing.
WARNING: Immediately check for leaks when the
boat is placed in the water. Do not leave the boat
unchecked for more than three hours. Even a small
leak may allow considerable water to accumulate.
CAUTION: Always operate the transducer in water.
Operating in air will allow the transducer to overheat
possibly resulting in failure.
CAUTION: The stainless steel housing must be
isolated from a metal hull to prevent electrolytic
corrosion. Use the isolation sleeve and washers
supplied.
CAUTION: SS422—The transducer must be oriented
properly. The mark on the face must be forward and
parallel to the centerline of the boat.
CAUTION: Never pull, carry, or hold the transducer by
the cable as this may sever internal connections.
CAUTION: Never strike the transducer.
CAUTION: Never use solvents. Cleaner, fuel, sealant,
paint, and other products may contain solvents that can
damage plastic parts, especially the transducer’s face.
IMPORTANT: Read the instructions completely
before proceeding with the installation. These
instructions supersede any other instructions in your
instrument manual if they differ.
17
-0
08
-0
6 re
v.
0
3
11
/22
/13
Thru-Hull with Stem & No Fairing
Depth Transducer
Models: SS200, SS422, SS502
Tools & Materials
Safety goggles
Dust mask
Permanent marker
Electric drill
Drill bits and hole saws:
Pilot hole
3mm or 1/8"
SS200, SS502
23mm or 15/16"
SS422
25mm or 1"
Sandpaper
Mild household detergent or weak solvent (such as alcohol)
File (installation in a metal hull)
Marine sealant (suitable for below waterline)
Knife or scissors (installation in a metal hull)
Slip-joint pliers
Grommet(s) (some installations)
Cable ties
Water-based anti-fouling paint (mandatory in salt water)
Installation in a cored fiberglass hull (see page 4):
Hole saws for hull interior:
35mm or 1-3/8"
Cylinder, wax, tape, and casting epoxy
Mounting Location
Guidelines
CAUTION: Do not mount in line with or near water intake or
discharge openings or behind strakes, struts, fittings, or hull
irregularities that will disturb the water flow.
CAUTION: Do not mount the sensor where the boat may be
supported during trailering, launching, hauling, or storage to avoid
damaging the transducer’s face.
• The water flowing under the hull must be smooth with a
minimum of bubbles and turbulence (especially at high speeds).
• The transducer must be continuously immersed in water.
• The transducer beam must be unobstructed by the keel or
propeller shaft(s).
• Choose a location away from interference caused by power and
radiation sources such as: the propeller(s) and shaft(s),
machinery, other echosounders, and other cables. The lower
the noise level, the higher the echosounder gain setting that
can be used.
• Choose a location with a minimal deadrise angle.
• Choose an accessible spot inside the vessel with adequate
space for the height of the stem and tightening the nut.
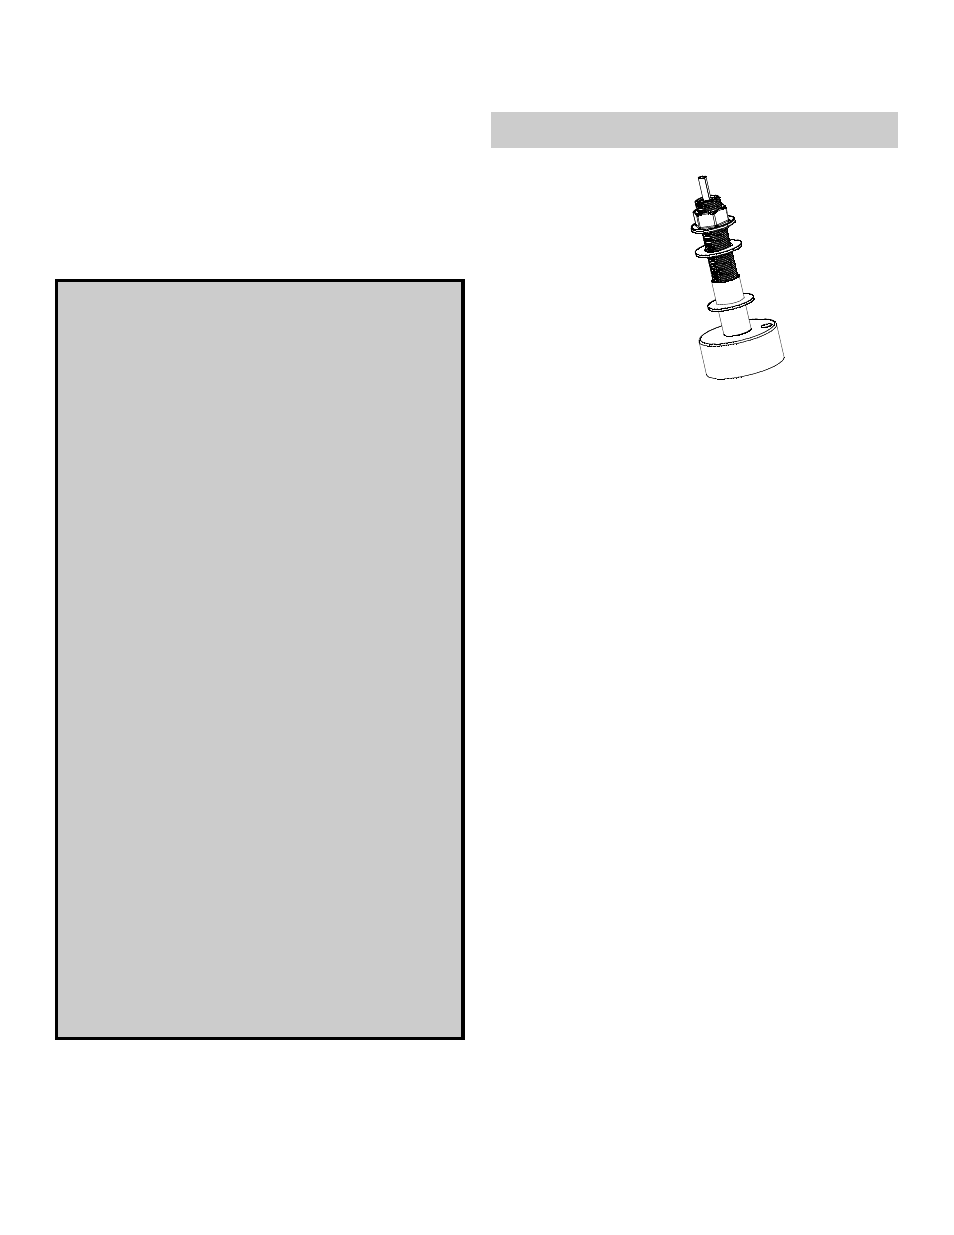
Record the information found on the cable tag for future reference.
Part No.________________Date___________Frequency_________kHz
INSTALLATION INSTRUCTIONS
OWNER’S GUIDE &
SS200
Applications
Stainless steel transducer compatible with all hull materials.
Recommended for aluminum hulls to prevent electrolytic corrosion
provided the stainless steel transducer is isolated from the metal hull.
SS502