Parts of the ks-1018, Preset/manu switches, Audio threshold (a1) and (a2)) controls – Teac KS-1017 User Manual
Page 5: Kachinko system, Front panel, The front panel contains the following
4
Kachinko System
5
Kachinko System
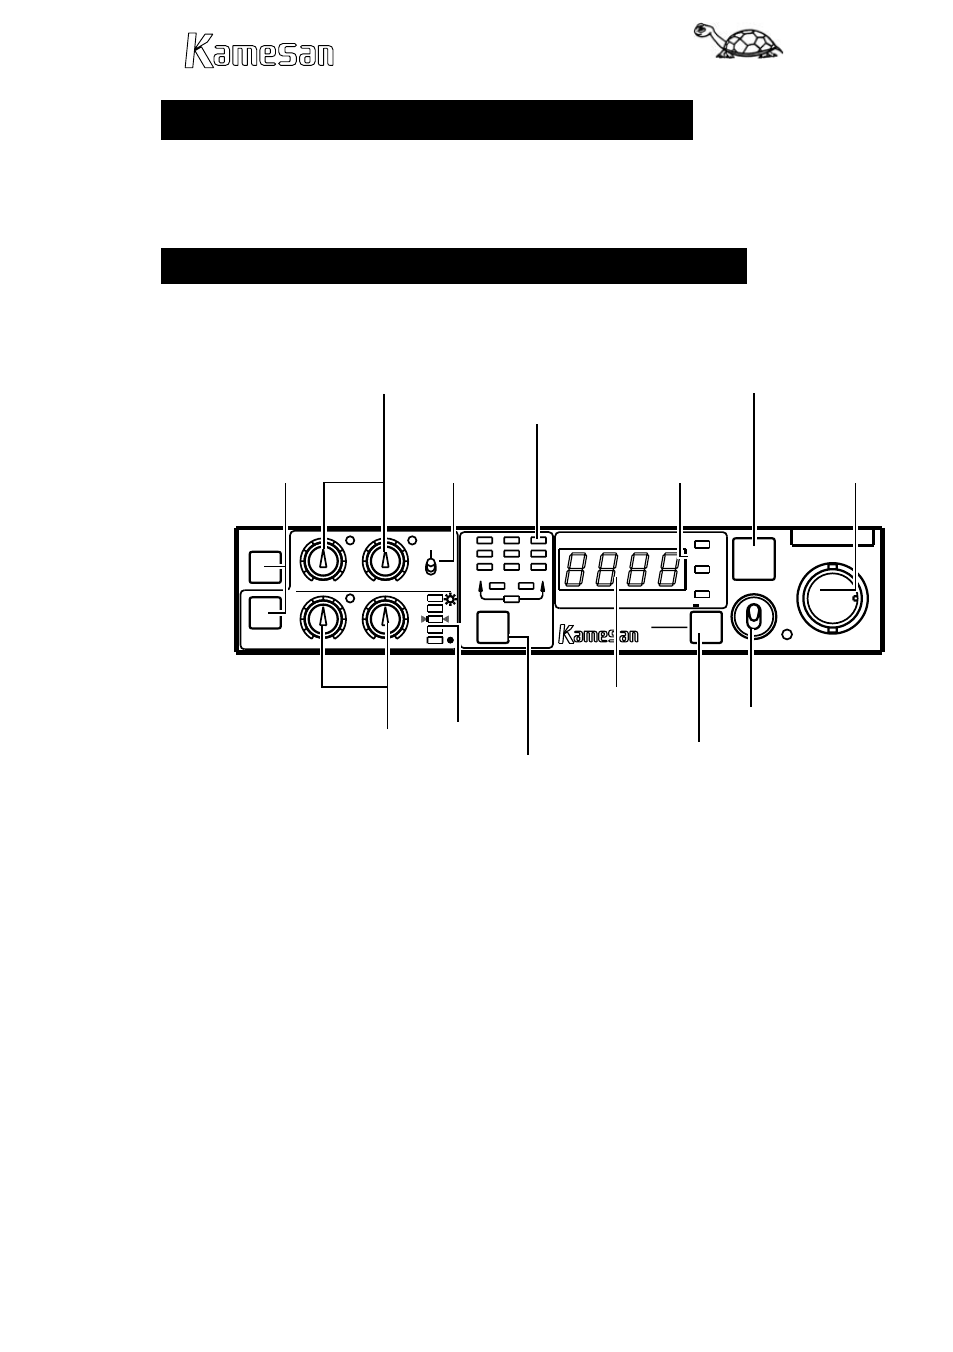
Parts of the KS-1018
The layout of the KS-1018 is quite straightforward, but here are
some brief notes about the features and controls, which will
help you when operating the unit.
Front panel
The front panel contains the following:
N T S C
KS-1017
SPK
MONI
V-PROBE
SEL.
BATT.
1st 2nd 3rd
DATA
DELAY TIME DATA
F
F
O
MANU
SET
PRE
A2
A2
A1
ms
FRAME
FRAME
A2
LIP CHECKER
.
T OVER
ON
ms
TH.
START
POWER
GAIN +
-
0
10
0
10
E
O
D
10
0
O
D
U
A
I
V
I
A1
V
A1
(
)
PRESET/MANU
selectors
Audio monitor
switch
Data
indicators
Audio threshold (A1
and A2) controls and
indicators
Millisecond/frame
and timeout
indicators
START
switch
Video probe
connector
Video
gain/threshold
and indicator
Video level
meter
Data
selection
switch
4-digit display
Millisecond/frame
selector switch
Power switch and
indicator
PRESET/MANU switches
Only one of these switches can be
on (lit) at one time. They determine whether the video thresh-
old and gain controls will determine the threshold and gain of
the signals (MANU) or whether the KS-1017’s preset values will
be used (PRESET).
Typically, you can use the PRESET value whenever you use the
KS-1018 “clapperboard”, but you may need to use the MANU set-
ting when you are using other synchronization sources.
Audio threshold (A1) and (A2)) controls
These two con-
trols are push-in/push-out controls. In other words, when they
are recessed, pushing them allows them to pop out for easy set-
ting. Push them again to recess them.